Sony 8-Bit to Kodak 250D Film Look - Re-Grading YOUR Footage
Welcome to episode two of re-grading your footage! In this series, I will re-grade your footage based on the description based on your client, then compare to your grade. Here is the description of this shot:
Here is the look we got from our DP.
Now let’s look at what makes the 250D so popular. It has a fine grain structure that produces sharp images and nice skin tones. Vibrant colors that help make skin tones and stuff pop. Plus wide dynamic range where the highlights and shadows are always protected.
And here are the top 5 films shot on Kodak 250D.
The Hateful Eight
The Dark Knight
Dunkirk
Star Wars: The Force Awakens
The Wolf of Wall Street
These are all so far apart that it shows the versatility of the film stock.
I will be using advanced techniques which may mean third-party plug-ins that are tried and tested by me.
Let’s go ahead and look at our shot.
This is shot on Sony a6500 in slog3, but 8-bit. Which means there’s not a lot of room to play around with this.
To start off, we are going to use a tool called film box. The reason we are using this and not something built into Resolve, is we need to stick with what the client is asking. Meaning we need to use the right tool for the job. I am going to use this by changing this to negative only, which is going to give us the 250D and change it to 16mm. And I will make it 250D dust and weave.
Now the way to think about this is that it’s actually shot on the negative with halation and grain.
Just think of this as our IDT. This will give us the most amount of information and dynamic range.
Let’s add four more nodes, and move to our forth node and drop another filmbox. And on this I will select print only.
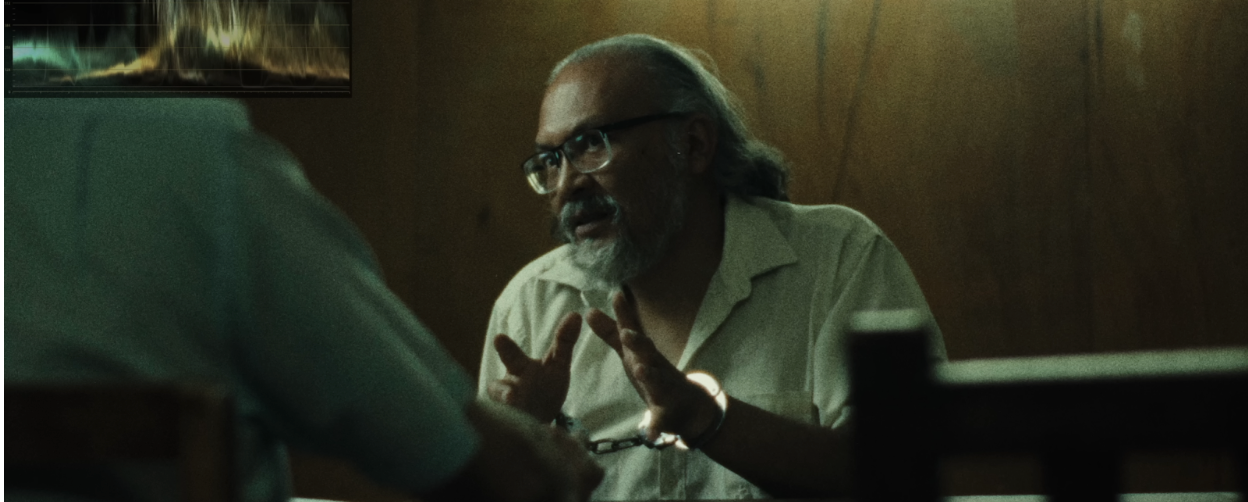
We are not there yet though. We still have to make that Fincher image, like this still.
This is that sickly green that Fincher is known for. Look at where we are and where we need to go.
Just because we used the proper film negative, doesn’t mean we are there. We still have to fine tune things.
What I am going to do is in my second node, I am going to use my HDR palette and pull down the global offset quite a bit.
We are getting a lot closer. We aren’t there perfectly yet, but we are doing great.
Then moving to our third node, we are going to use our curve to give it a custom contrast curve.
Just after that, it was a huge difference.
One thing I will tell you is that by using the print settings on film box, it creates this matte black thing. So it lifts them. I don’t like that so I created a corrector node (fifth node) and then jump into my log wheels and drop the shadow wheels a bit.
Then back in my look node, I want to add some things. We notice that Fincher’s shot has this green/yellow tint to it, so to get that I am going to use my gamma and start pushing it toward that green.
Look how crazy this is. We are super close and remember this is Sony a6500. What we can do is add some warmth, so we will swing the gamma to do that.
You may be looking at this thinking ours has more grain and texture than Fincher’s and that’s because the client wanted that. They wanted 16mm grain which is very pronounced.
One thing I am noticing is that it might be a bit dark, so I am going to adjust my custom curve and lift up the third bottom point, and move the second highlight point around. I just want to bring up the mids.
I do want to go back into the log wheels and pull them down a bit more.
Now we are going back into our look node, and setting our hero frame in the darkest part of the image. Then we are going to bring up the global offset in the HDR palette.
This is going to work and this is where we are going to stay. Now let’s break this down a bit, starting with our log image.
Then our rec.709.
Now for our grade.
This is just crazy what we could do with Sony a6500 and 8-bit footage.
Now let’s look at both grades side by side.
You can see that two people took the description and approached it differently, which doesn’t mean that one is better or right. It’s just the different interpretations of what was given to us. With that, work hard, get obsessed and get possessed.


