
Here's How to Grade iPhone Footage in Resolve
So shooting on small cameras or iPhones was frowned upon in the film industry, but that’s not the case anymore with movies like The Creator and such. Even businesses are filming things on their phones. So I want to give you tips and tricks to make your footage look better. But let’s quickly run through the pros and cons:

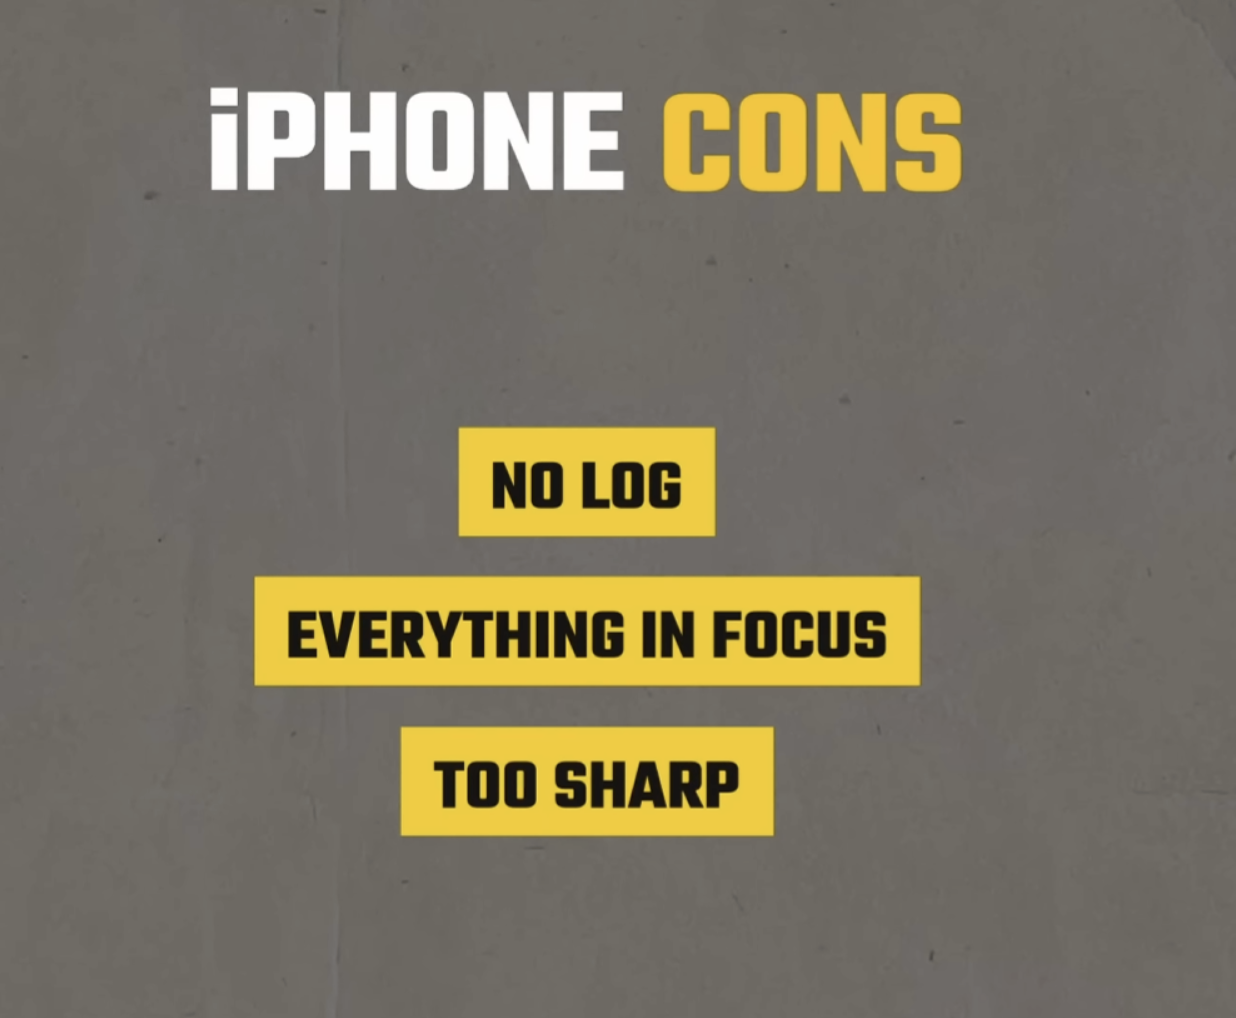
Now basically we are going to take these cons, and we are going to undo them to make the footage really pop.
Now let’s get to analyzing our shot first.

This was shot in rec.709 as in all phones. So what I am going to do is use a DaVinci Wide Gamut sandwich to convert so that I have as much information to play with as possible.


Now the first thing I see is that the yellow is generally ugly, so I need to fix that. Then it’s very sharp since that’s how phones do things, so we need to make that less sharp. Other than that we will do one secret thing, but that will really bring it all together and give it that film look.
Now starting, I am going to add some blur in my blur tab by pulling up on the radius.


Basically we are taking off the edge here. And I’m doing it so far up in the node tree because I want to fix what was done in camera, before I start color grading.
The next thing we are going to do is go into our curves and use our main curve to raise up the bottom, then bring down the top. It doesn’t look great afterwards, but all good things take time. Then I am going to grab a point closer to the bottom and pull it down, then take one up higher and bring up the top section.

This just gives us a nicer feel than before. It’s subtle.
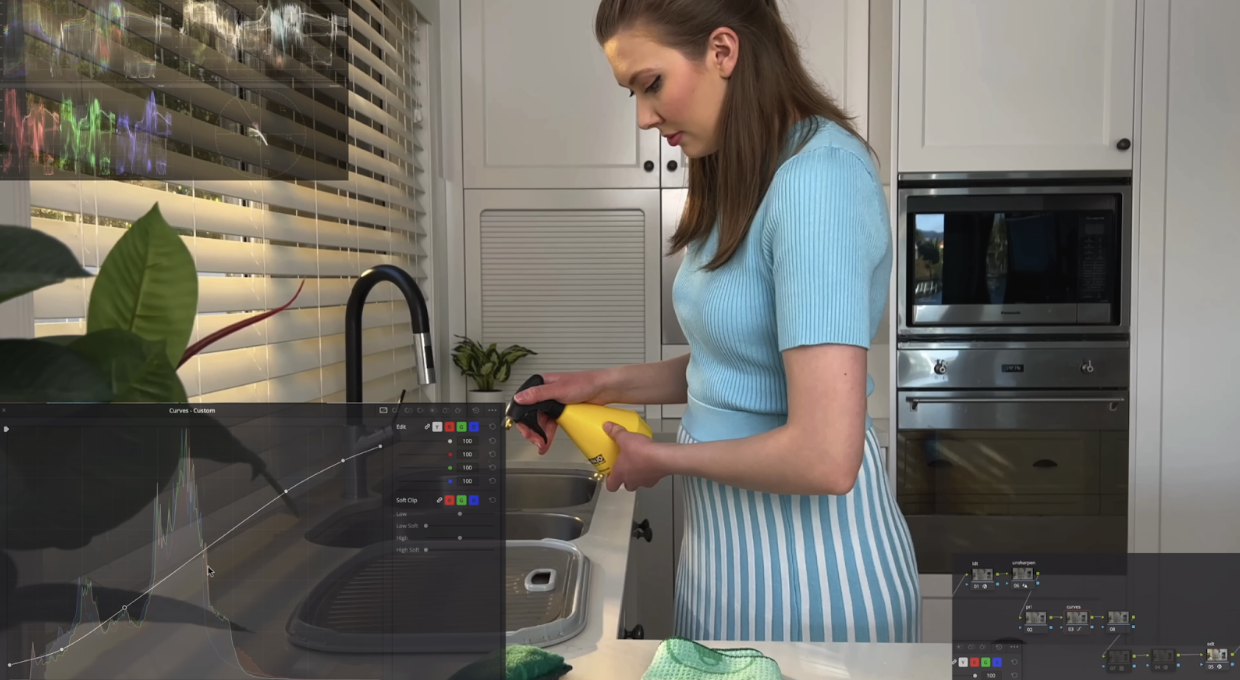
Next I want to go under my hue vs hue and click the yellows to swing them and make them look better.


Just like that we have the yellow looking much better. Now if it is a commercial for a cleaning supply company and they want the yellow to be accurate, we can isolate it and track it.
Overall this is looking good with contrast and hue. Next is going to be a window, which really helps control light and make things look cinematic. But the light has to be motivated. So with this window, we are going to leave the window and affect everything else.

Then I’m going to drop my gamma and make the exposure to look natural.


The next step is to add my custom LUT which is available for download, and it does a lot.

It’s really cleaning up the image. You can see it creates separation in her skin and the background. Adds that subtle teal on the bottom end, but keeps the warmth.
Our final step is to add halation and grain. We are going to use a plug-in called film box. Now adding this is going to be an essential part of working with iPhone footage because it’s really going to trick the audience into thinking it’s a different camera.

Look at how much texture and character this adds to the footage. This just brings it all together. Now you can use the halation and grain from Resolve and this is what it would look like.
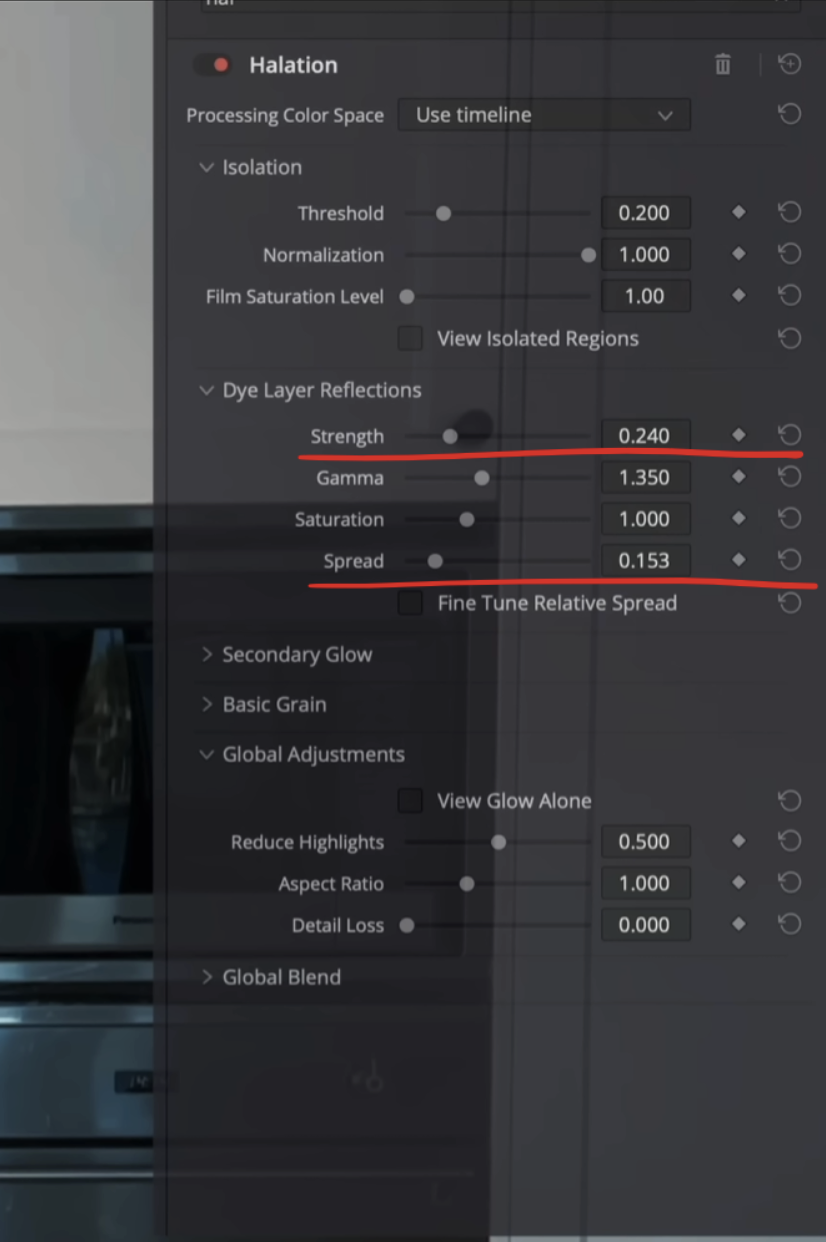


Now this just isn’t as good a method as film box, so I highly recommend it. With color grading, it’s always the smallest details that make the biggest overall difference so getting a plug-in like film box is important.
Hopefully you all got some good tips out of this. My approach to color grading is always to simplify, then go narrow.