If you’re a Beginner, Use THIS Node Tree
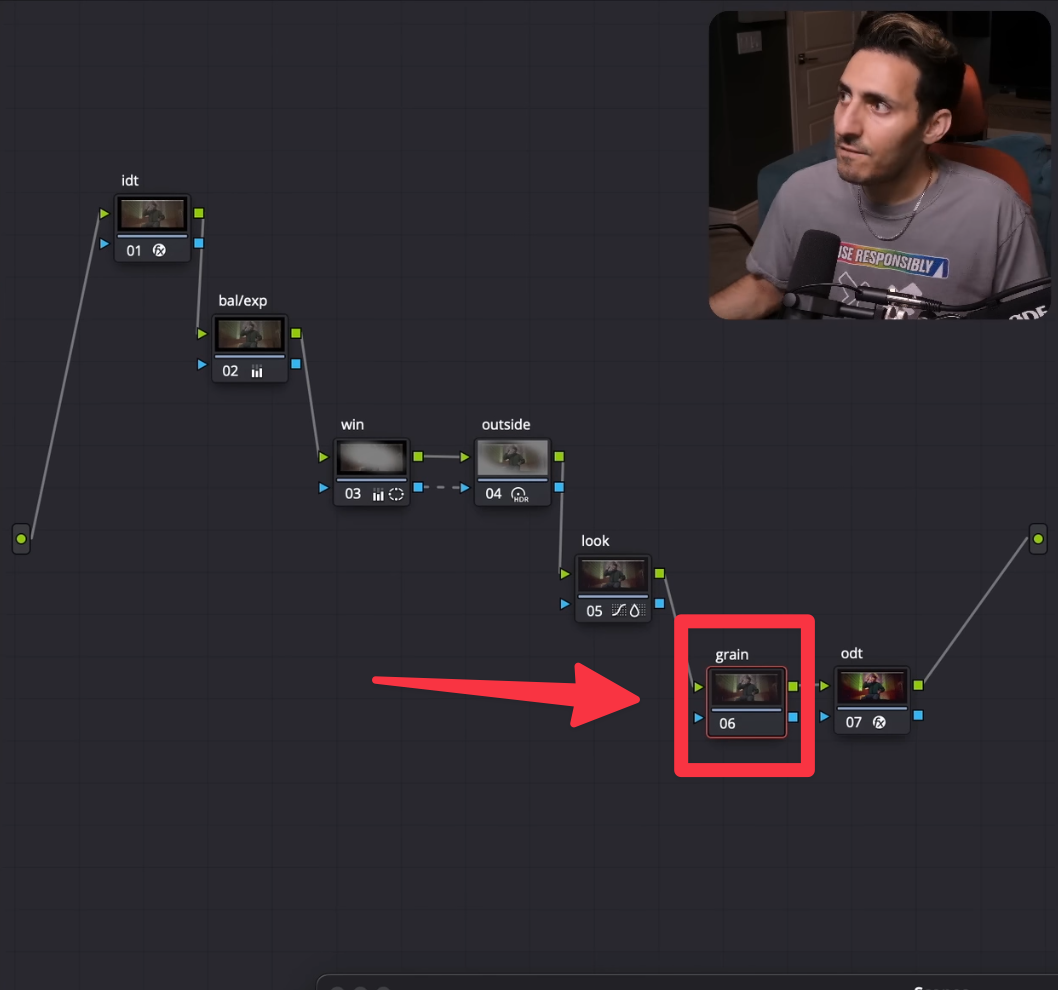
Creating a simplified node tree might seem overwhelming at first, but with just seven essential nodes, you can build a solid foundation. While a smaller node tree might seem tempting, achieving professional-grade results often requires this structure.
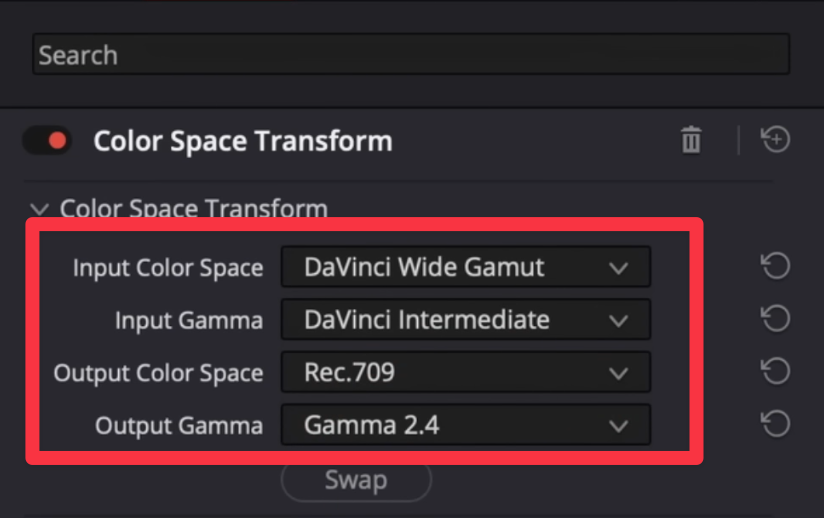
1. IDT (Input Device Transform) Node: The IDT node is the starting point of your workflow. This is where you transform your raw footage into a standard color space like REC.709, ensuring consistency and accuracy throughout the grading process. Think of it as setting the stage for all the creative adjustments that follow.
2. For this project, we are working with S-Log3 footage, so I’ll select the appropriate settings to ensure optimal color accuracy and dynamic range.
3. Next, we move to the final node, the ODT (Output Device Transform). This node determines how the footage is displayed on your output device. Here’s how we configure the ODT node for optimal results.
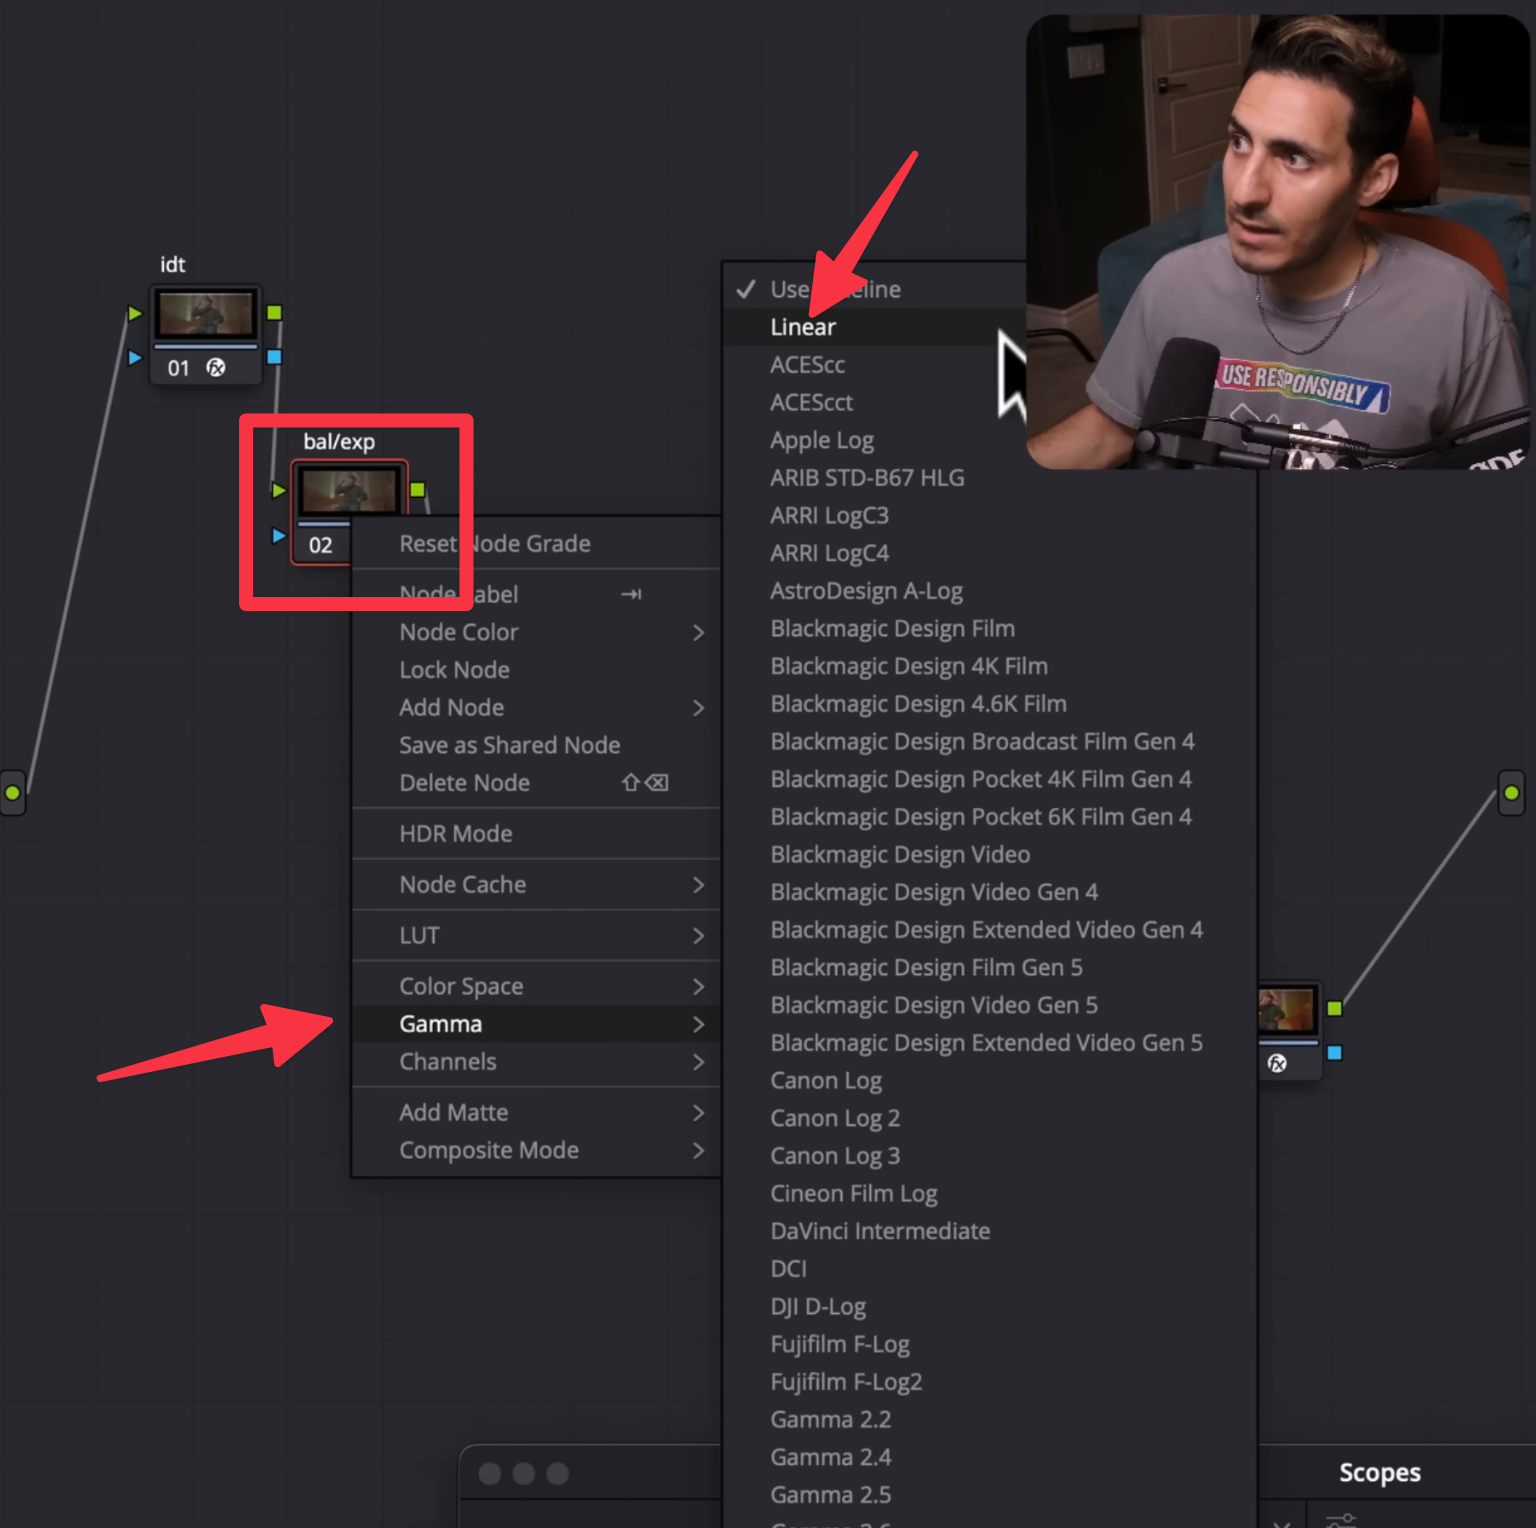
4. The next step is to work on the second node, which is the Balance/Exposure Node. For this node, I set the Gamma to Linear because all adjustments here occur in a photometric space, similar to when working in the HDR palette.
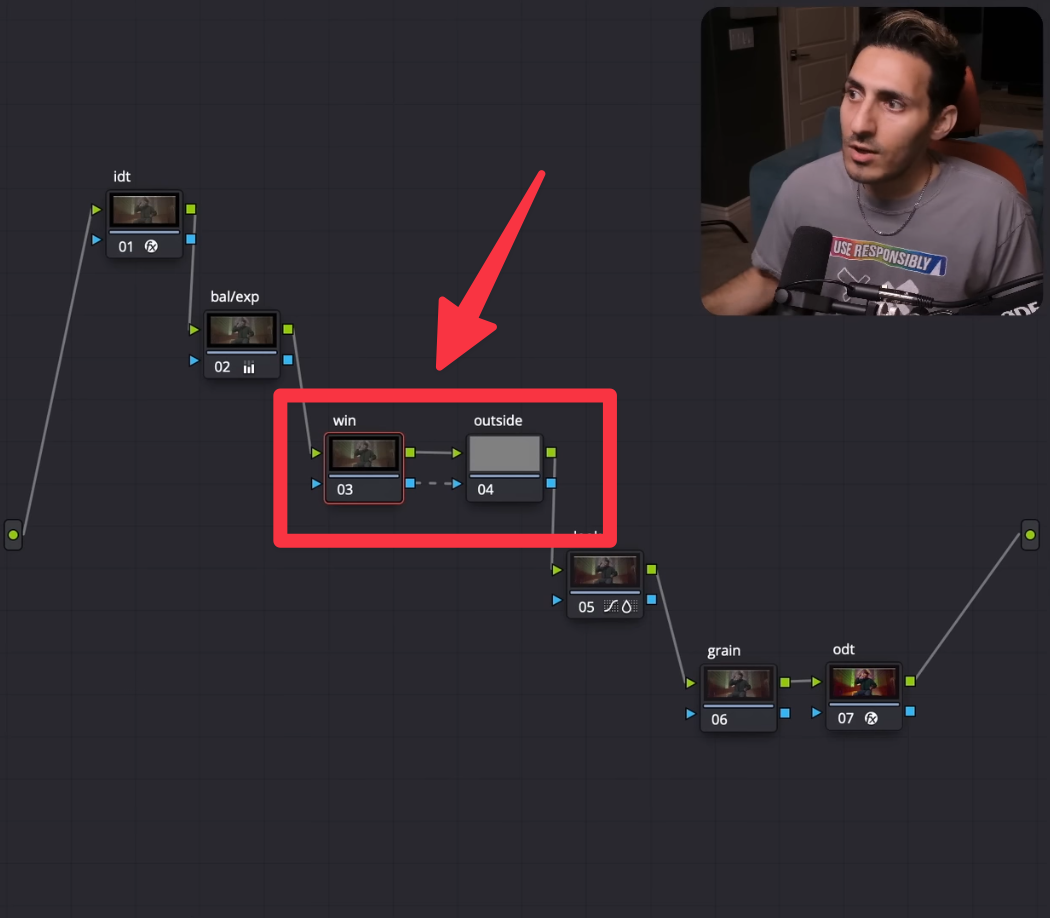
5. The next step involves working on the third and fourth nodes. These nodes are dedicated to creating a vignette effect, helping to subtly draw attention and enhance focus on the main subject within the scene.
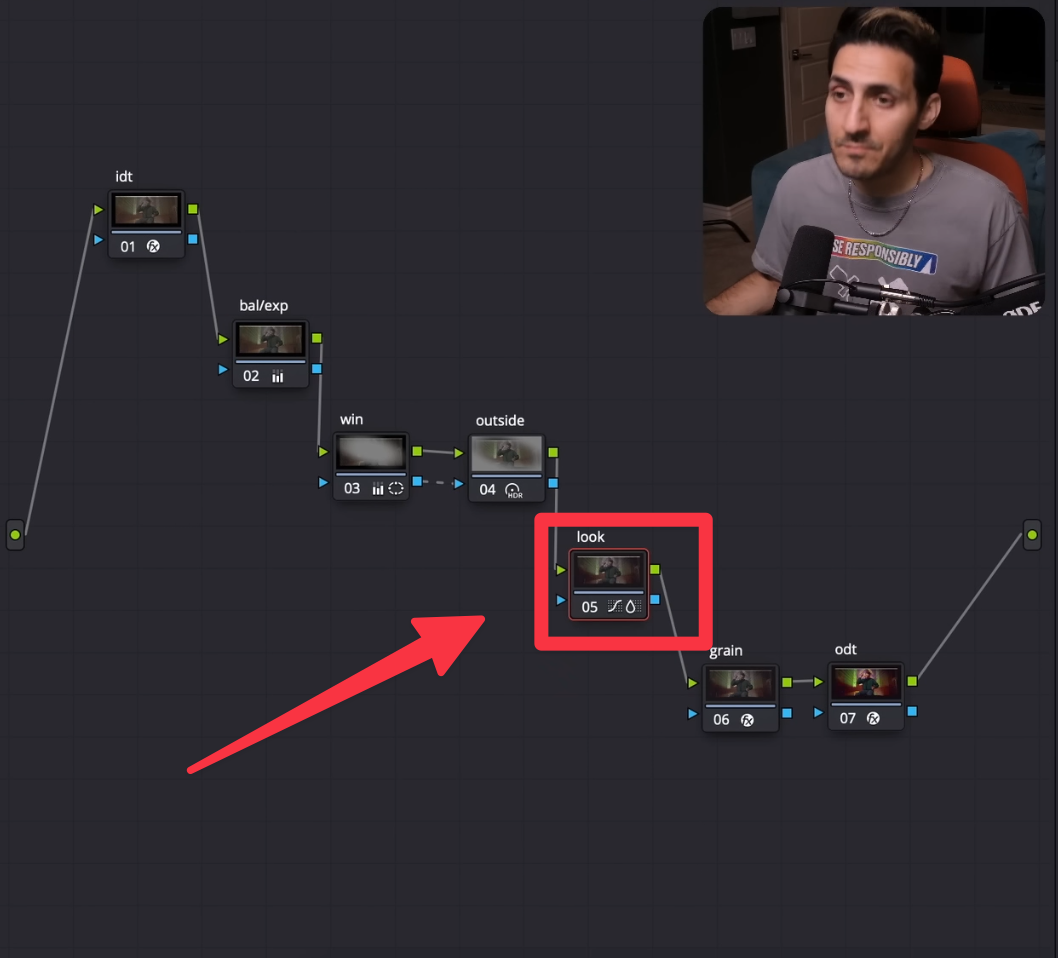
6. The next step is where the real creativity kicks in — this is when we craft our unique look.
7. Last but not least, this node is where we add grain or texture to enhance the overall aesthetic and give the footage a more polished, cinematic feel.
Some of your questions:
1. How to prevent slowing down your system when using noise reduction or other tasking nodes on multiple shots?
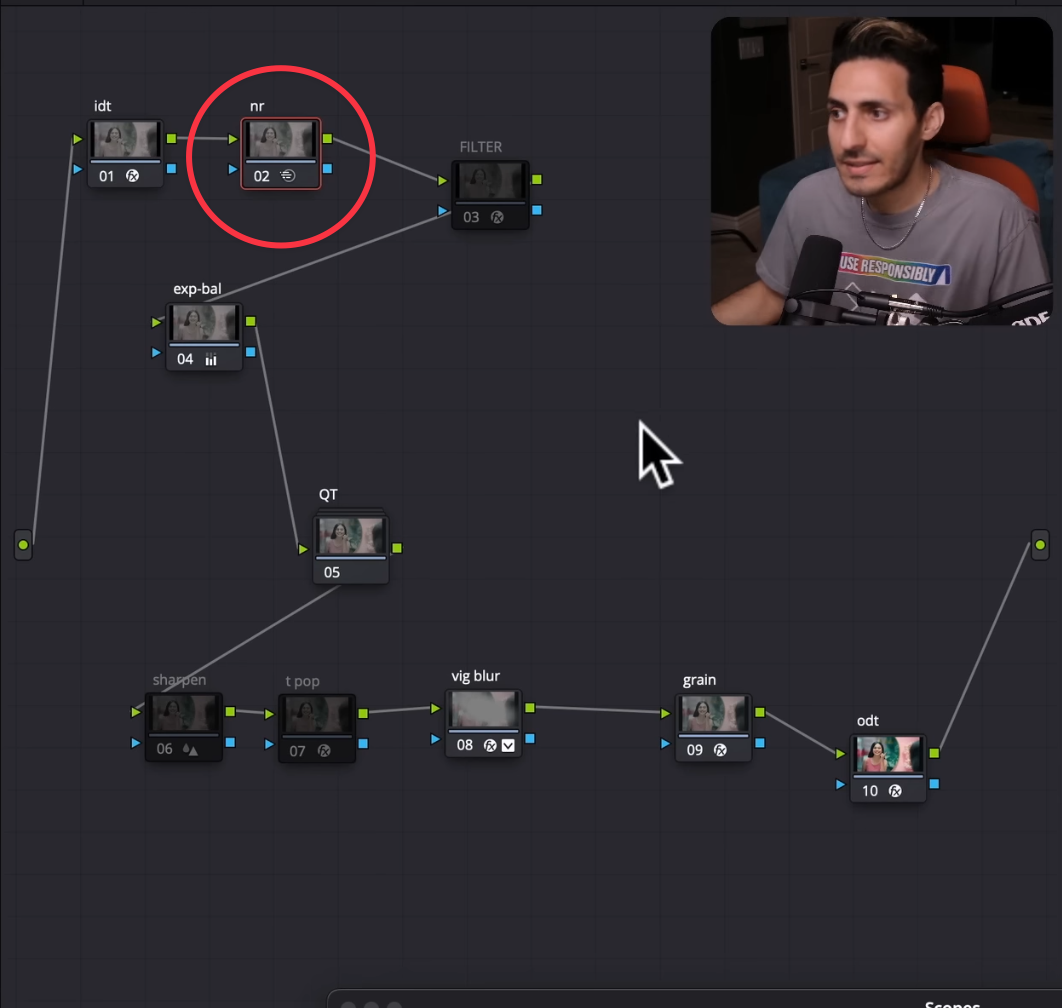
Place your Noise Reduction Node upstream. This means it should be one of the first nodes in your Node Tree.
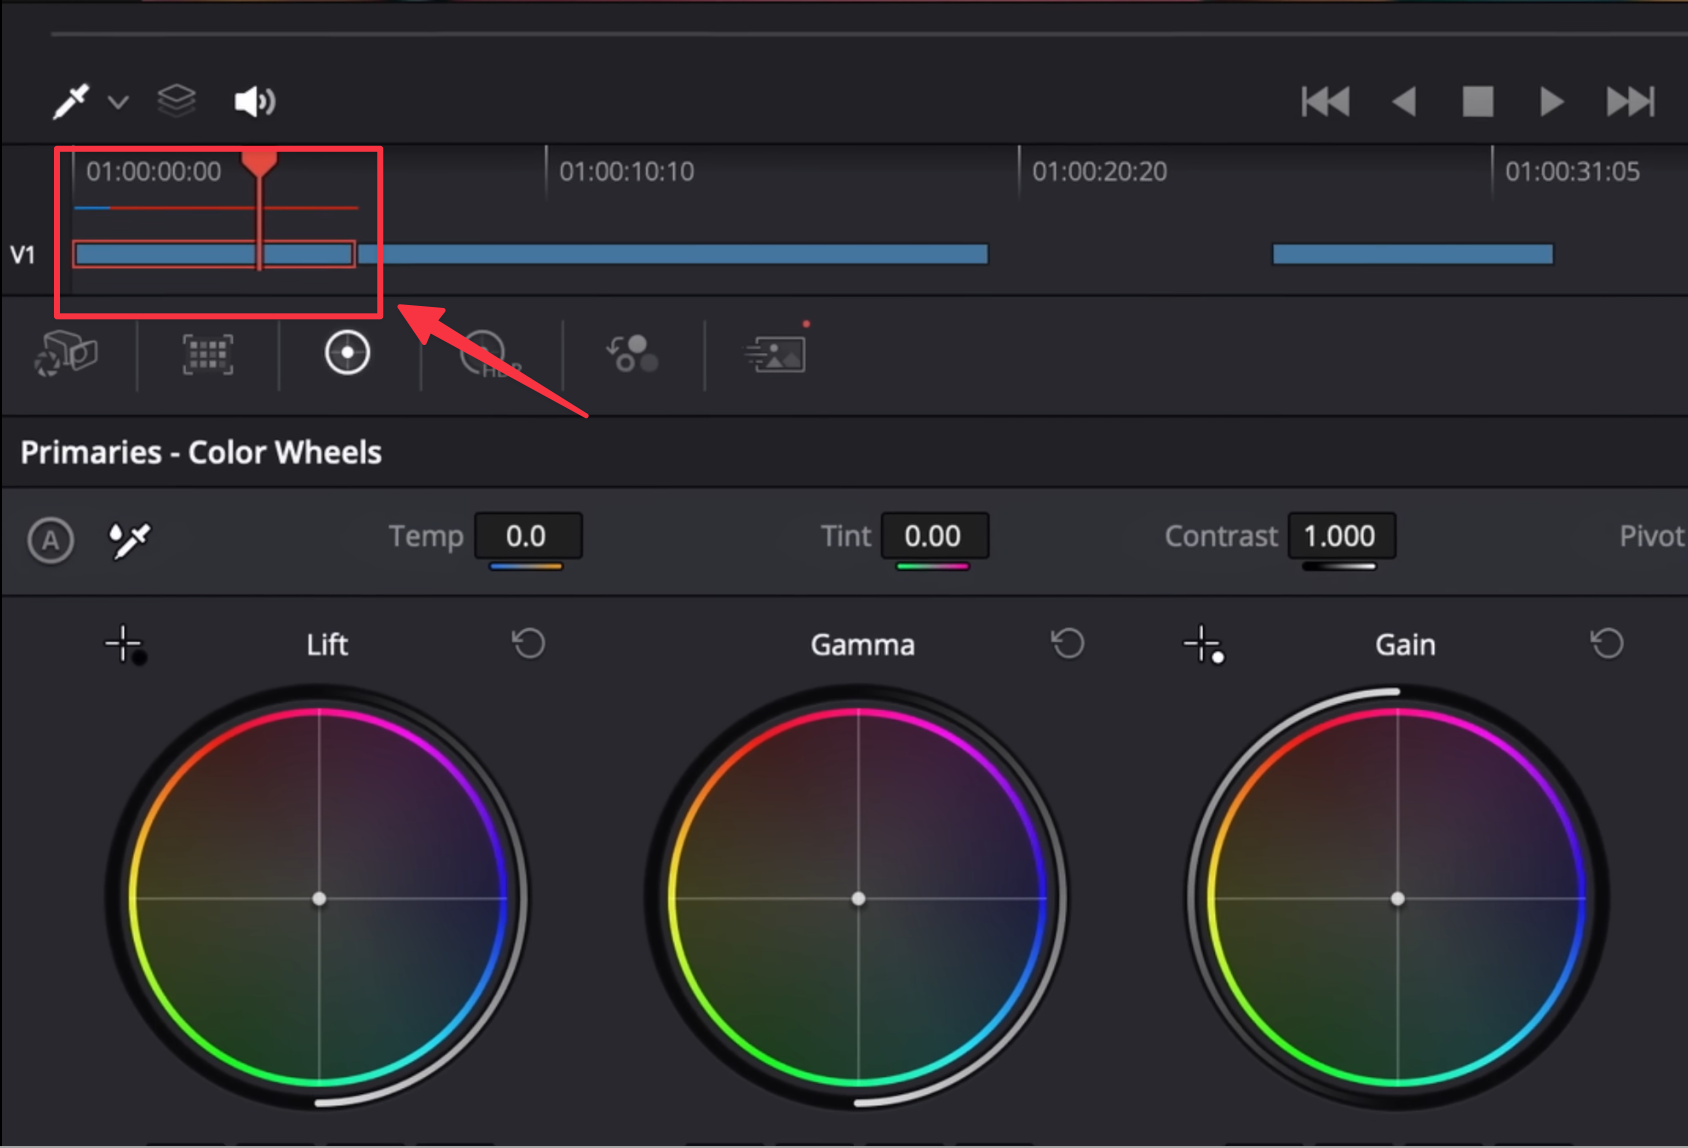
You can right-click on your node, select Node Cache, and enable it.
It needs to be rendered and when the blue bar is completed it means the selected Node is rendered. So, now you can play it in real time.
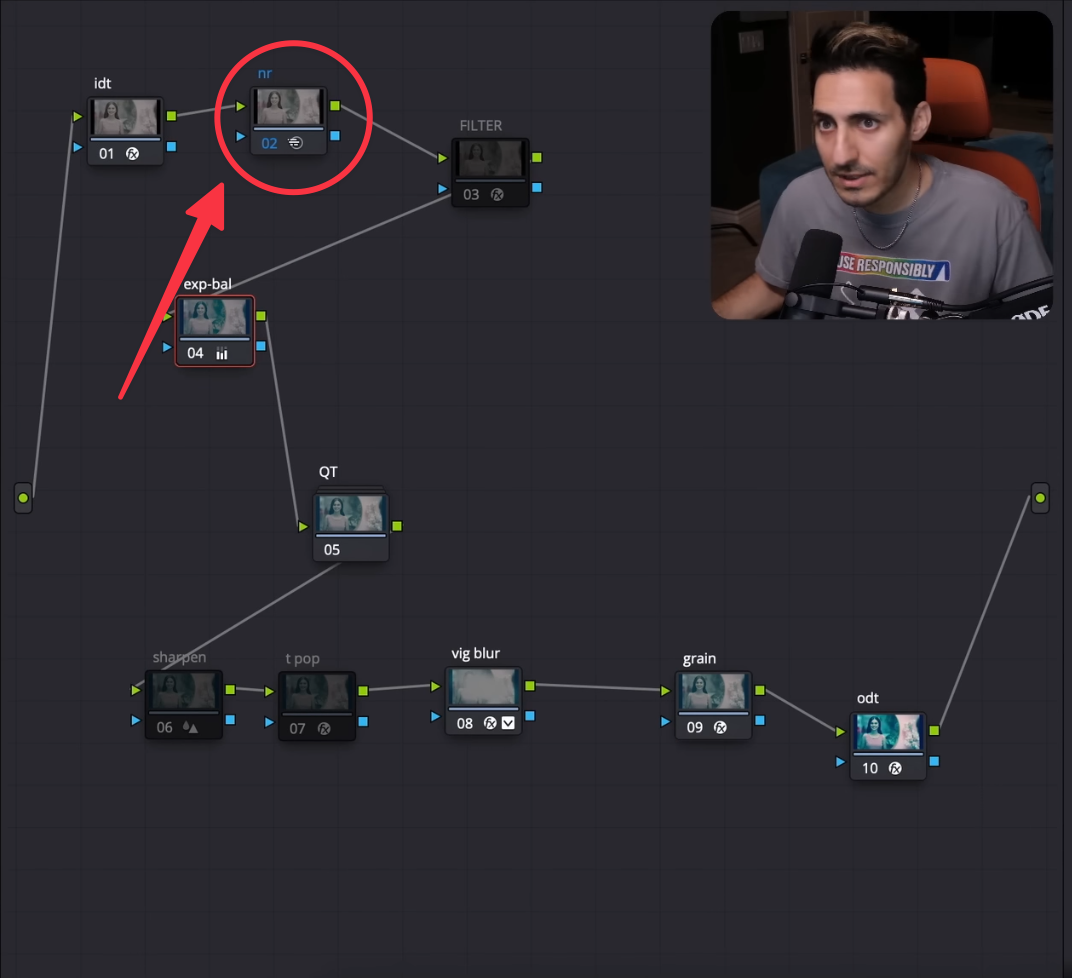
Now you can see that our Noise Reduction Node has turned blue, indicating it has been rendered and will remain rendered as long as no changes are made to any nodes before it.
This is why we place it upstream, as the first node after the IDT (Input Device Transform).
Pro Tip: I recommend using a fixed Node Tree. The reason is that if the node order remains consistent, you can select all 1,600 shots in your timeline and apply Ripple Node Changes to Selected Clips. This will instantly apply changes from a specific node to all the selected clips.
2. How much time should you spend on average per clip when working on an hourly basis?
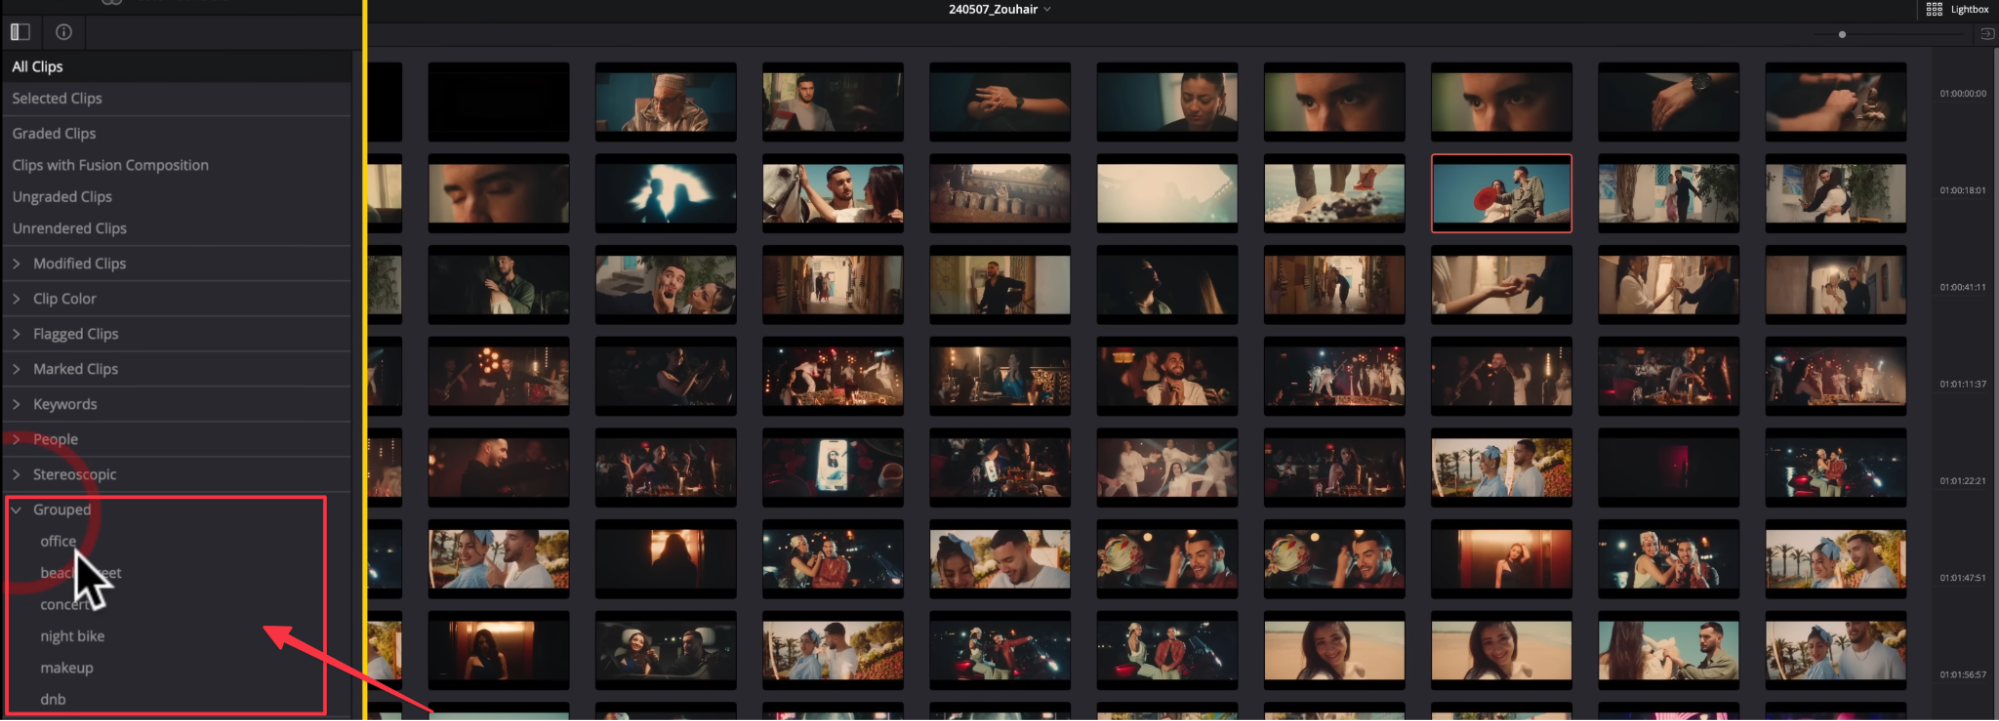
Let’s say we’re working on a music video with a total of 115 different clips. The professional approach to color grading them is to group the clips by location and then work on each group systematically.
For this project, I created six different clip groups based on the various locations.
Let’s take the Office Group as an example. I selected one clip, balanced it, and created a look for the entire scene. Instead of adjusting each shot individually, I applied the same look to all the other clips in the group.
This method saves hours, or even days, by focusing on creating a cohesive look for each scene and then moving on to the next.
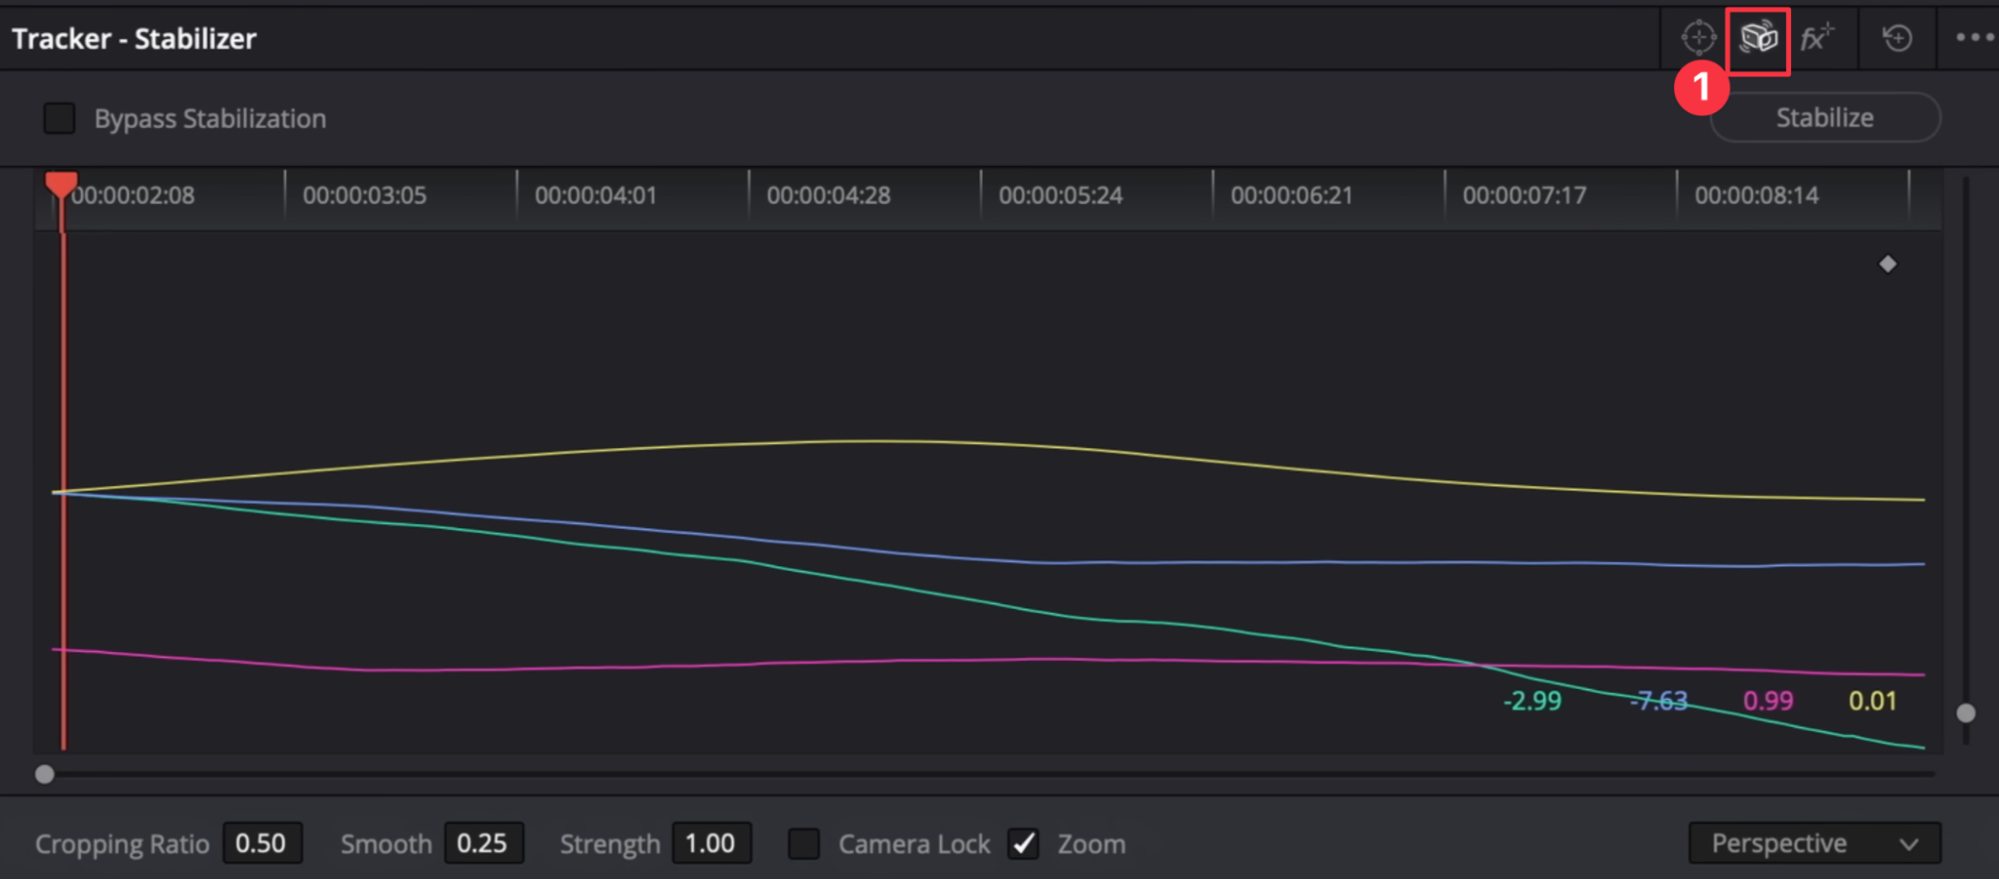
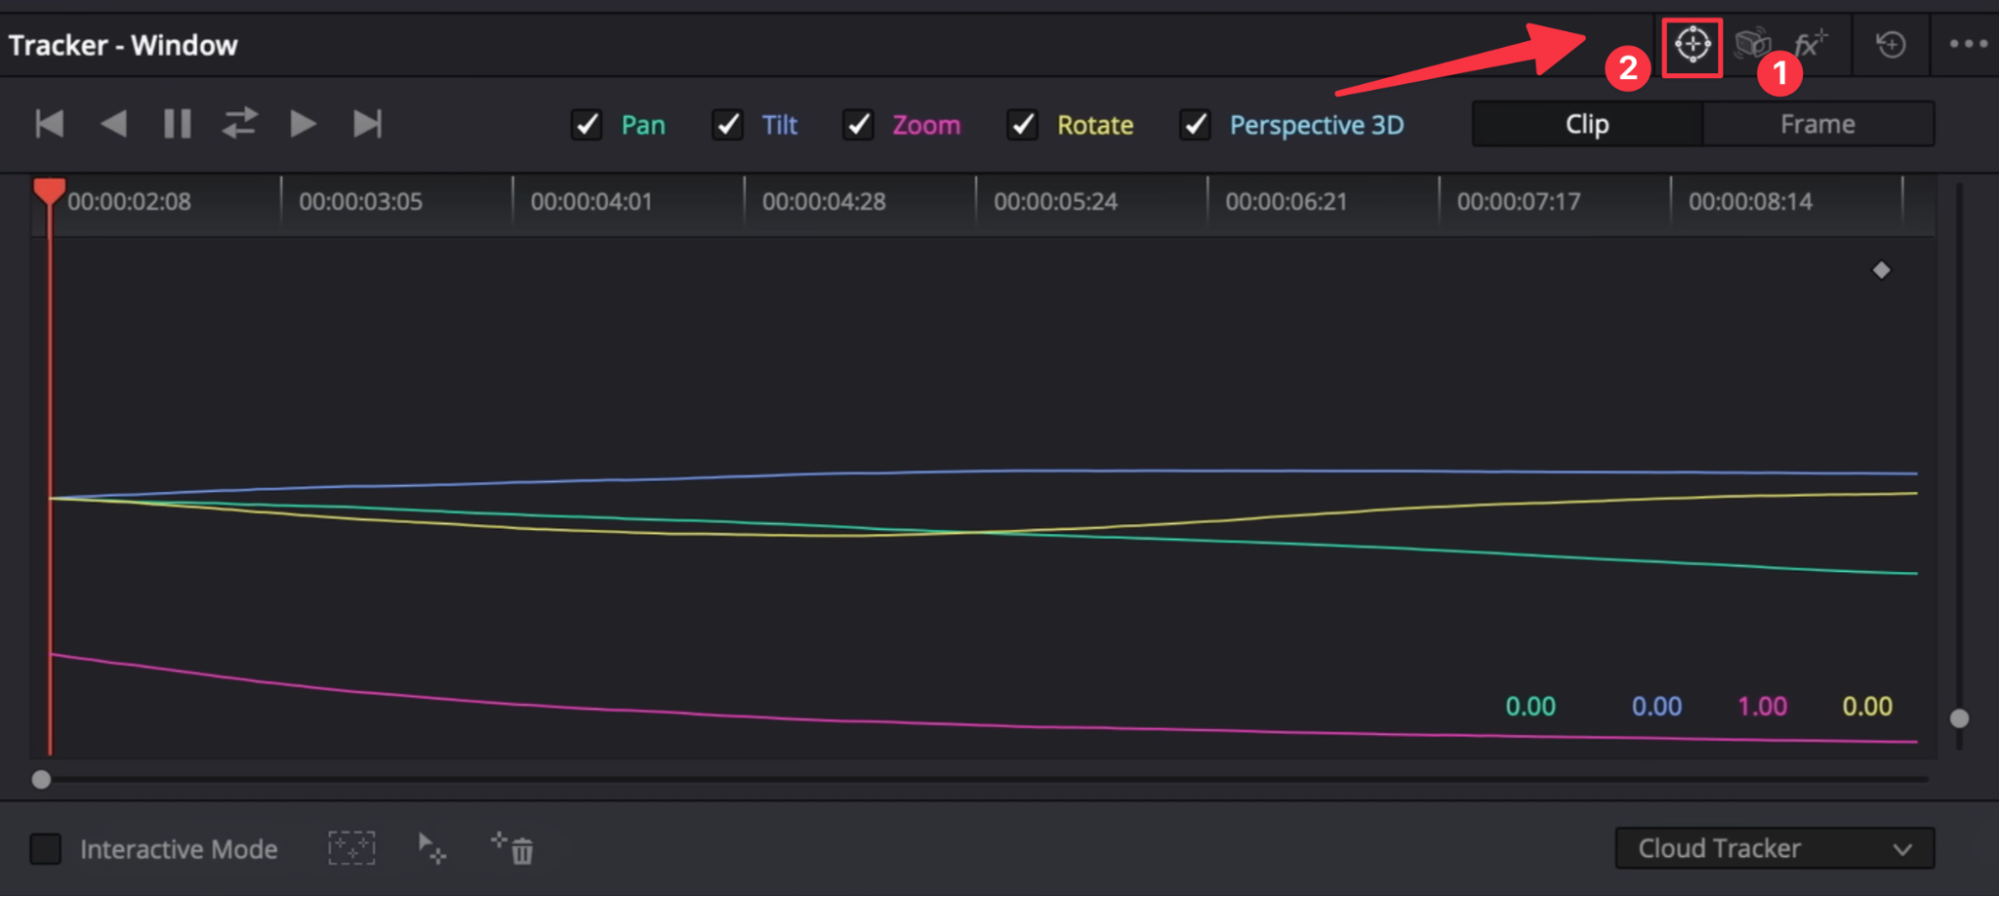
3. How do you stabilize a shot while creating a window and track it properly?
First, stabilize your shot in the Color page, and then proceed to track the specific object.
Once you’ve tracked the shot, this method ensures a professional way to stabilize and track an object accurately.
Feeling inspired but need professional help with your project?
Contact us for expert color grading services that bring your vision to life.


