
DaVinci Resolve Basics: Start with This Node Tree
What’s going on Qaznation! Today we are discussing the basic node tree you should start with. Imagine you’re day one, just downloaded Resolve and you go into the color page, this is the node tree you need. This will give you really good looking grades. So since you’re stoked, let’s jump into the video.
Now we are in Resolve and the idea is to build the perfect node tree for beginners. So here is the shot we are working with.

We are going to create our node tree using five simple nodes. We are going to stack them (see picture) to organize them.

The top and bottom are in and out nodes for our conversion to rec.709, the middle nodes are the ones we will use to make our corrections.
For our first node, we are going to use an OFX called Color Space Transform, which changes it to the color space we want to work with. Now we do need to know some info about our camera in order to plug-in the specs. This shot we are working on was shot in SLOG3. Then we are going to take it to DaVinci Wide Gamut, which is the color space I like to work in.
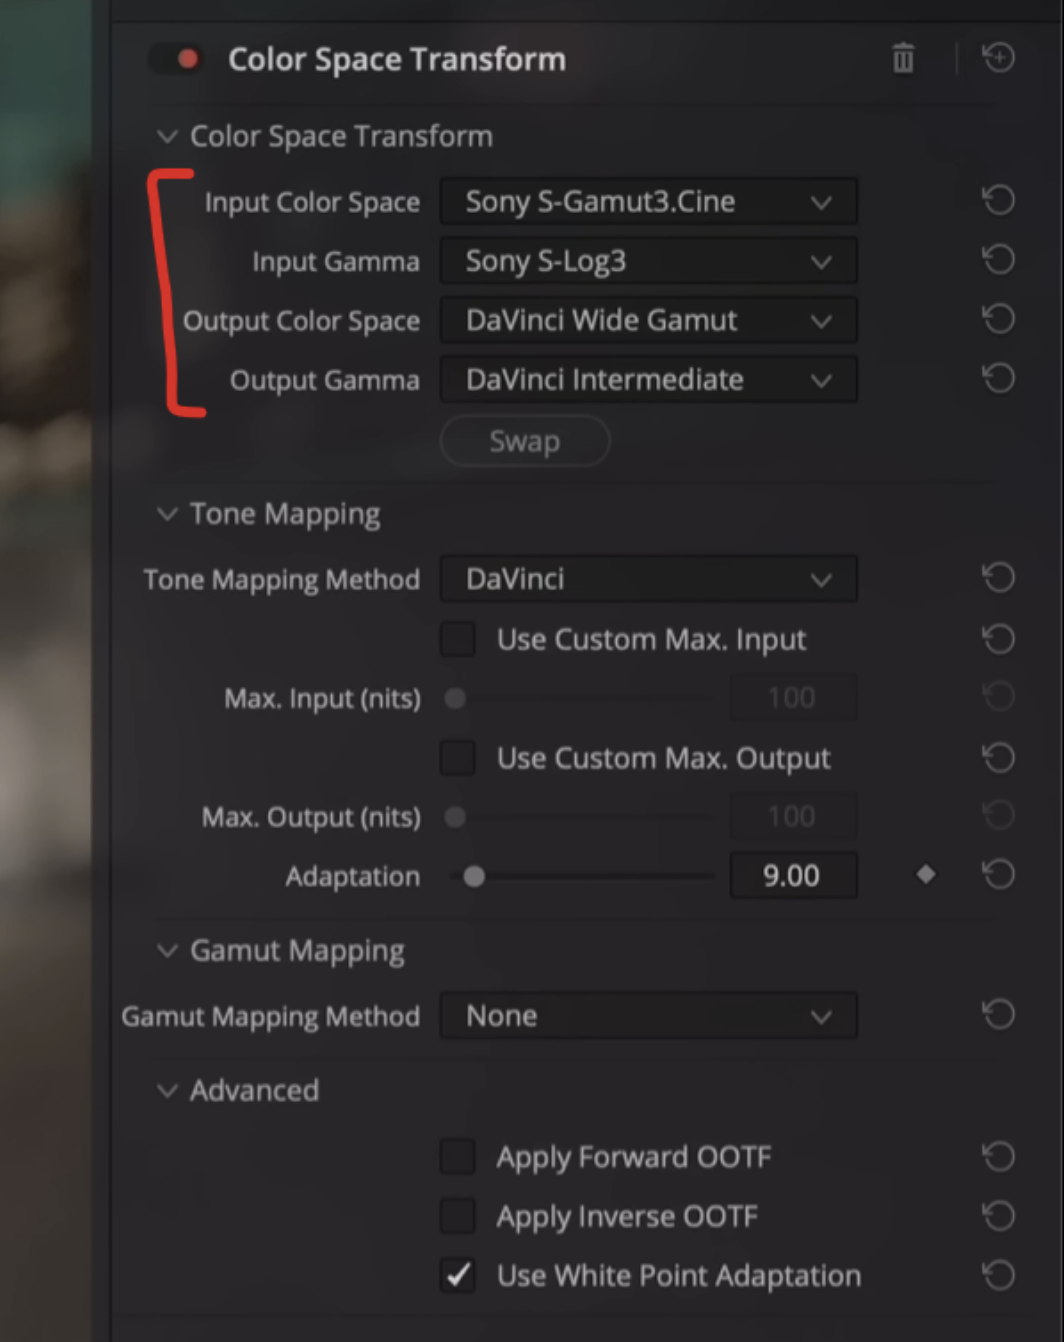
This color space gives you the most latitude to work with on all kinds of footage.
For the tail end, we are going to do a CST again, then convert it from DWG → rec.709.


Now we are properly converted to rec.709.
The second node is going to be for primary adjustments. In this one I am going to use the HDR color wheels and use the global offset to balance the image. I want to remove some of the red in the image, and add in some green/warmer tones.

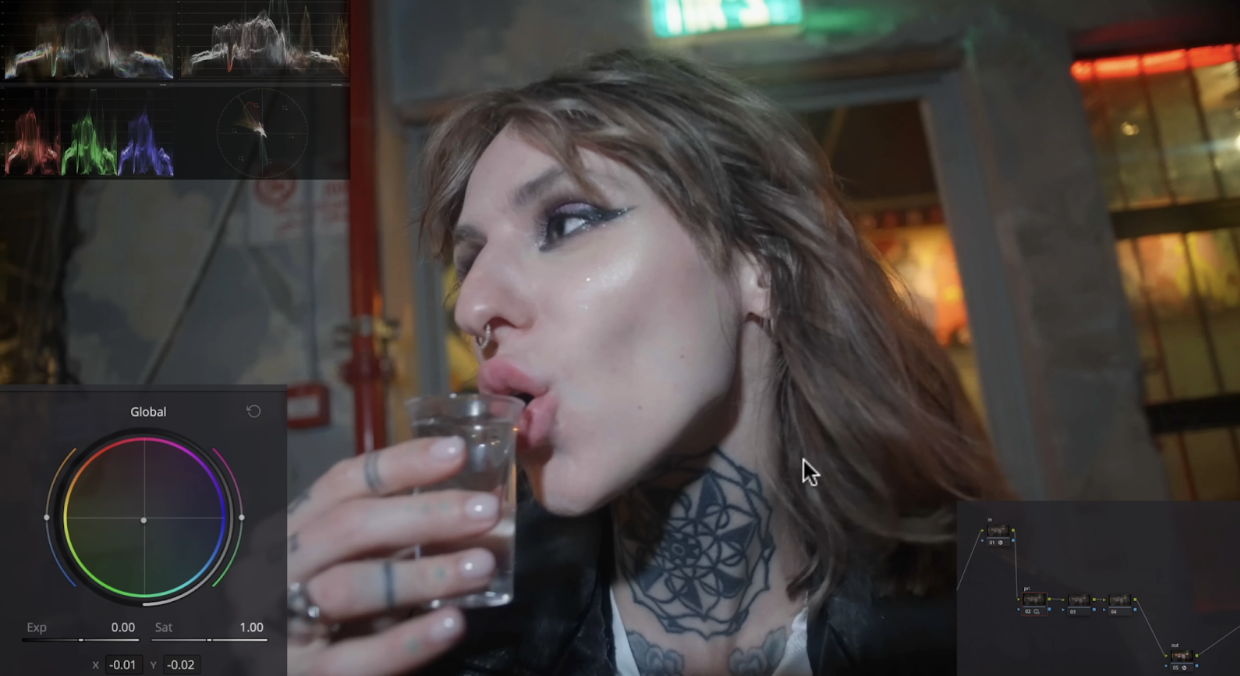
Now one thing you’ll notice in this shot is that the red is clipping because of this right here.

So what we can do to fix that is by going into our last node and changing the Gamut Mapping Method to saturation compression. And while this does a good job, I want to pull back a bit more on the saturation max to limit it a bit more.


What’s awesome is with all of this, we are only shifting things a bit. We are playing with the natural colors and just fixing things subtly.
Now going into our 4th node, we are going to call it look. Here I am going to start with the custom curves and mess around with them. I want to compress my highlights and shadows. Then I want to push my highlights, and my shadows.


Now yes we are pulling the image down a lot, but our main attention point is our hero. Her skin was looking thin before, so we brought it into a more believable look. Plus we can still make out more info in the background. But if we want more information in certain parts, we can play around with it. Then we are going into our hue vs hue and swing my yellows up a bit.

Then I want to go to my RGB mixer and play around with it a bit. I want to remove some of that magenta in her skin, so I am going to go into the blue channel and subtract some blue from the red section of the blue output.


I like what’s going on and the yellow has become more of a gold, which I like a lot. Then in the red output, I am going to drop the blue section.

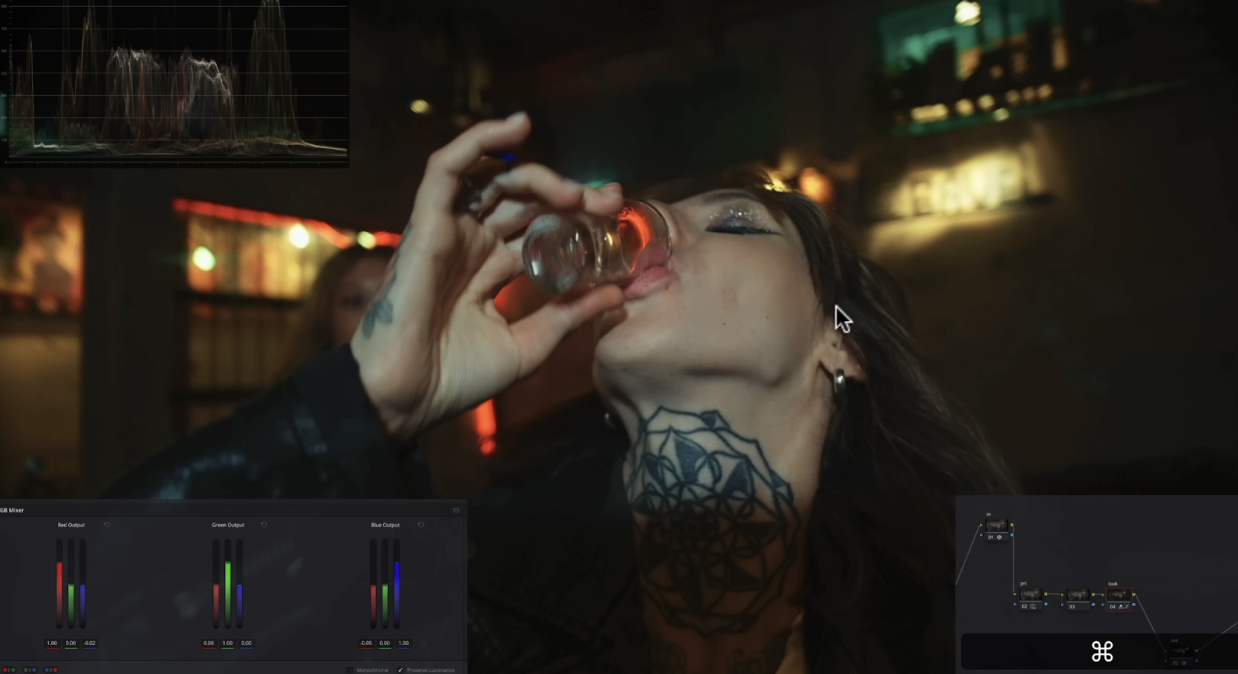
This is starting to look really good. Now this is a confusing tool, and it’s nearly impossible to get the same results as this tool can.
Now I am going to go into our third node and use this for windows. I always suggest at least one node for windows, and if you need to add more, you can always use parallel nodes. But for this one, we are going to create an oval and soften plus invert it.


Now normally I use this to make a vignette, but today we are going to actually bring back the information around her by bringing up the lift.


Everything is really cool, so we wanted to bring more information into the frame. A vignette isn’t always bringing down the outside, sometimes we want to emphasize it.
Now, let’s look at our progression here.

This is our LOG version.

This is our rec.709.

And this is our final. We did all of that with just the simplest tools in Resolve. Which if you are just starting out, you cannot beat this node tree. Plus if you have more shots in this scene, you can copy and paste this grade and all you have to do is move your window around, adjust things in your primaries, and then you can leave the rest alone. That’s the mindset here.