
Dos and Don'ts of Working with the Kodak 2383 LUT
One of the biggest mistakes people make when they start grading in Resolve, is that they think you can put the grade however you want. That’s wrong and I will prove it to you in this video. There’s a right and wrong way to do things. We will learn the how to, break it down, and from there you’ll be able to understand this more.
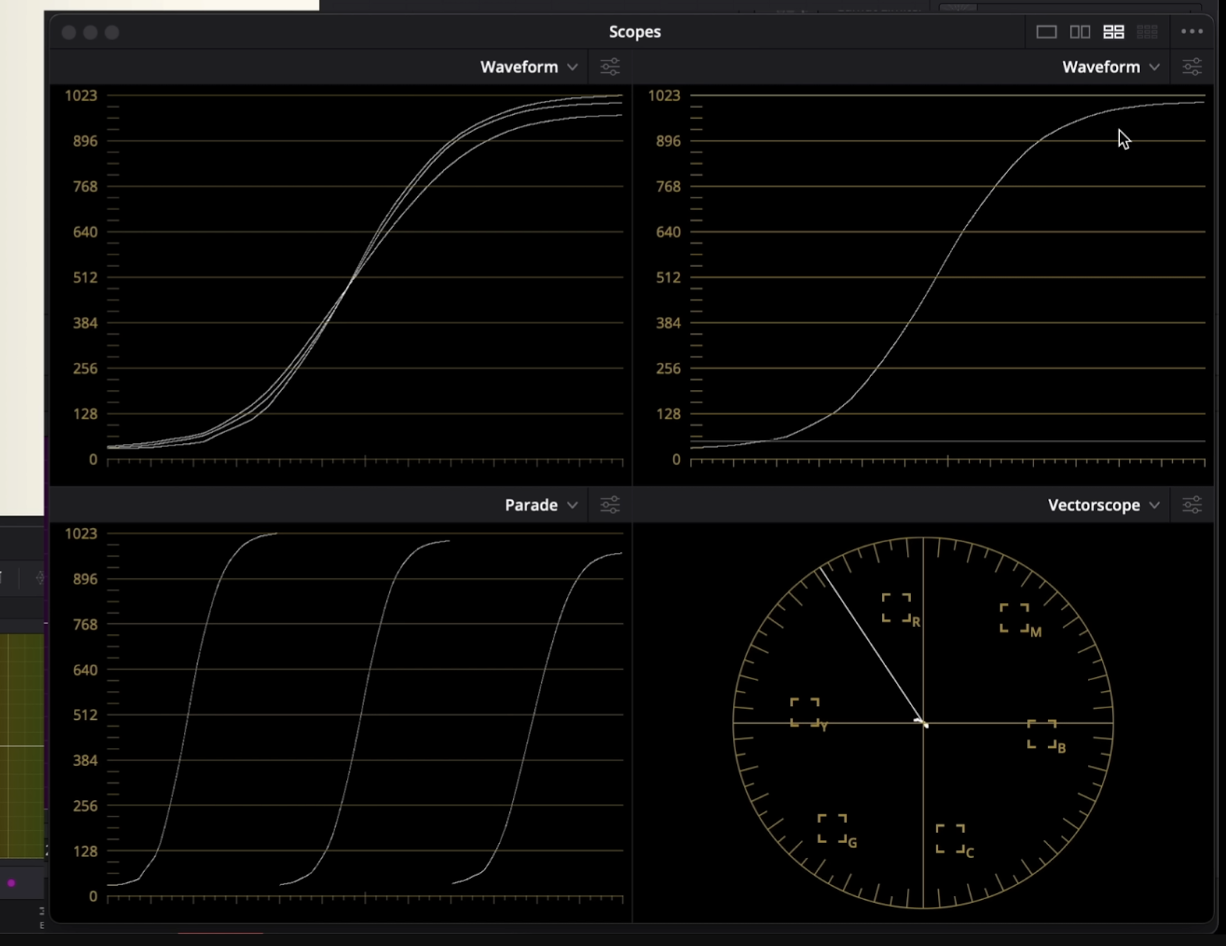
Hopping in, I want to show you on a grayscale what it means to grade over or under a LUT. We are going to apply one of Resolve’s film LUTs (it doesn’t matter which, it’s just a demonstration). If you look at the curve of the LUT, it applies a really nice S curve to our grayscale.
Usually what people will do is to apply the LUT, then they would add another node after the LUT, which is known as grading over the LUT. Let’s say you add contrast to the blacks, and you get something like this.

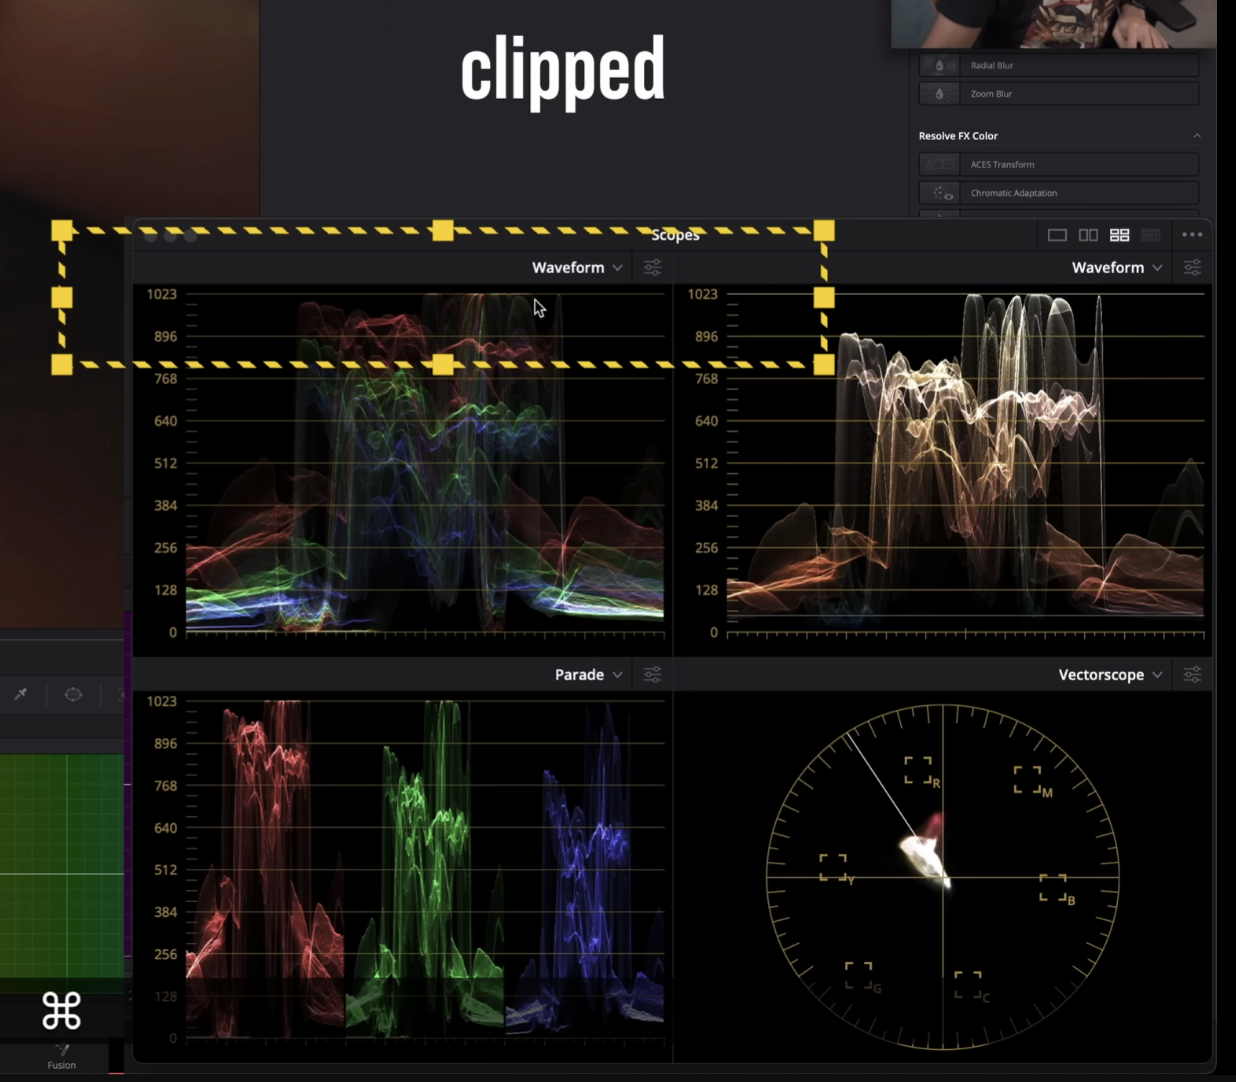
If you look at just the picture, it doesn’t look bad. But that doesn’t tell the whole story. Look at our scopes at the bottom end.
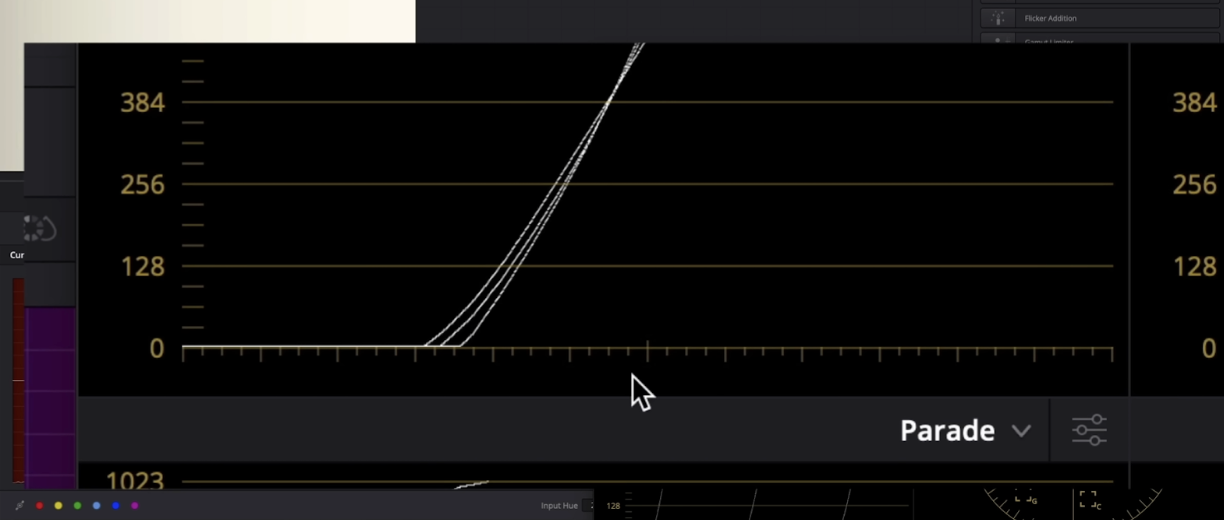
What’s happening here is that our blacks are completely gone. The information is destroyed and there is no rolloffs. Same thing happens with the highlights. It will clips as well. This is what happens when you grade over the LUT.
Now when you put this node in front of our LUT, look what happens to everything.


Look at how the top and bottom end are protected and still aren’t clipped. We still have that aggressive contrast, but it’s being protected by the contrast curve of the LUT. The sequence of nodes matters a lot in Resolve.
Now we are going to move onto an actual example. All we did to start is a simple conversion, just to get it out of LOG.

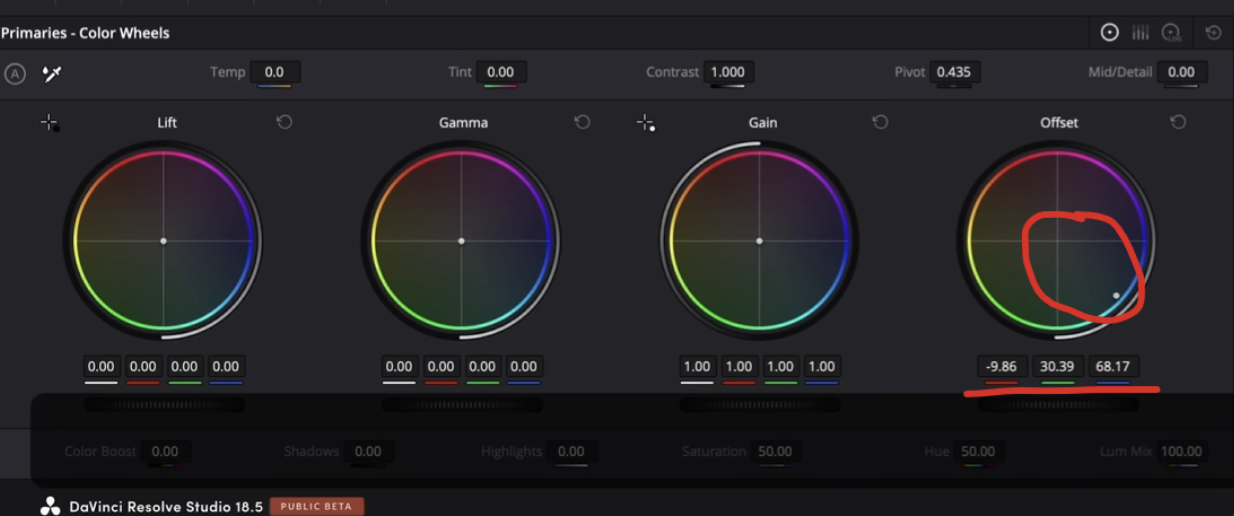
This was shot on Alexa Amira. But now if we go through a workflow of applying changes after the LUT, even on an Alexa, this is what we get. If we wanted to balance everything, we’d go in our offset and try to pull out the yellow in our image.

Why does this look so horrible? Why aren’t we getting a well balanced image? But let’s try working under the LUT, and see if that changes anything. If we take that same node, change nothing, and move it to the front, this is what we get.

But now, let’s reset this and make the changes again. Let’s swing the offset to remove that yellow.
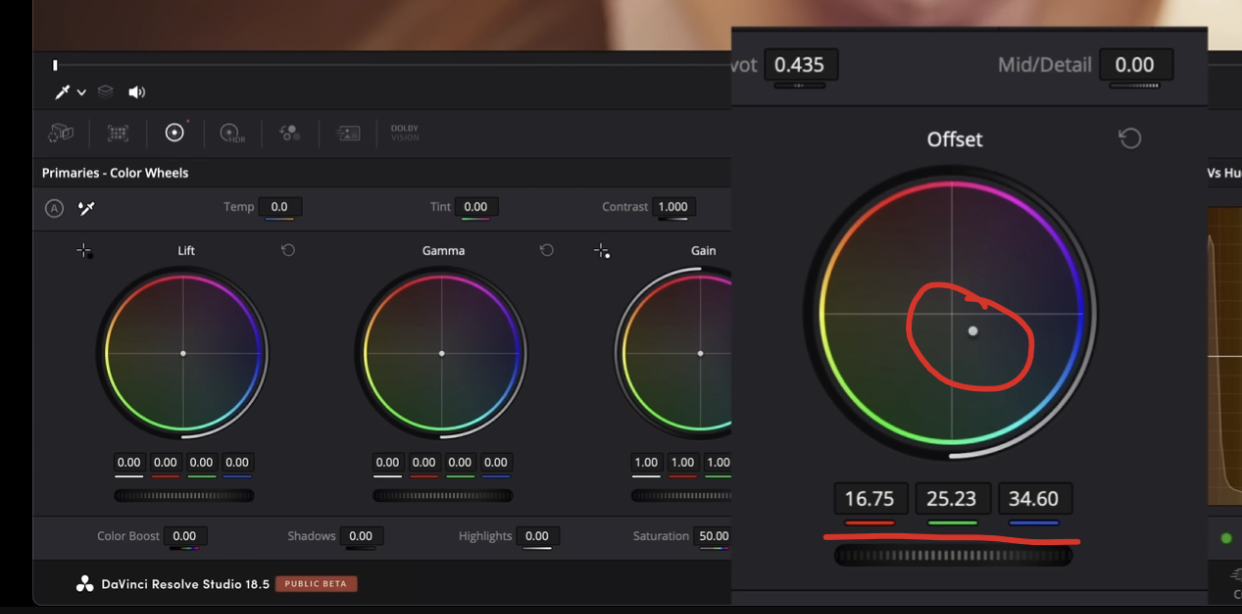
First off, we didn’t need to make a drastic change like before, but also look at how much better the result is.
Now let’s create a node over our LUT and change a few things to give it a punch.

You’ll notice even on these slight changes, the highlights and shadows are clipped. So if we just take that node and bring it before the LUT, you will see that nothing is clipping this time.

What you need to see with this, is how much the difference of grading under vs over the LUT makes. It’s beyond night and day, which is why the sequence matters when grading. It also proves that Resolve is not like a 32-bit float program. You can’t just put anything, anywhere.