
Grading YOUR Footage!! Ep02 | DaVinci Resolve 16 Tutorial

What’s going on guys, it’s Qazi. Welcome to another Grading Your Footage video! The point of this series is I want to give you permission to push your images. If you aren’t a professional colorist, you won’t know how far your image can be pushed.
In this specific example, the shot is part of a music video, so we are really going to push it. Alright, let’s take a look at our shot:

First thing to note is it was shot in R3D RAW, in 5K. The first thing we need to do is change the camera RAW.

In order to unleash the power of DaVinci resolve on this shot, you have to do this.
Let’s go ahead and build out our node tree.

Starting in our exposure node, I am going to bring up my contrast quite a bit. Then I am going to bring my gain and lift down, but gamma up.


Next I am going under my saturation node and I am going to add some saturation.
When it comes to shooting in RAW on a cinema camera, setting the saturation around 65 is just the right amount.


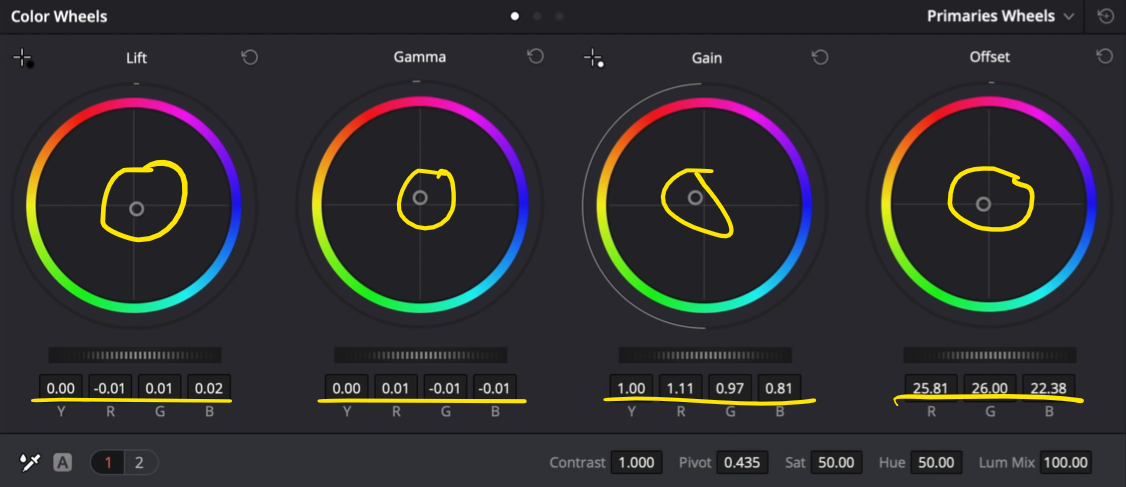
Then I am going into my balance. I can see it’s pretty heavy on the blue side. I’m not going for that kosher balance, but just bringing it to a place that looks good to me. I am going to start by taking my offset towards yellow, avoiding green or red. Then I am going to take my gain toward yellow/orange. Then I am going to take my gamma towards red. Finally I am going to bring my lift down towards green.

Next I am going into my curves node. I want to make sure editable splines are clicked on.
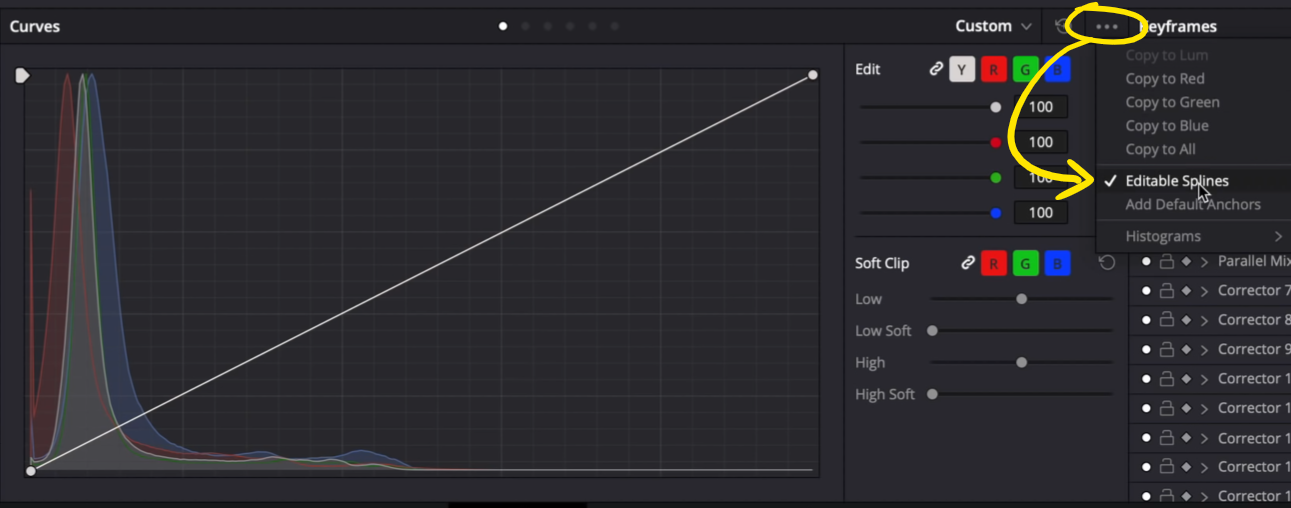
Once that is done I am going to click on the top and raise it. Then I am going to grab the bottom and bring it closer to the bottom, so that when I crush it, I only hit the darkest areas.


Now I am going to go under my hue vs. options and see what I need to do. I am going to start under hue vs hue and take the yellow down towards that green highlighter. Then I am going to take my greens and bring them up a bit to warm them up slightly.

Now I am going to go under hue vs saturation and pop my yellow. I want to make it gnarly neon and exaggerate it. I want to draw focus to her lips. I also want to take my green and pop it a bit, then bring my cyan and blue down a bit.

Now I am going to open hue vs luminance which is just a great tool, especially with a 16-bit image. I am going to start off bringing down my red to make it deeper and more vibrant. Then I am going to bring my yellow down a bit and then raise my greens up.


Let’s move into our log wheels and raise my highlights a bit. Nothing is happening, so I am going to go into my high range and pull it down to control it. Now I am going to raise my highlights more to really pop out the neon glow. I also want to get out that blue/magenta tone so I am going to pull it over to yellow/orange. The last thing I want to do is pull my shadows down, just a touch to add a bit more contrast.


Now let’s do our normal sharpening of .47. This helps sharpen her eyes a bit more.
Next we are going to add glow. Add it in from the OFX. First thing you want to do is take our shine threshold and brightness to 0. Then slowly start raising the brightness to add this special effect.


Next I am going to add some lens blur with our lens blur effect built in to resolve. Because it blurs out the whole image, we are going to add a power window and invert it.


This effect can be controlled, you just have to play with the parameters.
The next thing is to add some lens flare. When you first add the lens flare, it looks bad. So you are going to select the preset MIR-I 2.8/37. Now let’s modify it. Crank the anamorphism all the way to the other side. Then bring the global brightness down. Then crank the colorize result to the end, and change the color to red. Then take the glare brightness to 0. Then move it around a bit until it’s what you want.


Now to copy it to the right flare, just hold down the option key and grab and drop the node into node 13 and just move it and change the color to cyan. Then move it until it’s in the spot you like. Then you will want to pull up on the global blend on each node to blend the flare a bit better with the image.

Now there is some noise in the top, so what I am going to do is add some noise reduction.

Now we are going to add some grain. I am going to really add tons of grain to this image.

Finally, we need to add some deflicker. All you have to do is search in the OFX, and drop it on. Then you’re done.
We are done! Let’s go ahead and look at it in full screen.

Alright! I hope you guys had a blast and learned something new. We used a lot of new tools, so feel free to re-read/re-watch this tutorial as many times as you need.
MORE LIKE THIS


