How the Pros Balance their Footage | DaVinci Resolve 17 Tutorial
What’s going on everyone and welcome back to yet another epic tutorial. Today we are going to show you how a pro balances their footage. We will be looking at three different white balance techniques, and along with those techniques I will be showing you a way to adjust the exposure as well.
To start out, what we are going to do is do a simple grade. To start we are going to drag a color space transform onto the first node, and change it to the proper RED conversion.
Now we are going to add two nodes prior to this CST node. As I mentioned, I will be showing you three ways to do this and explaining why I like one over the others in certain scenarios. These can be used interchangeably depending on the scenario. To help your understanding, I will also be adjusting the exposure because I think it will help a lot.
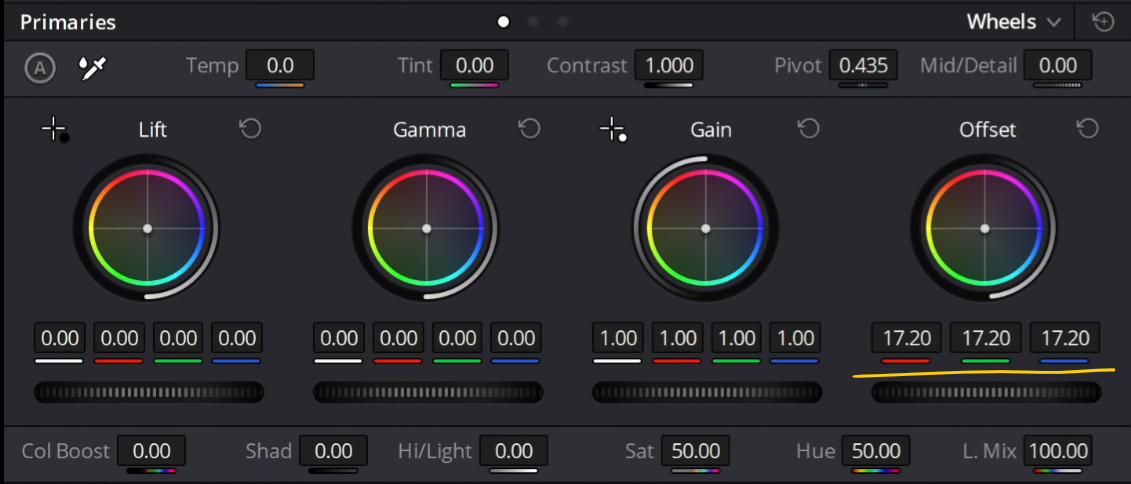
Our first method will be offset. Sometimes offset is called printer lights, but it’s all the same thing. I do want to explain and demonstrate how this offset tool actually works. When you remove the CST, and move your offset up or down, the waveform moves as a whole. What this is doing is just bringing it up or bringing it down. We aren’t expanding the waveform or adding contrast. When you reapply the CST and move the slider up and down, you’ll notice it doesn’t look linear. But since we are operating before the CST, it is moving the LOG image. Now check out this example.
Here is no offset correction. Now let’s move the offset slider down and watch what happens.
You can see there’s a sharp line. There’s no curve, it’s affecting it straight up and down. Then when you add in color, it adjust the highlights, midtones, and shadows at the same strength.
Now let’s get into our image. Let’s go ahead and pull our offset down to drop that overall exposure.
Now moving to our white balance node, our white balance isn’t that far off, but to demonstrate this, you can take the center part and move it in the direction you want to go, or you can take the numbers below and move them. This tends to be better if you are using a mouse and keyboard, as it can be a bit more precise. So, with that, we are going to bring up the red a touch, down on the blue and green a hair. This should warm it up just right.
Now method two is to use offset and your temperature and tint. To do this, you would adjust the offset the same as in our previous method, but to actually white balance, you would use your temperature and tint sliders. This has it’s benefits and drawbacks. For this example we are going to increase our warmth by sliding the temperature towards orange, then adding some green using our tint.
Now I prefer using offset because we are able to retain more of the colors we are putting in, rather than pushing them all to one color.
Now moving on to method three, the HDR palette. This is the most advanced and best math between all the methods, but that’s because the HDR palette is color space aware. The first way to input that is in your color management section. You would set your timeline color space to the specific color space your camera is in. The second way is to do it on a node level. You would click the three dots in the upper right corner of the HDR palette. You’d scroll till you see color space and find yours.
You’d also do the same for gamma. Now this doesn’t change anything right away because we haven’t made any changes, but now that it is aware of the color space, the math is accounting for that footage. Now we are going to swing the global and drop it a bit, then increase the contrast in the image.
One thing to note is that with the HDR palette, contrast doesn’t add saturation. So you may need to increase saturation as well on the offset.
Now moving to our white balance, we are going to move our temperature and tint slider. This is different from our primaries wheels since it’s color space aware. We are going to increase warmth in the image.
The reason we aren’t using the global wheel in the HDR palette is that it doesn’t hit the full range of the image. Our true blacks go untouched. To balance the full image, you would want to use the temp and tint sliders.
Now a bonus method is to use the x and y sliders under the global. The x slider moves the warmth and coolness, the y moves the green and magenta. So we are going to warm it up, then move our y slider to make it balanced.
There we go. There are three methods to properly balancing your footage. Four if you add the bonus. As we say, there is never just one way to accomplish things. It’s up to you to experiment and see what’s best for you. Only with repetition and instinct will you understand which tool to go to, and maybe even develop your own solutions to these problems.
MORE LIKE THIS


