
How to Color Grade a Wedding Video | DaVinci Resolve 16 Tutorial

Hello and welcome to yet another tutorial. Today we are going to be going over how to color grade a wedding film.
First, let’s go over some micro tips. Starting with micro tip number 1. Bride is the most important so focus on skin tones. Build your grades around the skin tones, then focus on the backgrounds second. Micro tip number 2. Focus on color separation or color isolation. Color separation is where you create color contrast and pull them apart. Color isolation is where you get the crisp white look. Where you pull everything down, then pull the skin tones back up. Micro tip number 3, neutral whites and blacks. Usually the dude is wearing a black suit and the bride is wearing a white dress. By keeping these neutral, you will have that well balanced image. Micro tip number 4, is high key. The skin needs to look flawless so doing a high key look can help you hide some of the blemishes. Micro tip number 5, make it dreamy.
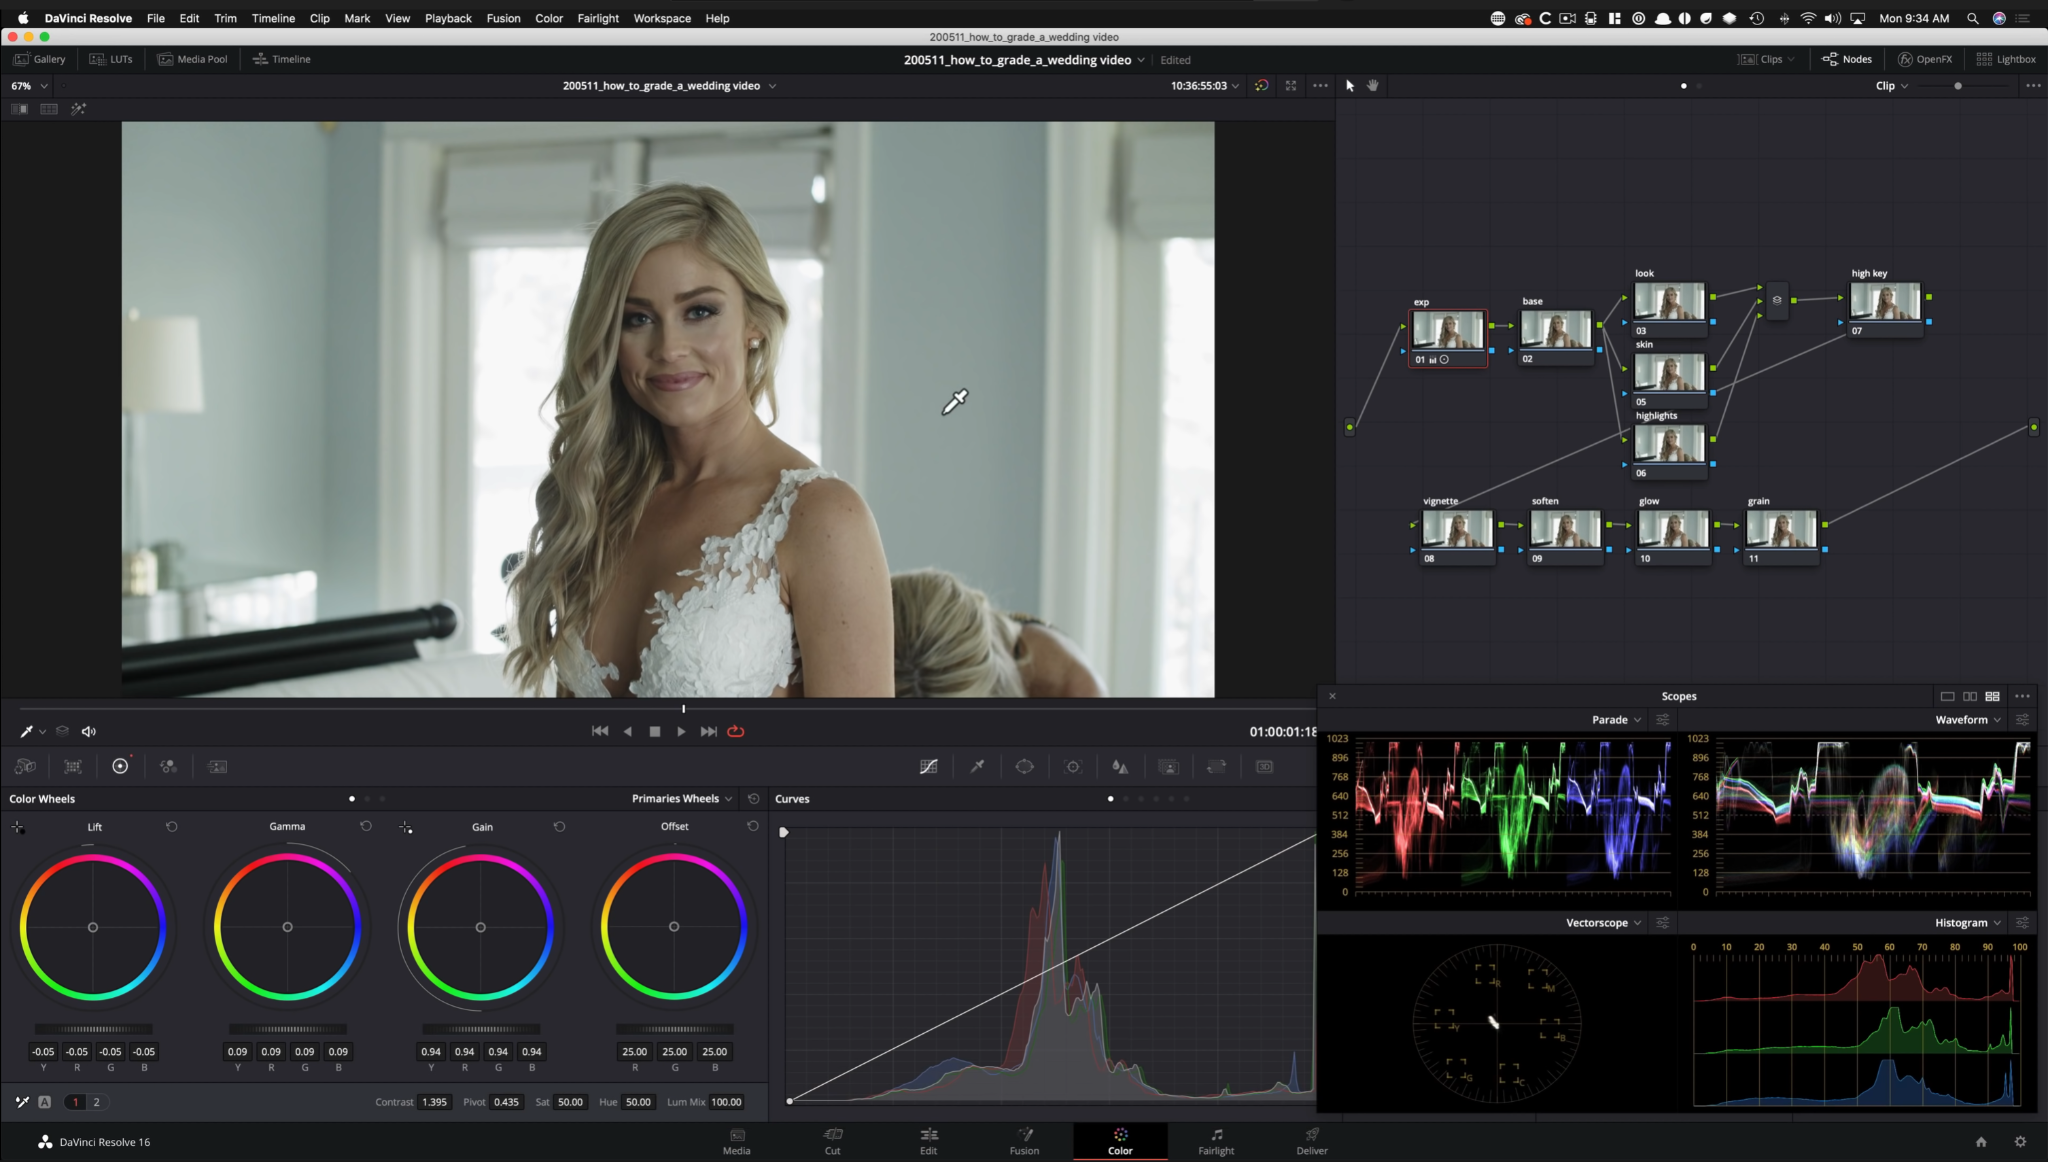
Alright, first, here is the shot we are working with.

One thing to note is that our highlights are gone. We can try to pull them back, but it will be artificial and won’t look good. That is okay though. You have to make sacrifices when shooting.
Okay, let’s start by building our node tree.

Now starting in our exposure node, we want to pull up our contrast. Do be careful because we don’t want to go too far. We want to have a gentle contrast. Next I am going to raise my gamma to bring more detail in her face, then drop the gain to control our highs. Then I want to drop the lift to bring more detail in the lower portion.

Now moving onto our base node, use your temp and tint control for a wedding. It’s very quick and easy. Let’s take our temp towards the blue side, and bring our tint towards magenta.

Now let’s add saturation to the image.


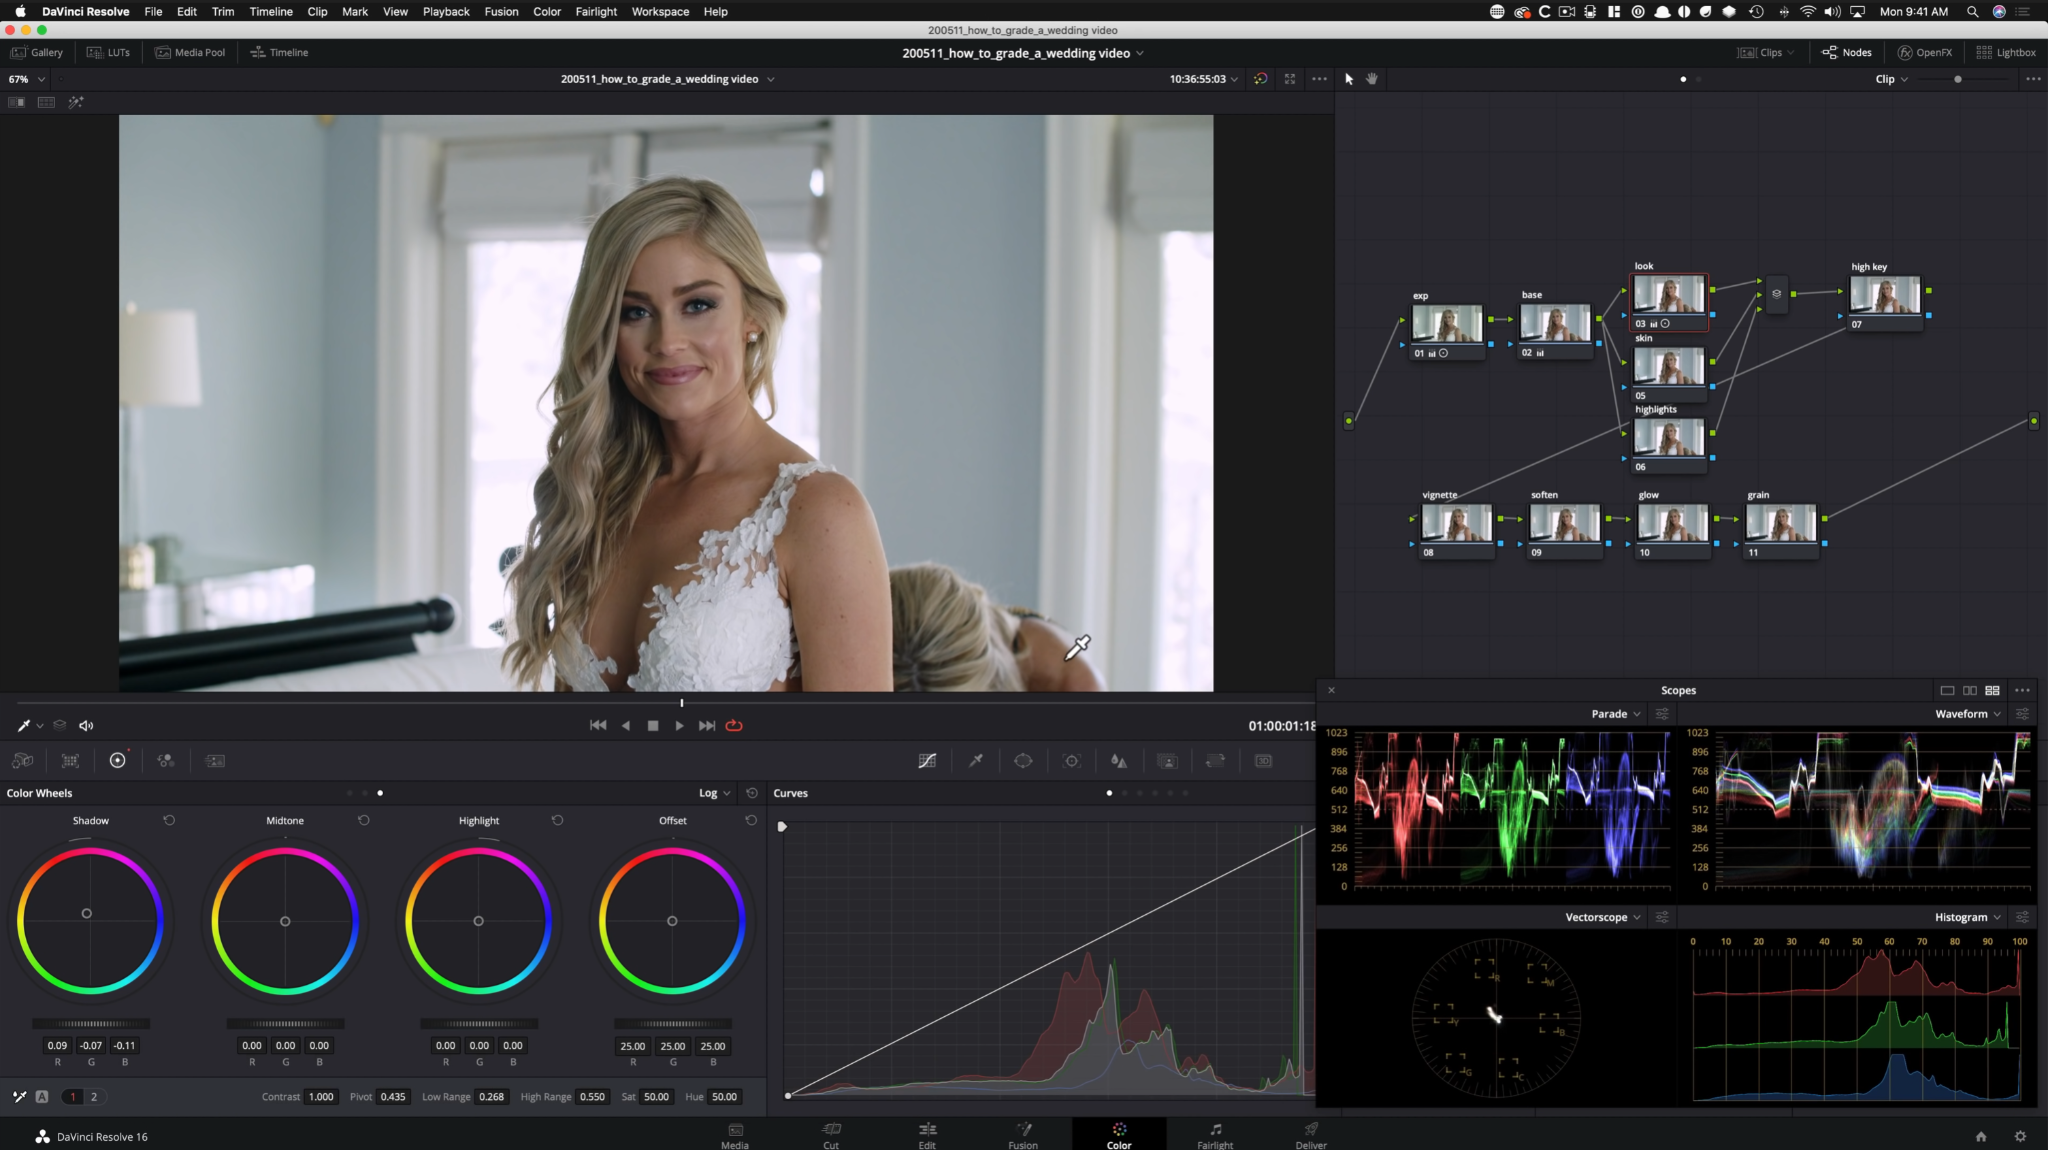
Now we are going to go under our look and start creating some interest. Remember color separation. What I am going to do is start by bringing the color wheel on my lift down towards cyan. Now to make sure we don’t lose much in the mids, I am going to bring up the gamma wheel towards red/orange.

Now I’m going to dial in my black points. I am going into my log wheels to move my shadow color wheel around to balance out those black points. Then I am going to take my low range and bring it down to give back detail in her eye.

Moving into our skin node is to go under my hue vs saturation and click on the red. Then I want to pop it up.
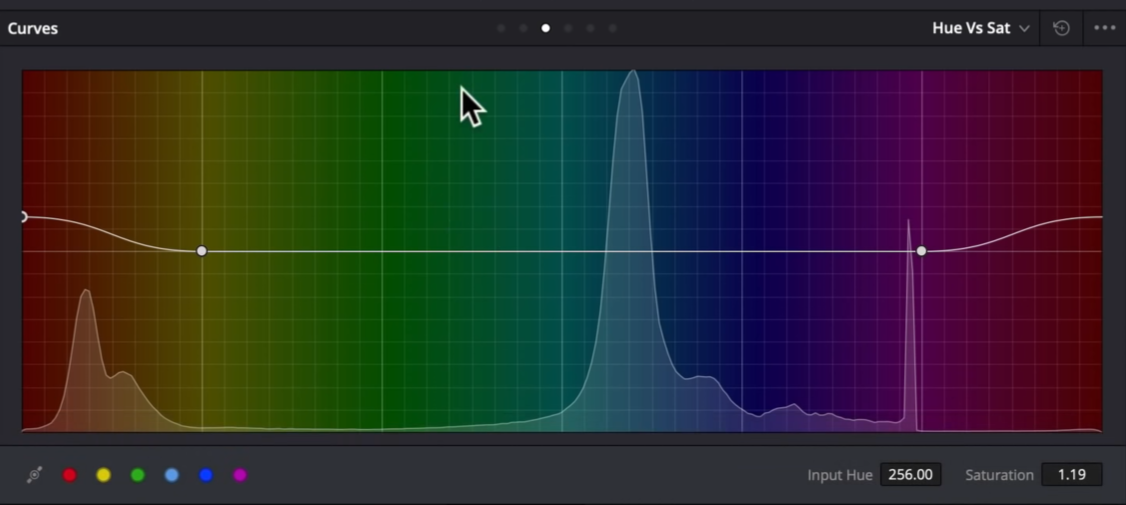
Next I want to go under my hue vs luminance and bring it up as well.


Now moving to our high key node I am going to check on my editable splines and take the top and raise it. My focus is on her.


Now we have blown out the background quite a bit and we are losing a bit of detail on the dress. So we are going to go into our highlights and qualify them using our luminance.


Now I am going to bring my highlight slider back to control the highlights.


Going back into our high key, we need to bring back just a bit of highlights. To do that we are going to raise our highlights under the log wheels section, just a hair.

Now I am going under my vignette and I am going to create a power window and soften it. Then I am going to invert it.


Going into my curves, I am going to uncheck editable splines and grab the curves from the middle and pull it down.


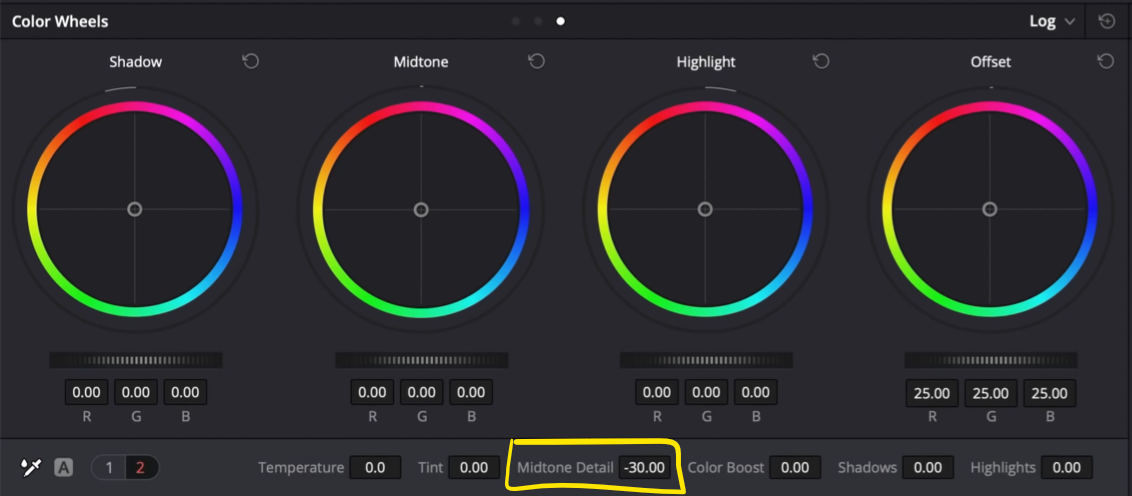
Then under our soften node, we are going to drop our midtone detail to -30. That is the sauce for the bride.

Now I am going to go under my glow and set it to these settings. I am going to change the composite type to softlight, and then bring down the brightness. Then I want to go to the spread and bring it to the right to bring back the detail in her eyes. Finally I am going to go under my global blend and adjust it.


Then we are going to add some grain. You don’t have to, but I want to. I am going to set mine to 35mm 400T and bring the strength up a bit.

And there we have it! Let’s check out the final look in full screen.

The goal for this was pretty straightforward and simple. I want you to take this method and apply it to your next wedding video. It’s all practical. With that, I will see you in the next tutorial!
MORE LIKE THIS


