
How to get the John Wick look | DaVinci Resolve 16 Tutorial

Hello and welcome to another look recreation. Today I will be showing you how to get the John Wick look.
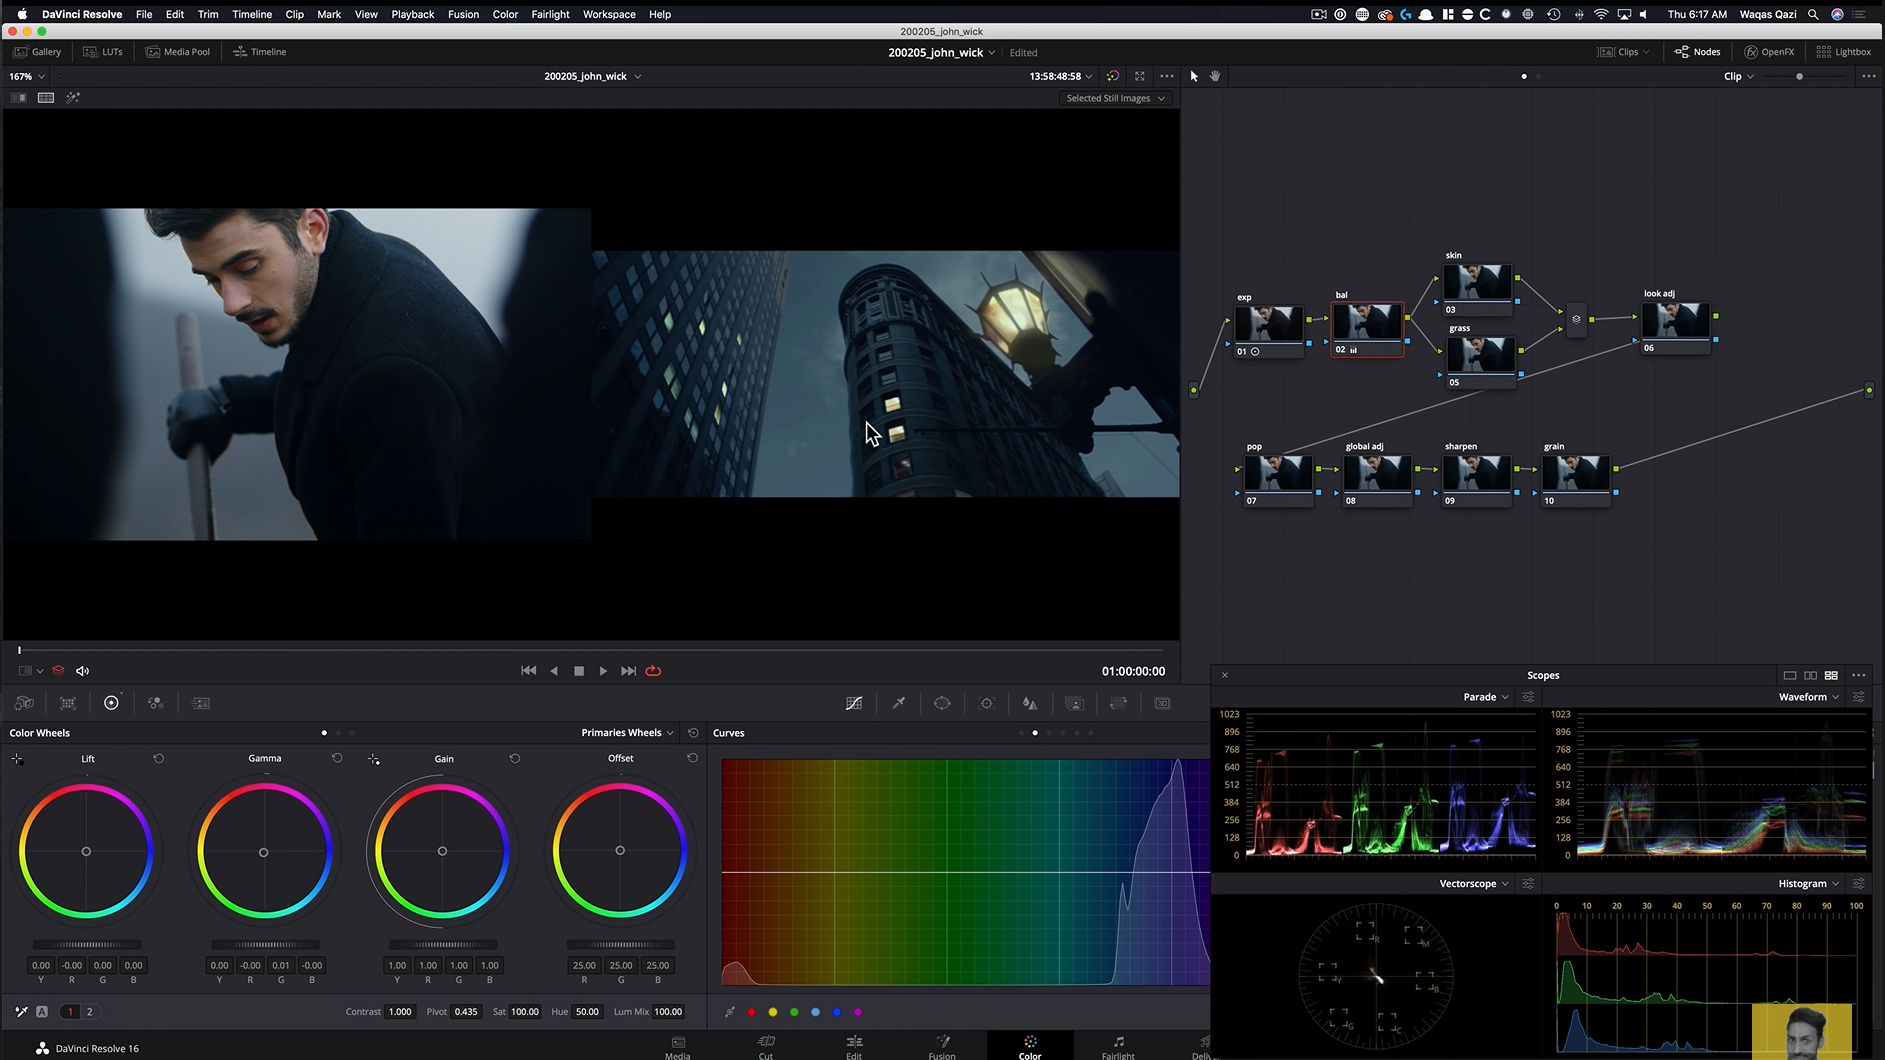
Before we get started on the grade, let’s first pop in our color palette effect to analyze the image.

First thing to note is that it is obviously CGI. The sky has been replaced, the lamp is fake, but let’s assume that this is all real and do the best we can. I see in the highlights they have warm colors/tones and in the shadows and midtones, they have a lot of cooler tones. This creates a color contrast in the image that compliment each other. There are also no primary colors; this is a very sophisticated and classy look. This cyan look is a signature hollywood look.
Let’s go ahead and create our node tree.

Starting in our exposure node we are going to start with the contrast. Give it a good amount of pop, but keeping the detail in the shadows. I left the contrast around 1.6.

One more thing I want to do is go under my log wheels and bring the low range down to about .180 and bring down the shadows to darken up the black points.

Moving onto our balance node, let’s crank that saturation all the way to 100.

Then I want to take my gamma towards yellow and bring my reds down just a tad in my lift, to bring out that cyan undertone.
Now I am going to skip my skin and grass node to go to the look adjustment node. I am going to go under the curves and grab the highlight knuckle and drop it a lot. I am watching the scopes to try and match the exposure.

Then I am going to break the chain and select the red channel. Once that is selected I am going to drop the red highlight knuckle down a bit to bring in that cyan look a bit more.

Then I am going to bring my green down just a tad to add some magenta into the image.


As you are picking up on the theme, lately in the Popular Look Series, I am trying to give you guys these looks that you can use shot to shot, scene to scene. I am going to try to avoid using too many windows and too many qualifiers, because in the real world you want to keep your grades very clean.
Now I am going into my skin node. I am going to go under hue vs. hue and grab my red to give some juice to his skin and change that yellow to a normal skin color.

Then I am going into hue vs. saturation to bring up the saturation in his face; not too much because the scene is generally desaturated.

I am going to park it here for now. Though one thing I do want to try is taking my midtones to the orange/red color space to try and give the skin a bit more juice. However, it is seeping into the gray portion so I want to bring up my low range to keep it out of that area.

Having a better command of your tools, you can create some magic without going the extra mile.
Next I want to tackle the grass. Now there is no reference in our still image for the grass, so you could take it wherever, but I want to get it into that burnt orange/red space, to keep that warmth instead of cool tones. I am going to go into my hue vs hue and select the yellow channel. I am going to bring it up quite a bit.


Now that we are done with the skin and grass, let’s move into our global adjustment node. What I am noticing is that the sky in our image, is pretty far off from the sky in our reference. In order to do this, I am going to drop my highlights down, roughly to around -40. This just takes the edge off quite a bit.

Next I am going to take my midtones and try to dial in that sky color.


The next step is to go into my pop node. Everything is looking good, but some of these areas have a pretty solid contrast and I want to see if I can replicate that. What I am going to do is go ahead into my curves section and add default anchors.


This allows me a bit more control over specific parts of the image. All I want to do is barely bring down the darkest parts. Then I am going to lift my second lowest anchor up.

This is barely noticeable, but at the same time it is. It’s cleaning up his skin a bit, adding a bit more contrast and drama overall, and it’s super subtle.
One thing I am going to do that you don’t have to, is I am going to create a third parallel node. I am going to qualify just the blue highlights and bring down the highlights a bit, just until they match the sky in our reference.


Alright, our look is done, but before we end, let’s go ahead and add our normal sharpening to .47, as well as our standard film grain.

Alright and there we have it! Let’s check out the final look.


I hope this was entertaining and educational! Don’t forget you can sign up for my masterclass and share with friends!
MORE LIKE THIS


