
How to Color Grade like Once Upon a Time in Hollywood | DaVinci Resolve 16 Tutorial

Hello and welcome to this tutorial. Today we are going to be recreating a look from the movie Once Upon a Time in Hollywood.
As always, we are going to start with analyzing shots, starting with our reference still. Let’s start with our color palette effect.

As we can see, most of the shot is sitting in this mid-deep browns. Even our highlights are more off-white. All of this is giving us this film feel. The real sauce is the color in his skin tone. They were successful in recreating the saturation in the skin from that period. The contrast here is pushed.
As you can see in our image, there is way too much light on them compared to our reference still. It will be challenging to get their skin into the ballpark, but we can!
Let’s start our grade by creating our node tree.

Let’s start dialing in our contrast. Don’t be shy with this. Now we want to take our gain down a lot. To keep the midtones sitting right, we will be bringing up our gamma and my lift.
Moving to our parallel node look trio we want to start this first node off with a LUT. Yes, I know what I say about LUTs, but without this LUT, I won’t be able to get this look right. They used this specific film stock during production, so the look cannot be recreated without this LUT. We are going to add the Vision 3 500T 5219 negative from Impulse.

Now we are going into our skin node to qualify the skin. We will need to adjust it a bit just to grab more of the skin. Then just blur the hell out of it.


We are going to start off with our gamma, just pushing it like crazy to get it into the world.

After that I am going to bring down all three primaries’ sliders to add that contrast we need.
Now, the table in the shot is subjective. We are trying to get it into the Once Upon a Time space, and some of the tables are a greener color and not as bright, but you can leave this as is if your shot works with it. For this example, we are going to qualify it using luminance. This just gives us the cleanest key to work with.

We are going to use our highlight wheel in our LOG wheels to balance the table and make it look natural.
Now that we are done with the table, we are going to move to our saturation node, we are going to just crank the saturation all the way to 95.
Then in the fine tune node, we want to match the blacks. We will go under our LOG wheels and adjust our low range to about .2 and bring down those shadows.
Let’s move to our look adjustment node and start balancing the image. Start by bringing the lift wheel down a bit. Now bring the gain up towards the warmth and bring the gamma down a bit towards cyan.
Once that is done, we are going to go into my global adjustment, and we are going to grab the curves from the middle and pull down to get rid of some of that sting but bring up my gamma just a bit.

Then I will go into my LOG wheels and bring some red up in the highlight wheel, as well as pulling down the highlights.
Next let’s add our noise reduction.

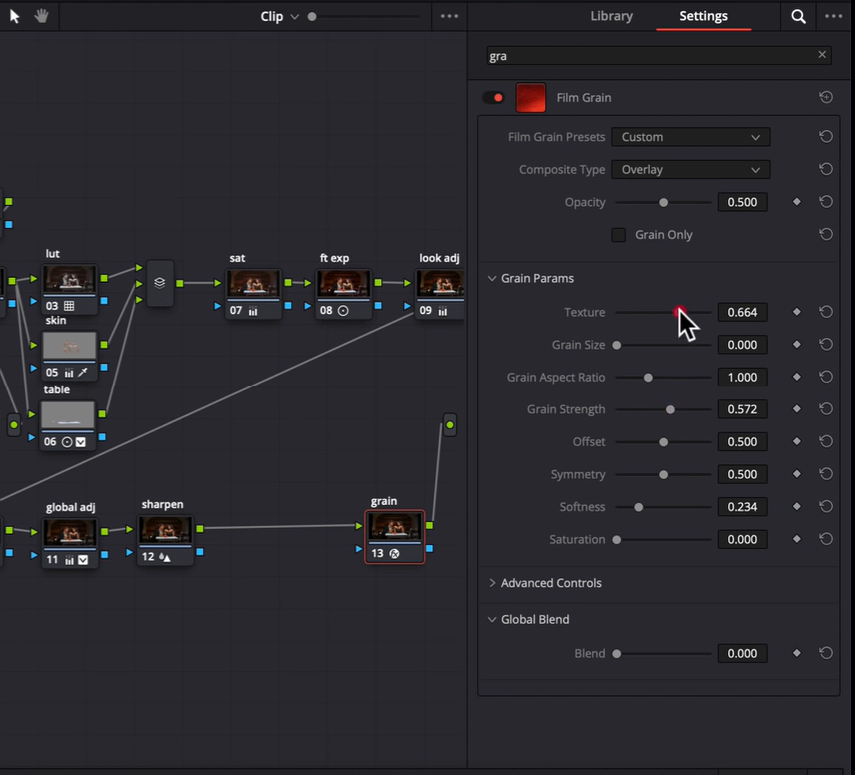
Let’s add that sharpening we always do and add that film grain we always do.
There we go! We just created the Once Upon a Time in Hollywood look. I hope you enjoyed this tutorial.
MORE LIKE THIS


