
How to Get Game of Thrones Look using ACES | DaVinci Resolve 17 Tutorial

What’s going on everyone! Welcome to yet another epic video! Today we are going to be going over how to get the Game of Thrones look using ACES. I don’t know what took so long to make this look recreation, but here it is! It’s an interesting approach to create this and it was very surprising to watch it on TV, then come to the computer and try to break it down. So there will be a lot of unique techniques I am using here that will be beneficial to you.
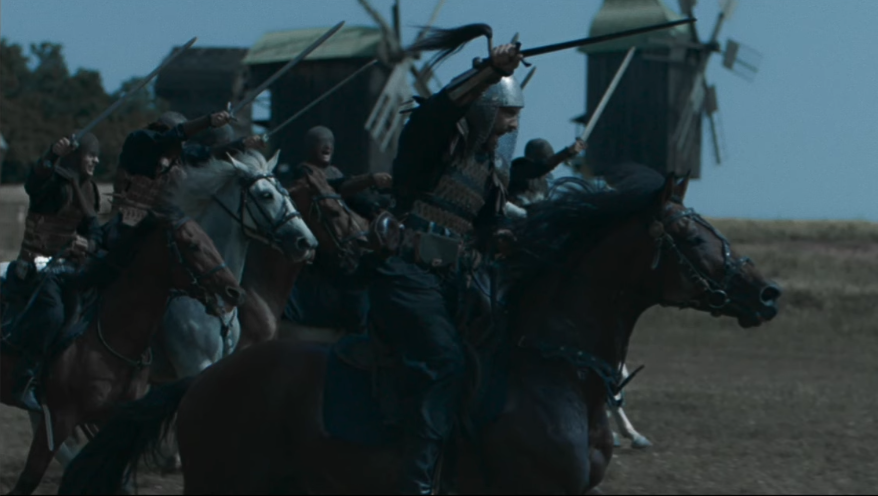
Let’s first start by looking at our reference shot.

This shot was shot during the winter and it even looks really cold. You can tell that there is cyan in the bottom end. Even the horses aren’t pure white. Our entire image is sitting down at the bottom. It gives you that desolate, cold, dead feel. We don’t have that in our shot. Our shot is more spring or summer.

Let’s go ahead and get our node tree built out. On the last node, we will be doing an ACES transform.


ACES contrast is definitely more pushed than DaVinci Wide Gamut, but ACES has a significant advantage in the filmic look department. The dials just feel easier to use.
In our shot we need to remove the greens, and make it start living more in that cyan space. Now we are going to move to our 6th node and use our custom curves to get that film curve the reference has. The first thing I am going to do is pull down the top, and pull up on the bottom. Then I am going to create a few more points (picture below).

It is not easy to match this contrast, but we got it pretty close.
Now remember, the whole goal of doing these look recreations is not to get that 1:1 match, but just to give you an idea of the steps to take to emulate a certain look.
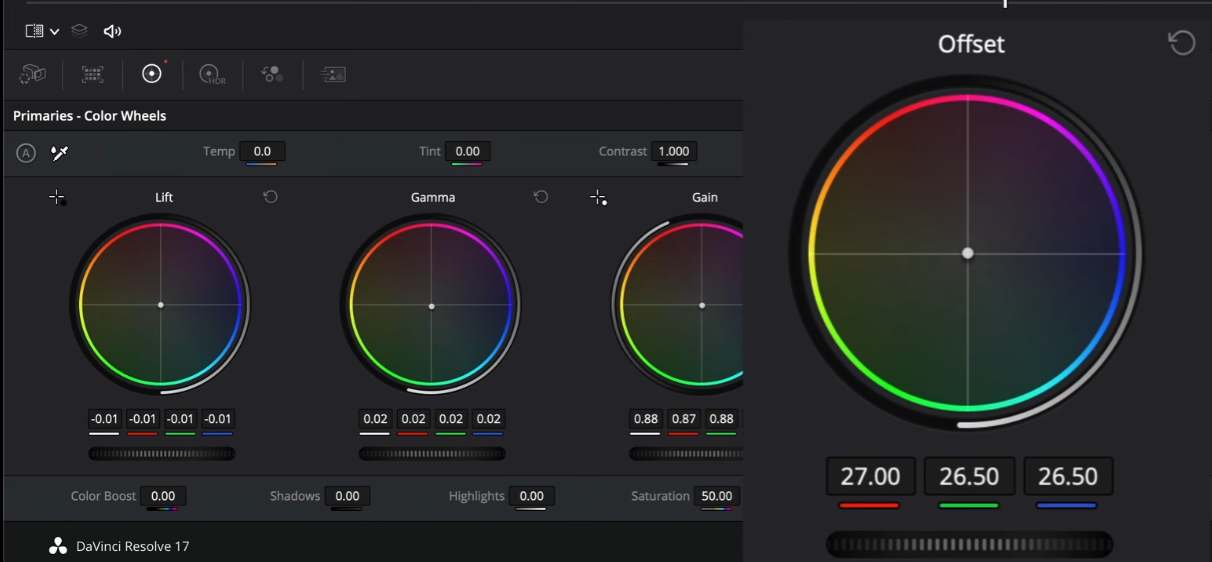
Now moving to our second node, we are going to use our offset and start raising our red. Then I want to add some cyan as well. Then we will take our shadows in our log wheels down.


We are even closer now. Obviously our image is overly saturated, but we will get there.

You can even see that we are looking good with our scopes.
Now moving to our third node, we are going to start under hue vs saturation. I am going to create a point on my cyan so that it doesn't move, but then we will grab around it and pull down on the saturation.


Just like that we are even a lot closer. Once you understand how to read your scopes, it can cut tons of steps to get there.
Now I am going to the first node and I am going to use my qualifier to grab my grass. Then we will need to make adjustments to it. We will also use a gradient window to mask out the upper parts.


Now all we need to do is to crank my contrast. Then I am going to take my gain and add a bit more warmth.


This is a key that will hold up too.
Now we just have too much saturation in our highlights. So moving to our look node, we are going to go back into our curves, then go into our luminance vs saturation and pull our highlighted areas down.


We are a lot closer overall, but we can definitely push more cyan into the image and see what that does. I am going to do this by using my hue vs saturation curve and just bring up the cyan.


We are a lot closer, but we need to dial in our contrast. To do this I am going to my primaries node and I am going to bring up the gamma a touch, then drop the gain. Then I want to pull my lift down a little bit.


Now moving into our look node, we are going to drop our color boost to -4 overall.


Now we do have a bit more warmth in our midtones, so moving back to the primaries I am going to drop the warmth in my gamma and gain.


Now I am moving back to my look node and I am going to drop my saturation vs saturation top down to match the vibe.


Honestly, this is looking pretty good. Just even look at the scopes.

Now I want to do just a couple more things at this point. Our reference is a bit softer (some motion blur, etc.) and then we are going to add some grain. So we are going to our fourth node and drop our midtone detail to -50.

Then I am going to do one more thing. I am going to add some blur under our blur and sharpening tool.


Then moving to our fifth node, I am going to drop on our grain and use the 35mm 400T preset.

Now let’s look at these side by side and see what we need to do to finish it off.

One more step I want to do is go to our saturation vs luminance, a new curve we got in Resolve 17, which is a crazy hack to create a bleach bypass effect. What we are going to do is bring up the darkest parts a bit, then drop the highlights. This creates a very similar thing to our reference.


It looks like that raised our overall image quite a bit, so we are going under our primaries and we will take our gain down a bit, but bring our gamma up some.

Then I want to go into my log wheels and drop the shadows just a touch.

The more you look at looks, the more you notice things that need to be fixed. So I am noticing that it can use a bit more cyan. I am going to be under the primaries node and add one more cyan.

Then I want to move to my look node and I want to pull some of the color out and I want to use luminance vs saturation to pull out more of that saturation.


Then moving to our first node, I am going to up the contrast in our grass.

Then there are two more changes I want to make before we wrap this up because it’s still just a bit lifted in the midtones. So in the custom curves node, I am going to move our curve shadow point in a little.

Then in my look node I am going to use the luminance vs saturation down almost all the way.


To my eyes, this is a pretty good match. It looks really good. Let’s check this out in full screen.

I had a lot of fun putting this together and I am hoping that you can take away a lot from this tutorial.
MORE LIKE THIS


