
How to Get Marvel's LOKI Look | DaVinci Resolve 17 Tutorial

What’s going on everyone! Welcome to yet another epic tutorial. Today we are going to be recreating the Loki look. Now this won’t be a one to one match because my goal here is to recreate it as best we can using mainly primaries, so that we can use it on a shot to shot basis. This will be done in ACES color management.
Jumping right in you will need to have something shot similar to create this look. Something with similar lighting and color. Now let’s take a look at the color palette.

You can see our shadows are more of a warmer, dark look. In our mid-section, there is more of a warmer teal/orange. All of these are sort of low saturation. Then in the highlights there is an amber look, but also this subtle desaturated teal.
Now let’s look at our shot.

From the start it’s very different. Just a man in a prison. Because this is a moving shot, we don’t want to key or track anything. We just want it global. We don’t have that two-tone lighting like Loki, so as I said it won’t be 1:1.
Now quickly, here are my color settings.
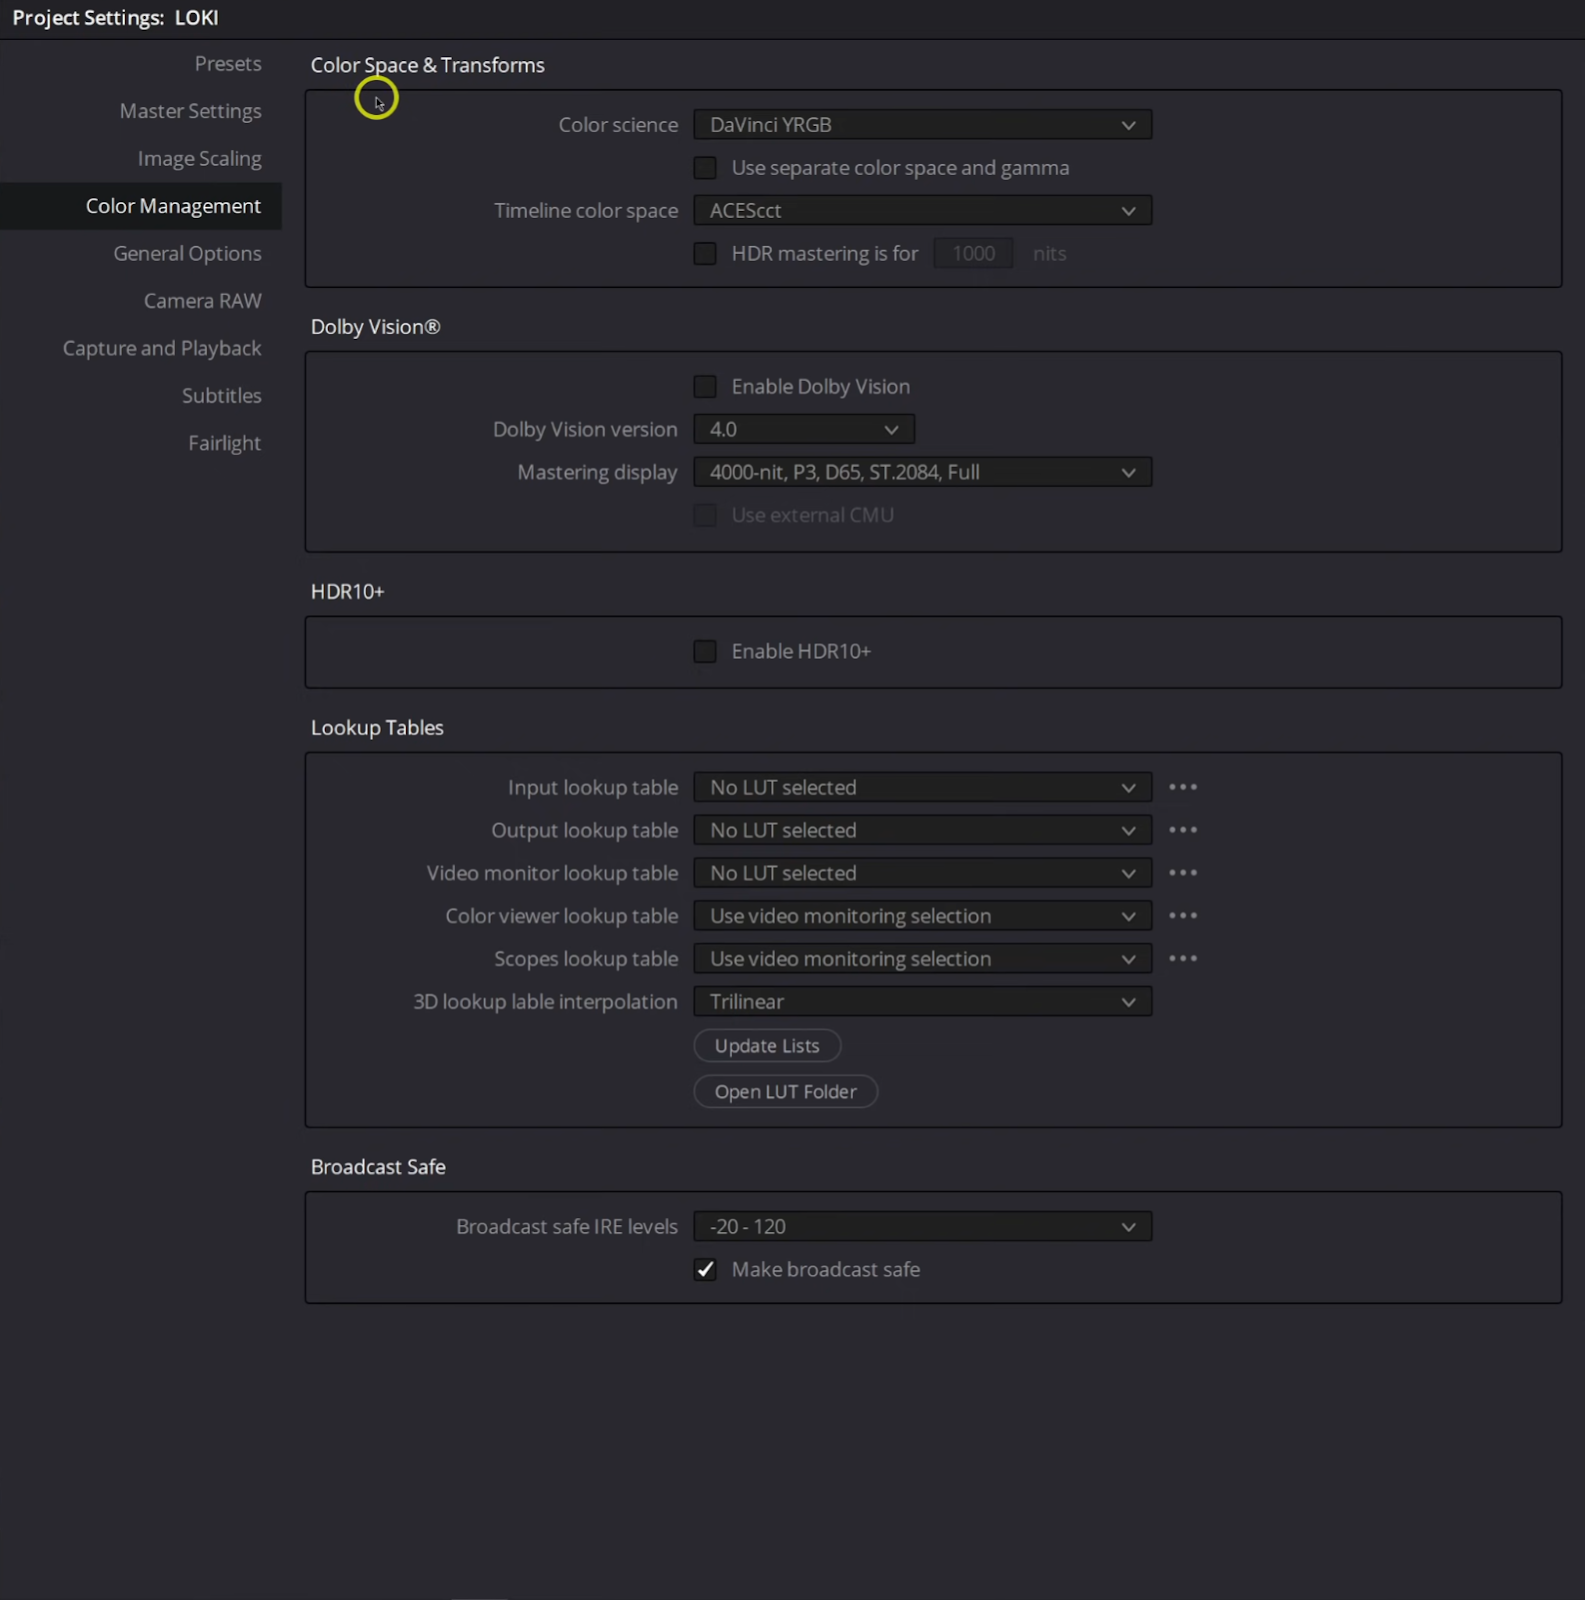
We will have to do an ACES input transform, but we want the full control so we will be doing it at the clip level.
Now let’s build out our node tree.
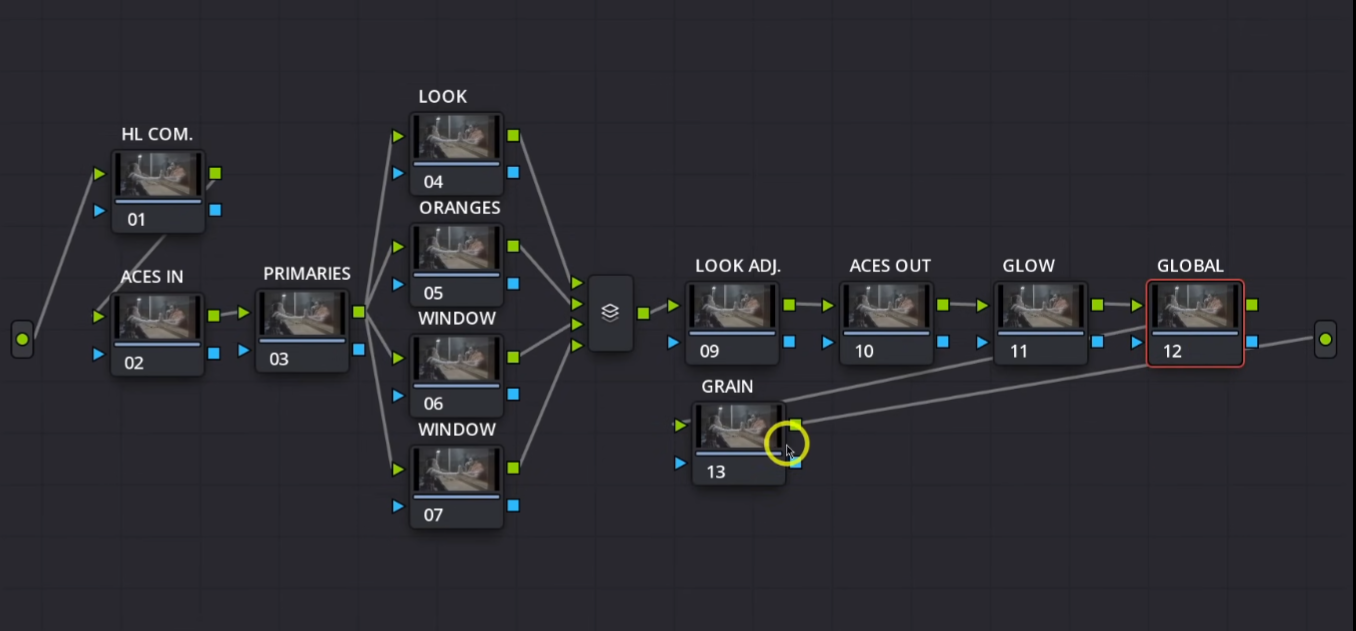
For now, this is it but we may add onto it later on.
Starting in our second node, we are going to need to do our ACES input. To do that, you will need to use the ACES transform effect and use ACES 1.1. Then for our input transform we will use Alexa, and for our output we will use CCT.

Then on node 10, we want to do our ACES transform again but using the settings in the picture below.


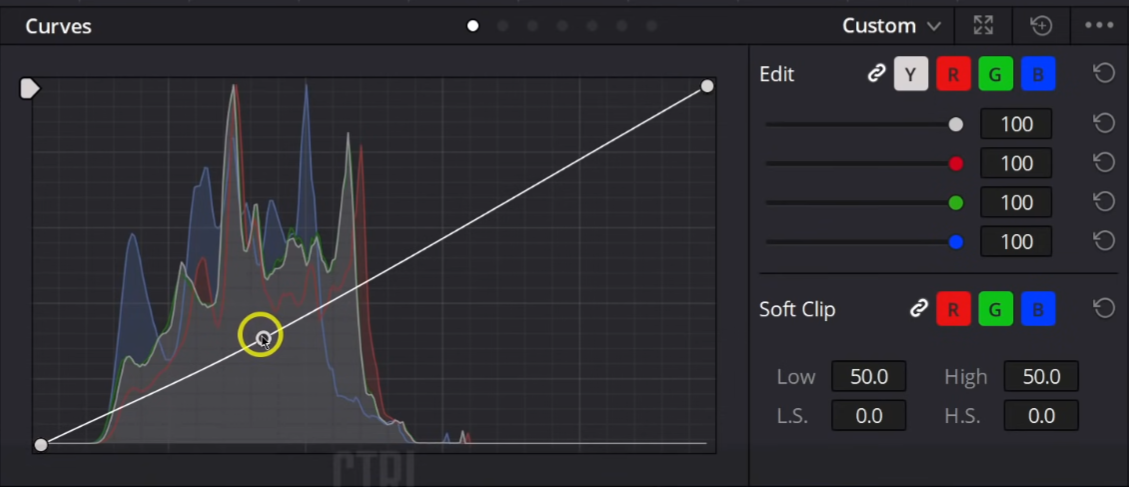
Now that it’s converted, we are going to go into our highlights compression node and go into our curves. We want to make sure our editable splines is checked on and then we are going to grab the white point down, then bring that knuckle up a bit.


Now moving to our primaries, the goal here is to start pushing some warmer/green tones into the palette by using our HDR wheels. These wheels know we are in ACES. Now we are going to start raising up our temperature, then make our tint more green.


Now moving to our look node, this is where we are going to start pushing some colors and dialing in our contrast. To do this we are going to use our primaries wheels to pull down on our gain and gamma a touch, then lift up our lift a touch.

Then I want to try and get that highlight blue/green by using our primaries bars. I am going to subtract some red and blue. Then in our gamma we are going to add some red and green. Then in our lift we are going to try and pull out some of that red and green.


Now I want to add glow, but I don’t want to work with it on. I just want to see how things react. So I am going to add the glow OFX and I will bring the threshold down to 0, change the composite type to softlight, and drop the global blend to about .500.

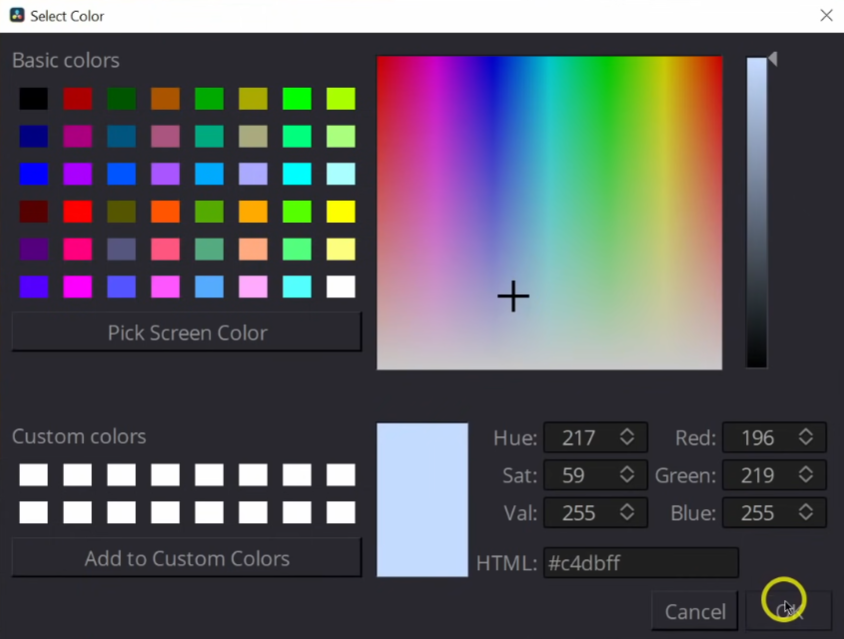
Then I want to bring some of that green tint in using the colorize tool.

Now moving onto our oranges node, we are going to use our hue vs hue curve and shift our yellows a bit upwards. This changes them to a bit more red.

Then we are going to use our hue vs saturation tool to bring down the saturation on those reds and yellows.

Then moving to hue vs luminance we are going to bring down the luminance of those reds and yellows.


The skin is looking a bit dull so we will need to qualify it. However, when we add a parallel node, if we try to qualify, it will be before our rec.709 transform. To fix this, you will need to right click anywhere on the empty node area and add a new source. Then we need to add a corrector node, and then add another node.


Then we want to use a color space transform on the first node and change it from Arri LogC to rec.709.

Now I would warm it up a tiny bit with our offset to just balance it a slight bit more and add some color separation.

Now on that second node I will use it to pull my key.
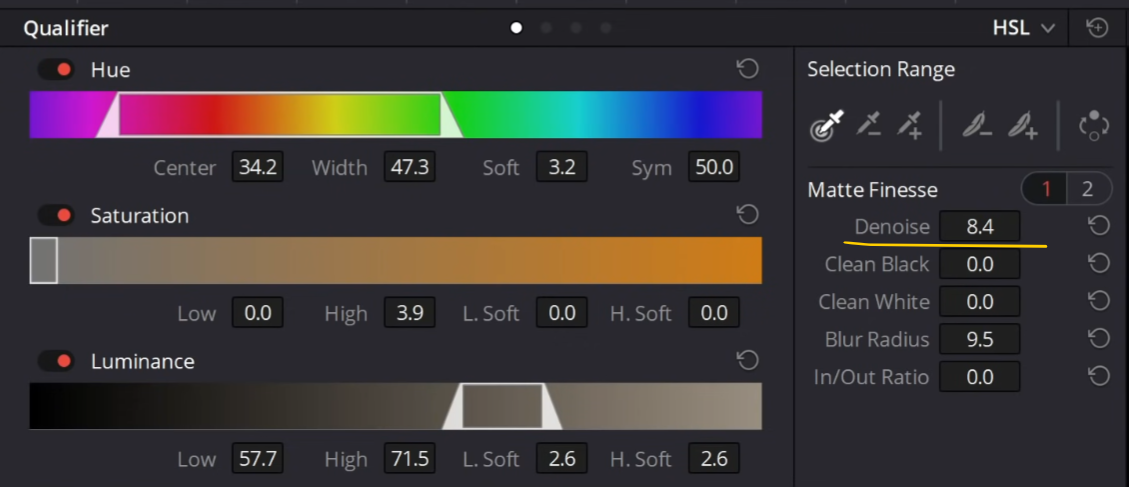

Now, we are going to take that information and send it to our skin node.

Now that we’ve done that process to get the skin qualified, we are going to use our gain to cool off the skin a bit and counter that by pushing red into our shadows.


Now you can obviously skip that step if you need to. It adds one more point of possibly breaking and isn’t 100% necessary.
Also be careful when you’re starting out. Don’t use too many keys because it can put you behind, but also break your image.
Now moving into our look adjustment node, we are going to move into our curves and uncheck our editable splines, then pull up on the upper mids, then do the opposite on the lower mids.


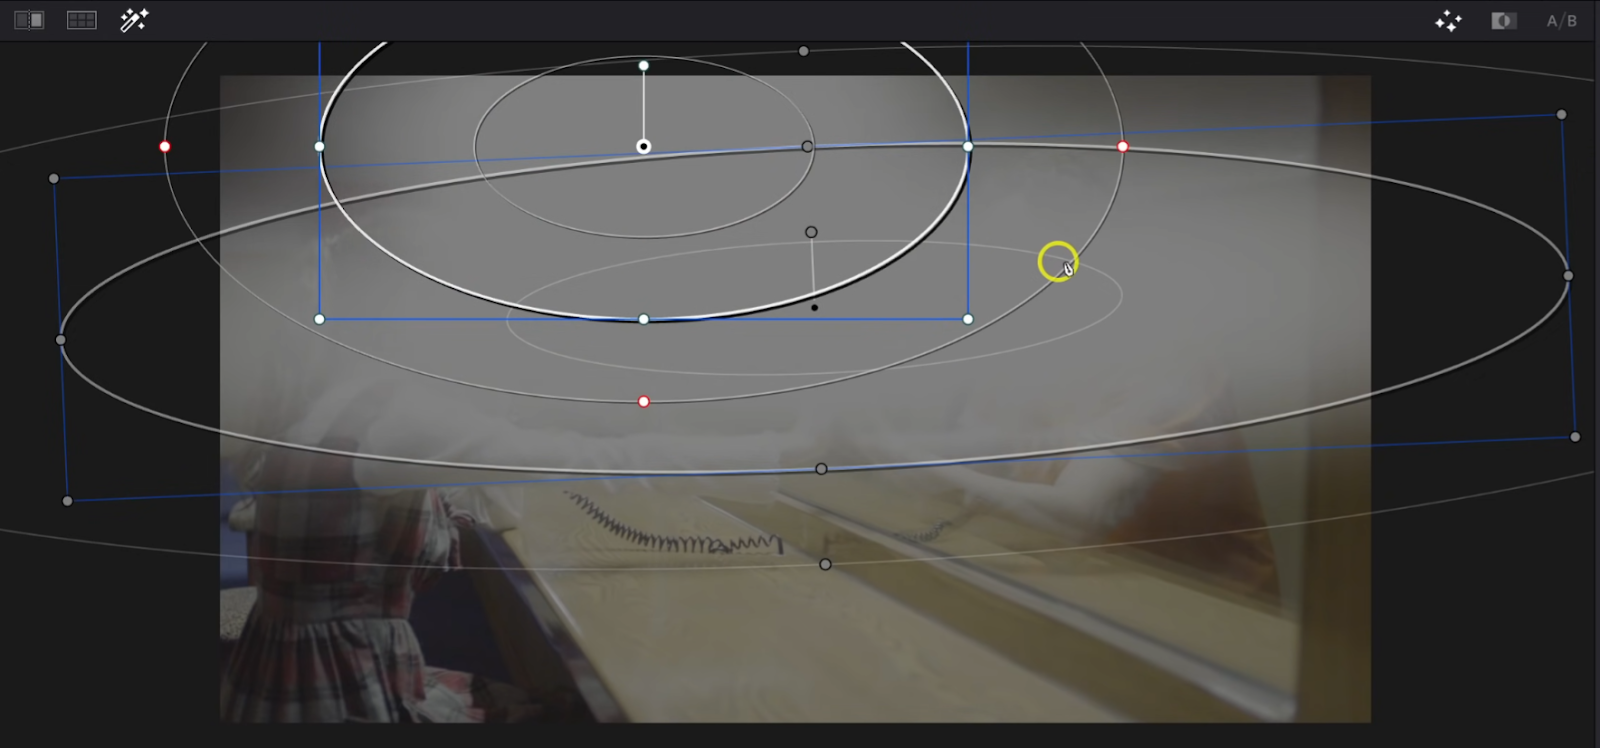
Now moving into our window nodes, we can now start shaping light. Starting in that first window node, we are going to add a circular power window and make it wide and soften it a lot.

We also want to invert it. Then moving back into our curves, we are going to pull down on our lower mids.

Now to keep that upper mids teal color, we are going to create a second power window and say to invert the key.


Now moving into our second window node, we are going to add a gradient window to work on the bottom part of the image.

Then we are going to use the curves to pull down on the bottom again.


Now moving into our global adjustment node, we are going to desaturate the whole thing a bit.


Before we get into our grain, I want to go back into my look node and add a custom curve to compress the shadows a bit. We will add a point in the middle to keep it from attacking the middle part of the image.


Then in our look adjustment node we are going to add a touch of blue to our shadows in our log wheels and take our low range down a bit.


Now there is a blue bucket in our background, so in our global adjustment node we are going to use our hue vs saturation curves and pull down the blue and cyan a bit.


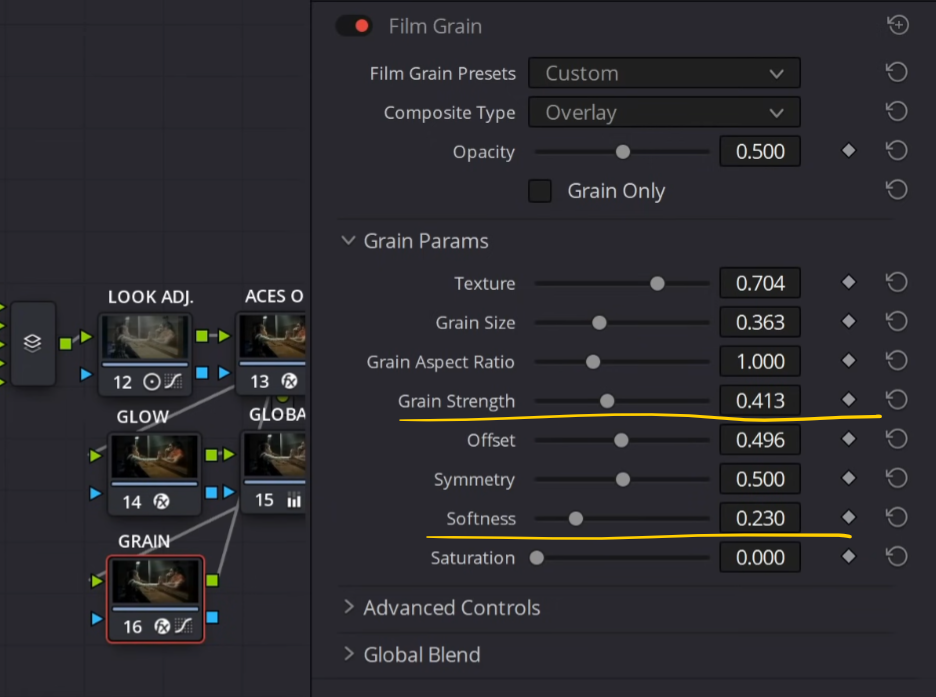
Now we are going to add some grain. We are going to use the 16mm 500T preset. We will make our image a bit sharper by subtracting softness, and add more grain strength too.

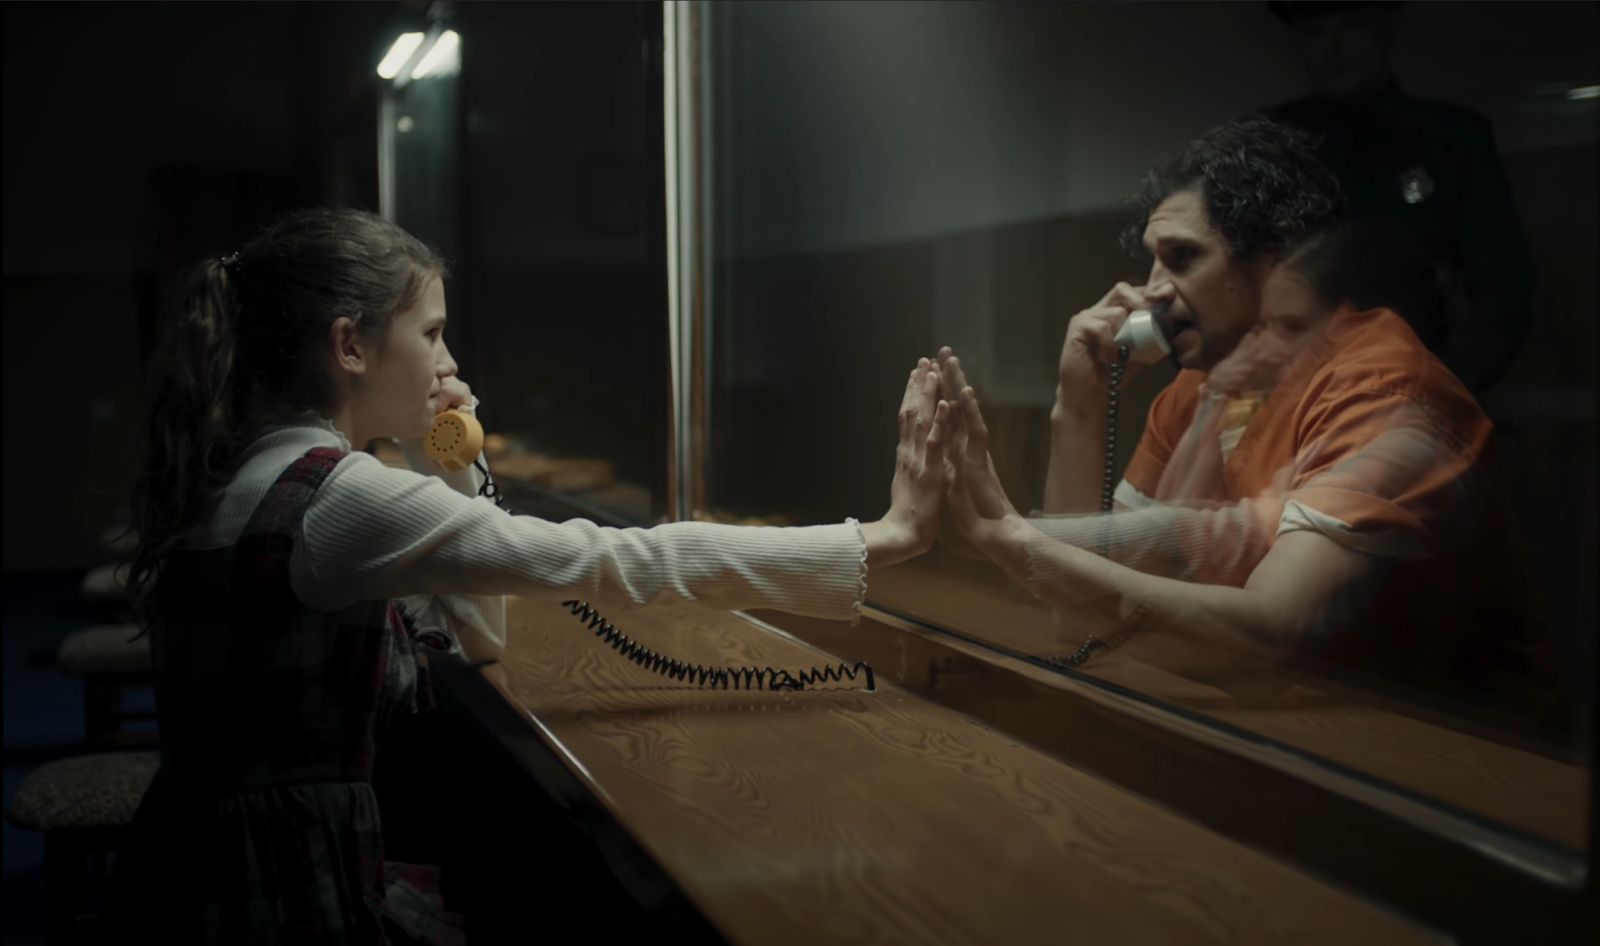
Just like that we are done. Just look at how gorgeous this is. Let’s see it in full screen.
I hope this tutorial was helpful and I hope you learned something. This is one of my favorite looks, and I hope you enjoyed it!
MORE LIKE THIS


