
Advanced Techniques To Get The Film Look | DaVinci Resolve 17 Tutorial

What’s going on everyone! Welcome back to another awesome tutorial. Today is part 2 of a 3 part series on film emulation. Today we are really going to get into the grit of film emulation and start making our digital image look like film. We are going to be studying film stills and using only resolve’s built in OFX tools, we will be recreating those.
Alright, jumping in, I want to address a few things before we get started. First, film emulation can be very technical but it’s also very artistic. Don’t place the technical accuracy over the artistic. Now looking at some film stills, one thing I got wrong in the previous video is that image sharpness doesn’t necessarily need to be sharper than grain sharpness.


For a lot of true film, grain can be sharper than the image because it was captured on film, which isn’t known for its sharpness. It’s a less perfect image since it’s analog.
In this we will be experimenting with the different grain settings. Sometimes adding saturation to the grain can help get the look, but also working with halation. You can take this as far as you want to, but this is a look that will look beautiful!
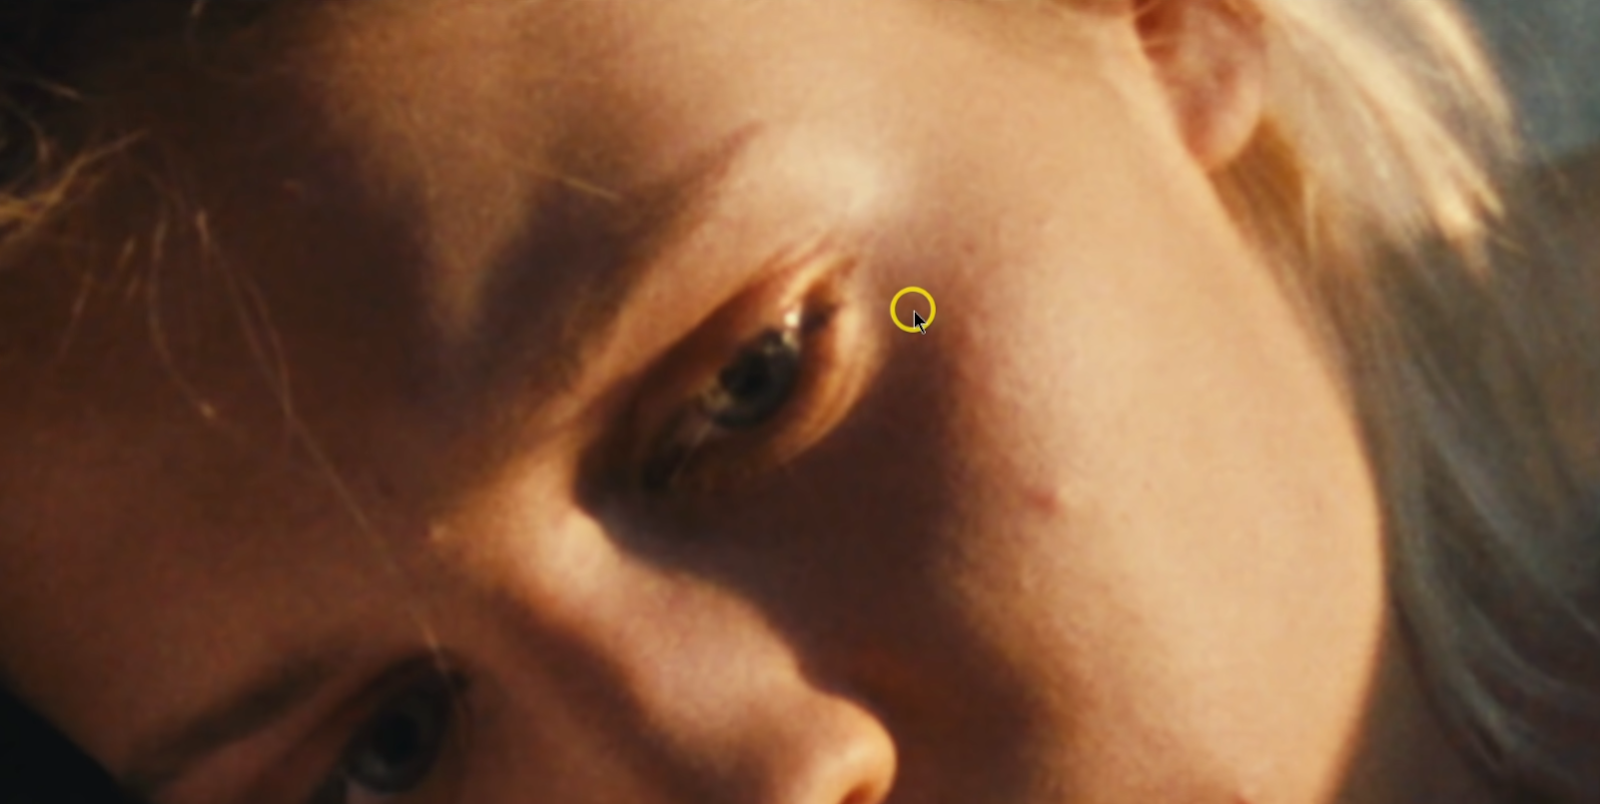
Here is our hero frame.

Now we are going to start with our node tree. We are first going to set our CST. I was shot on Arri, so we are going to set our settings for Arri.


Now we are going to add another node after this, and select our film LUT. The Kodak 2383 D60. To do this, we will right click on the second node, go to our LUT tab, find our film looks, and then find the exact LUT that we want to use and select it. You can use any of the LUTs, I just prefer the D60 version.


Now, these two nodes are going to be at the end of the node tree. This is going to lead to a more technical and proper conversion of everything. All of the nodes happening prior to the CST will be in the Arri LOG C space which gives us a bit more room to work with.
Now we are going to add some nodes before the CST by doing shift + s. This we will label primaries.
Quick note. If you are on set and you know you are wanting to do this type of look, I always recommend protecting your highlights at all cost. Film does a lot better job covering the highlights, so underexposing it can help.
So in our primaries we are going to take our lift and gamma up a little bit. Then bring our gain up a touch. Then I want to bring my highlight slider down a touch, and my shadow slider up a bit.


Now adding a second node, we are going to call it saturation and jump into our RGB mixer and max out the red, green, and blue.

Now it is pretty saturated so moving to our node key tab we are going to drop the output to half.


Now we are going to add another node and use a gaussian blur effect. We want to increase our blur just a touch. Not too much.

When you are doing this part of the look, you do want to make sure you zoom in on the most detailed part of the image.


Now to work more on this halation I want to use a compound node to keep it a bit more organized and tidy. We are going to add two more nodes, right click and say create compound node.

Now we want to go into the compound node and add two nodes. In the first node, we are going to go into our qualifier and use only our luminance to select the highest areas.


Now we are going to go into our blur tab and deselect the link in the radius channel so we can work on each of these individually. Halation has a bit of color, so that’s why we are doing it this way. It should give us a bit of tint. We are going to start bringing up the blur on each of the channels, making the red the highest.

Now moving to our second node within the compound node, we are going to use our edge detect OFX and make some changes to the settings. We are going to bring up the threshold and smoothness a bit. Change our mode to grayscale edges. Then also select our edge mask overlay.
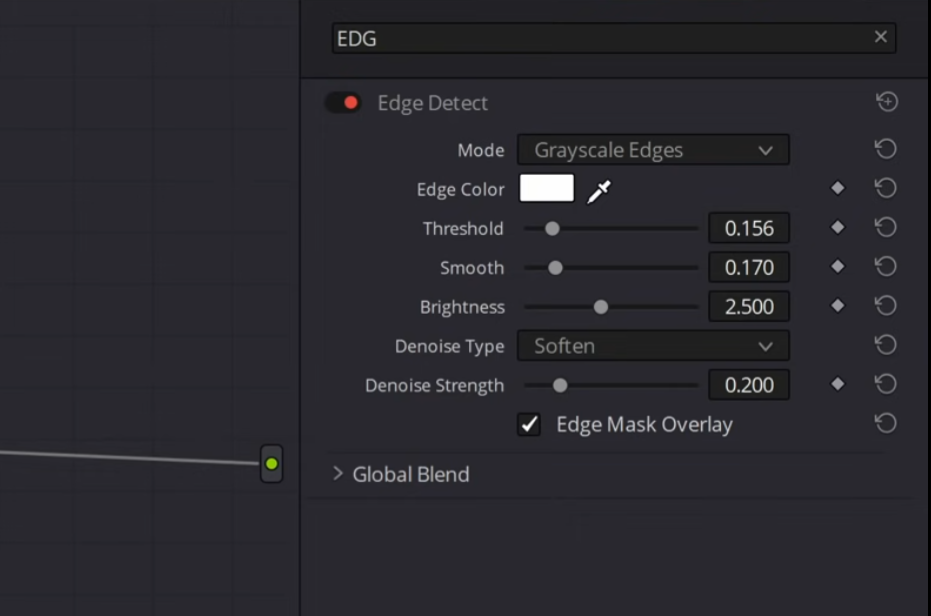
Now this is what we are left with.

Now we are going to change the edge color from white to red, but drop the luminance value.

Then moving to our smoothness, we are going to increase that value. Then we are going to add some denoise strength. Then finally we are going to pull back in the global blend. This will give us a better idea of what the final result will look like.

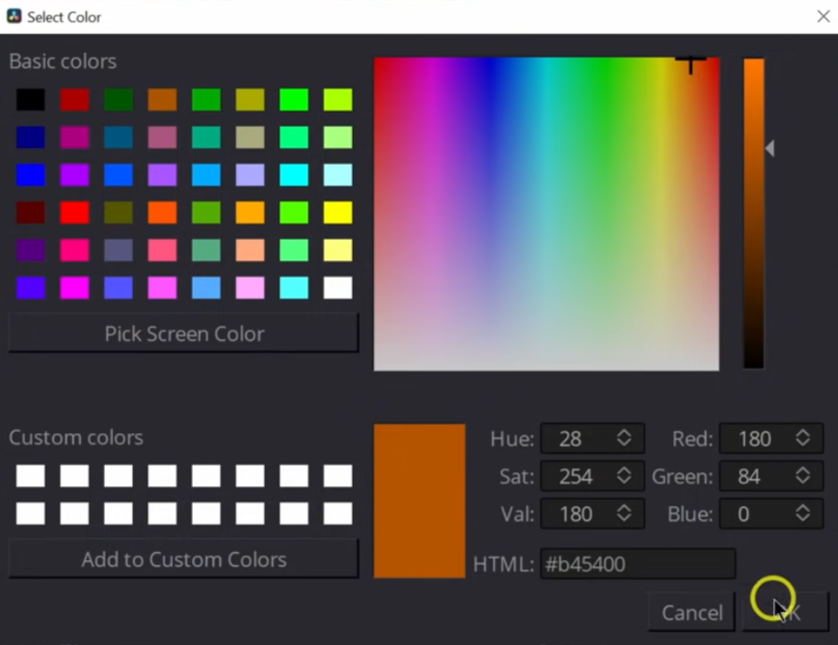
Now the edges are looking too red in comparison, so we are going to change the color to an orange hue.
Then we will also take up the brightness a bit.

With all of these changes you can really start to see the bloom and halation around the edges.

Now I am noticing the edge detect in our shadows, so what we are going to do is bring the key output from the first node, to the key input on our halation node. What that does is tell the node to affect the qualified area.


Now we are going to jump back into our main node tree. We are going to add another node (fifth node) for our glow. This is going to help with softness, but also tint our shadows. So we are going to take our shine threshold to 0 and our composite mode to softlight. Then I also want to add a teal tint to our glow. Then we will drop our global blend.

Now after our CST and LUT, we are going to add grain. We are going to use the 16mm 500T preset. Then we are going to increase the size, strength, and texture. Then in our softness we are going to increase it a bit. We are also going to add some saturation to our grain.

Going forward, if you wanted to make more adjustments, I would set your node tree to look like this:

Then right after the primaries I would add another node that you could do some changes to.
Just like that, we are done! Let’s look at this in full screen.

With that, I hope you learned a lot! This is again very technical, but it is also an art. Don’t always let the technical side of things take over. Let the artistic side show some too! See you in the next one!
MORE LIKE THIS


