
Getting the Stranger Things "Upside Down" Look with this SECRET Trick in Resolve

What’s going on Qaznation! In today’s video, I am going to show you how to create the Upside Down look from Stranger Things. We are going to do this from scratch too.
Now to start this look, I went to ShotDeck.com and picked out a shot.

This was the shot I ended up picking.
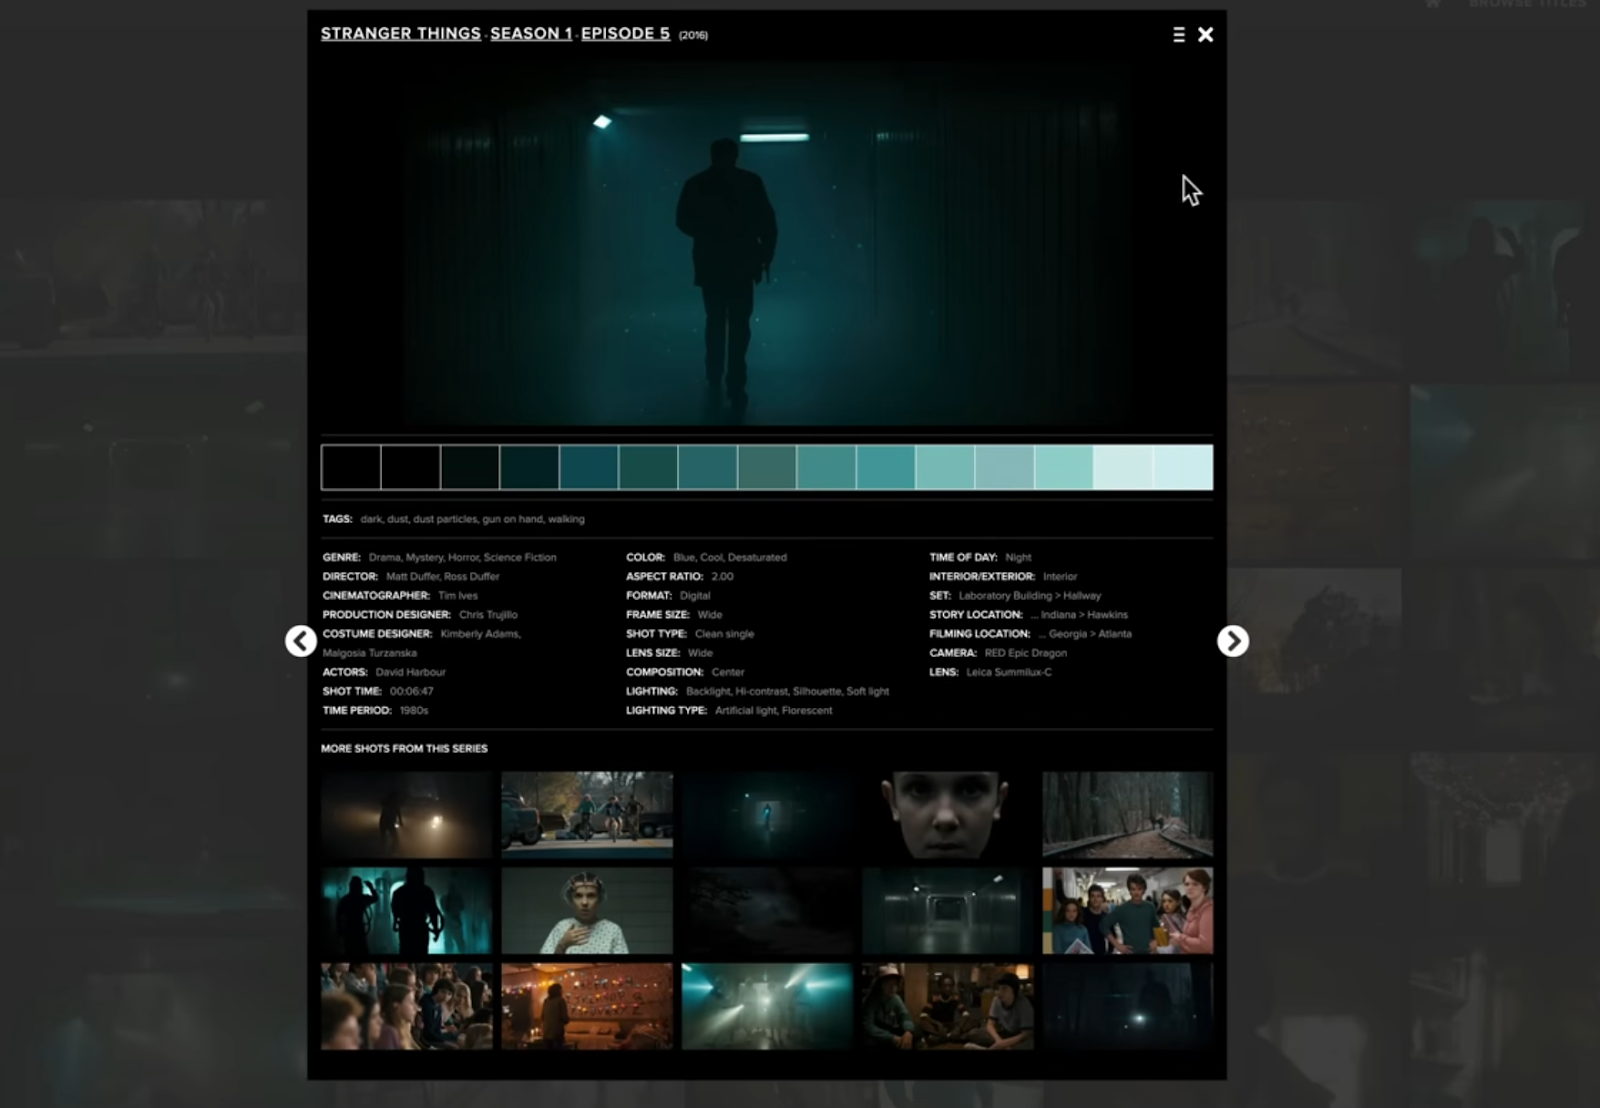
Then I added it into my Resolve. Now when I look at my scopes you can see that this is pretty much a monochrome image. We can see that represented in our scopes because the only color we see is teal.

Now I am going to switch to my shot.

This is shot from Sony A7S III in SLOG3. Now let’s go ahead and get our node tree built out.

Okay the first thing I am going to do is drop on a color space transform and give it the proper information.


And really quickly I am going to show you my color management settings within Resolve.

I find this to be the best way to do things and the cleanest way for all these tools to operate.
Now when I play this through, you’ll see that there are other colors that come in the image.

Whereas ours has nothing but teal. So this is as difficult as it gets. So knowing your tools is a must because once you have that knowledge, you can look at your reference and know how to get there.
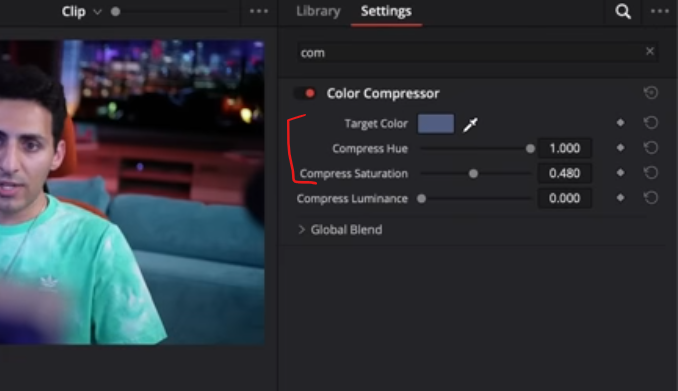
Alright now moving to our secret sauce node, we are going to use color compressor. With this, I am going to set my target color to blue, and then take the compress hue and swing it to make everything come closer to that blue. Then we are going to open up the compress saturation to get cleaner results.
You can see here that it did a great job. Now I can go back to my hero frame.
Now I am going to go into my look node and all I’m going to do is swing my hue and move it around to where we are in the ballpark.

Now this doesn’t look amazing and what’s happening is there is too much saturation happening. So I am going to dial back the saturation a lot.

Then I am going to swing my hue again to get it even closer.


That one node brought us really close.
Now next up is our custom curves. What I am going to do is select a point lower on the curve and bring it down a lot.


Now I am going back to my look node and keep adjusting the hue and saturation.


Now I am going to go under my adjustment and grab my gain and pull it down a bit.


Now I want to go back into my look node and add a bit more green into the image using hue vs hue.


We can see that we are already about there, but what I am going to do is go into my custom curves and I’m going to level out the blacks by adding some red into my shadows.


Now what I want to do, this part is extracurricular, but I am going to use dehancer (which is a paid plugin). I use this on almost every paid job because the power of this tool is second to none. So what I am going to do is go under halation and turn it on.

Now just know that most every look you see are either using proprietary plugins, or similar plugins to these, because there’s only so much you can do within Resolve. These tools can help you go that extra mile easily and effectively.
Now, when I say a proper node tree matters, let me unhinge our look node, and then plug it in before our secret sauce node.
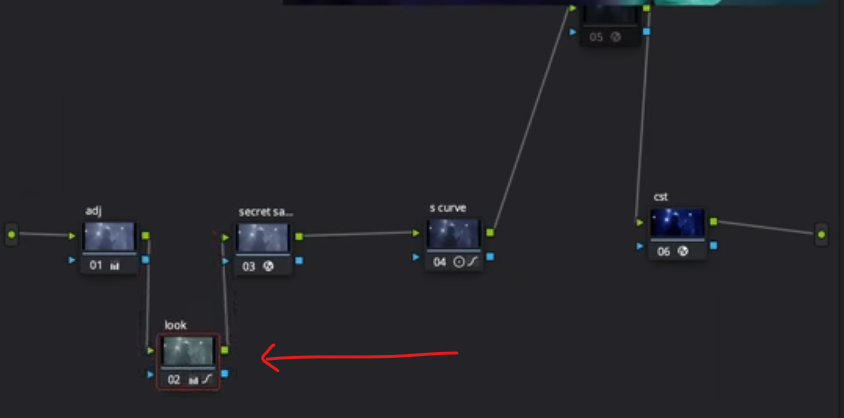

Look what happened. It’s the same everything, but look at what it did. This is why it’s important to have a proper node tree structure.
Now moving back to Dehancer, I want to push it to these specs.


But I really wanted to use this plugin for grain. So I am going to enable the film grain, and then I want to drop the amount. Then I want to bring up the resolution. Then I want to bring down the shadows and highlights and midtones and then leave chroma where it is.


Now I am noticing the saturation and exposure are still off. So going back into my adjustments, I am going to drop the gain even more.

Then I want to raise my highlights under my LOG wheels.

Then I want to pull down my saturation a bit more, and bring more blue back in under the hue.


Then in my shadows I am going to bring up my girl a bit.


Now our girl is a bit too dark, so we are going back under our adjustment node and we are going to bring up the gain a bit.

Then I am going to go under my LOG wheels and bring down the highlights just a touch.


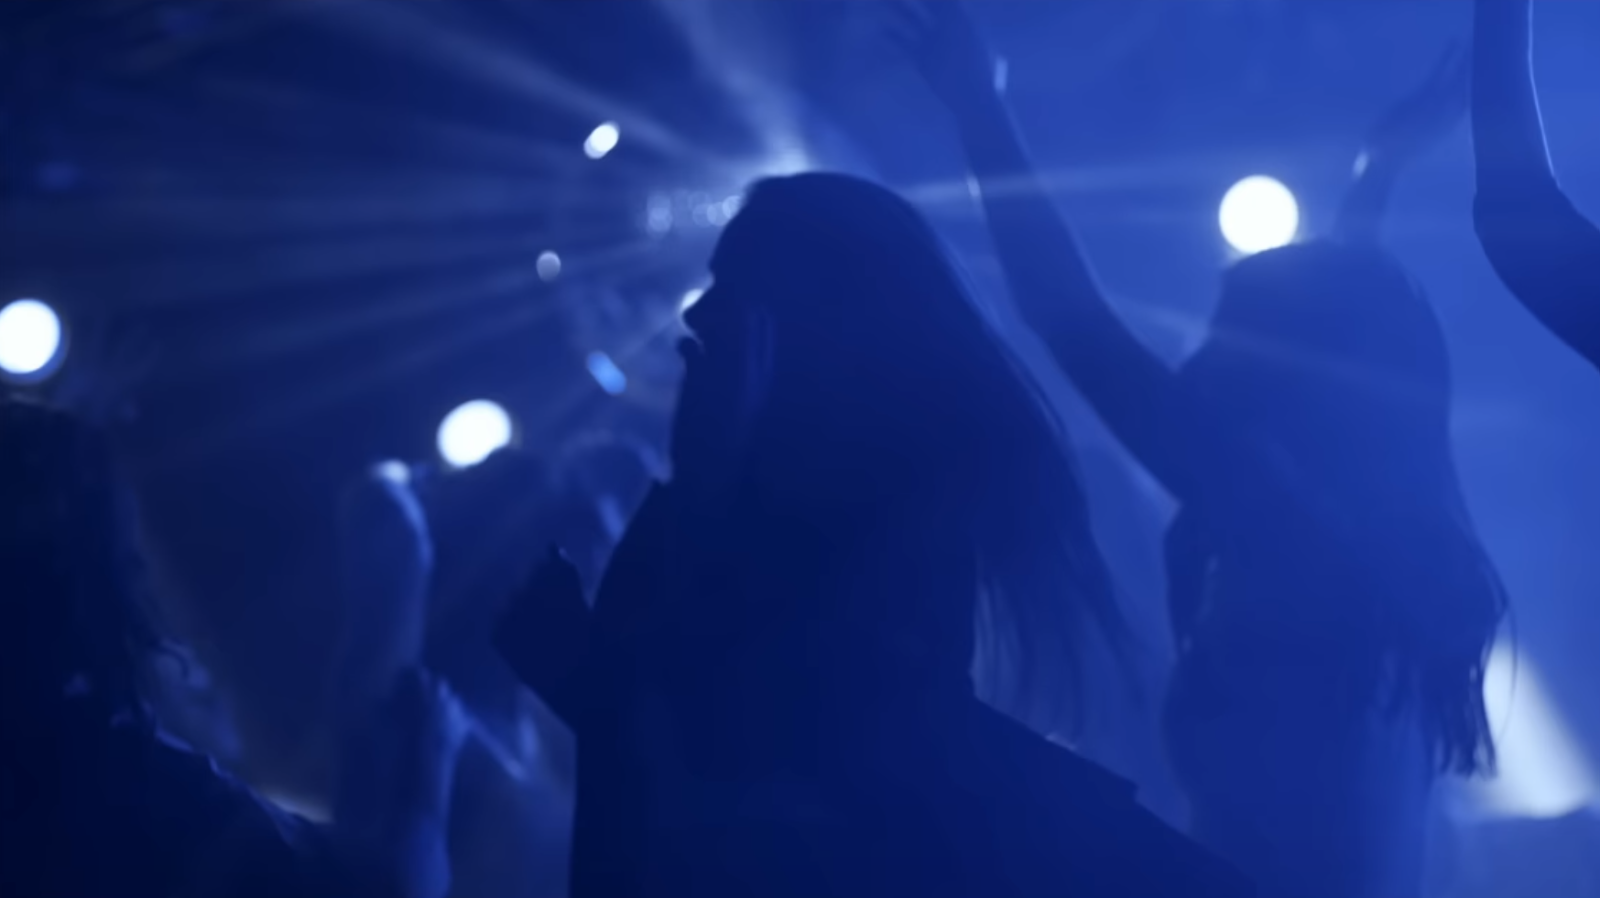
Just like that we are done! Now let’s check this out in full screen.

The best thing about this is that I don’t need to create qualifiers or power windows even while this plays through. This is our entire look DNA and apply this to our entire scene and just use offset to make sure the exposure stays where it is for shot matching purposes.
Now with that remember, work hard, get obsessed, get possessed, and I will see you in the next video.
MORE LIKE THIS


