
In-depth Overview of the Blackmagic Design's DaVinci Resolve Mini Panel

What’s going on guys! Welcome to another awesome video. Today will be a little different as it will be a very in depth review of the Blackmagic Design Mini Panel. I know there aren’t a lot of videos on this topic and when I was looking at this versus the micro panel I couldn’t really tell which would benefit me more. So that’s what we are going to do in this video.
So first off, here is the layout of the actual panel.
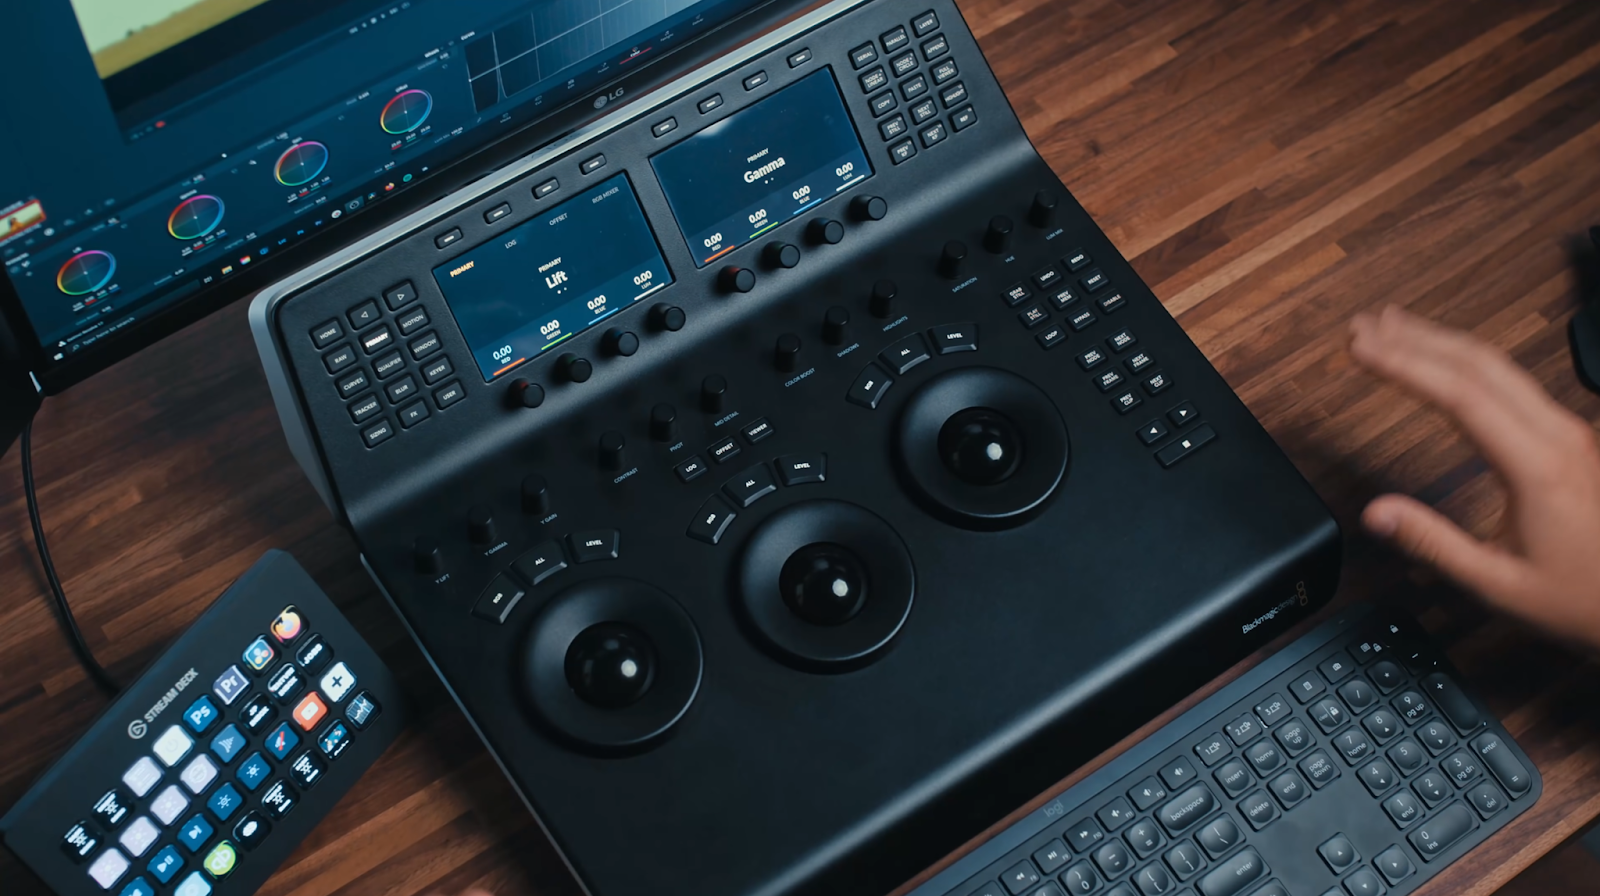
One thing I want to start off by saying, and you’ll notice in the photo, is the bottom half of the mini panel is identical to the micro panel, except the mini panel has a bit of a ledge that allows for a palm rest. The MSRP on this is $3000, but you can find them cheaper used.
Now starting on the bottom half, we will start with the primaries knobs.

Starting off on the top left, you have the y lift, y gamma, y gain. These are under used and under appreciated, but it’s a great tool to have.

Then you have contrast, pivot, and midtone detail. The nice thing about these is you don’t have to be on the primaries palette to use them. You can use them on any page.

Then you have color boost, shadows, and highlights. These are pretty self explanatory. Also forgot to mention that you can press the knobs in and it resets that specific parameter.

Then you have saturation, hue, and luminance mix. Again these are pretty self explanatory. I won’t get too much into the luminance mix right now though.
Now we are moving onto the trackballs and wheels. The wheels allow you to adjust exposure in any tonal range and the trackballs help you push color into those same tonal ranges.
One of the main advantages of having a panel is that you can adjust two parameters at the same time, which can allow you to experiment more and get different results.
Above each trackball and wheel we have reset buttons. You can reset the RGB (coordinates to the trackball), you can reset all of the parameters for that tonal range, or the level (the Y channel). Then on top, we have the log, offset and viewer buttons. The log button switches you to the log wheels. The offset button allows for the gain wheel and trackball to be used as the offset, while your lift and gamma wheels control the temperature and tint of the image. The viewer just pulls up whatever viewer mode you are in.
Now let’s move to the function and transport controls.

So the first button is the grab still. That’s self explanatory. Then undo and redo, again self explanatory. Then you have play still, which will bring up the still that you want to look at. Then you have previous memory, which allows you to see the previous memory on the grade. I still prefer versions, but this button helps with memories. Then you have the reset button, which allows you to reset the specific node you are on, but if you hold it down, it resets everything. Then you have loop, which allows the clip to loop back to the start at the end of the clip. Next is bypass, which bypasses the whole grade. Then there is disable, which disables the changes to a specific node. Moving to the two x two section, first up is the previous node and next node buttons. These are self explanatory, they just take you to the previous or next nodes. Then under those are the previous frame and next frame buttons. Again, they take you to the previous or next frames. But, like the reset, if you hold the buttons, they take you to the start or end of that clip. Same with the previous clip and next clip. They go to the previous clip or the next clip. The arrows and square at the bottom are your play controls. The arrow pointing to the left rewinds the clip, while the arrow pointing to the right, plays the clip forward. If you press them multiple times, they speed up the playback speed. The square stops the clip from playing. That covers the bottom half of the mini panel (and the whole micro panel).
Now we are going to take a look at the top functions which makes this panel worth the price tag.

Starting at the top, the home button just shows you the network you are on. Then you have the about resolve page. This shows you that you are using the mini panel and which software version you are on for the panel, and how it is connected to the computer. Then under that, you have the RAW tab. This isn’t a raw clip, but you would have options for that. Then moving to the right you have the primaries tab. This takes you to the primaries wheels and options. This has been helpful for me recently because I can move the trackball, but if I can’t fine tune it enough, I can use the knobs and move it to the precise place.

Now you’ll notice that in this, only the lift and gamma are on the screens. To get to the gain, you press the right arrow key.
That’s the thing with this panel. There are so many unlocks you can do using the arrow keys. You can always tell there is an extra tab when there is a dot under the name.
Then you have access to your log wheels, offset, and RGB mixer from the primary tab. Then moving right once more, you can go to the motion tab. That’s our noise reduction tab. Here I still feel like I am faster with a mouse and keyboard, but in many instances the panel is faster. Then you have curves.

In the photo you can see that you have every curve option, and the dials on the panel coordinate to different points on the curves section. On the RGB curve, you can adjust all channels together, or you can do them each individually. This really helps speed up the workflow because you can dial these settings in perfectly, without touching your mouse and keyboard. When you open each hue vs tab, the different color selections are there too.

Then moving right from the curves, we get to our qualifier function. This is one of those tabs I’m still torn on because you can use the qualifier tool on the panel, but I still prefer to use mouse and keyboard because I feel that I have more control with a mouse. Moving to the right again we have our windows tab.
This is another instance where the panel speeds things up. You have all the controls necessary to get the perfect window. Then you can also track the window. You just have to select the tracker button and hit the arrow key. Now moving onto the next one we have the blur tool. This again mirrors the blur tab. Then moving to the right one you have the key function. This allows you to drop the intensity of the node. Moving to the last row on the left, you have the sizing tab which allows you to adjust all the input and reference sizing, direction, etc. Next you have the FX tab which you can set your favorite 8 effects and have quick access to them. The last one on the left side is user. This isn’t handy that much, unless you are working with the HDR palette. You can set this one to have the HDR palette, which helps have quick access.
Now, we are going to move to the right side of the panel or the node based controls.

Now starting again from the top, you have serial, parallel, and layer. These allow you to add these different types of nodes. Now moving to the second row, the first selection is node + linear. This adds a window with a linear mask. Then you have node + circle, which adds a node with a circular mask. These are quick and easy if you know you need a vignette, you can just click the node + circle. Next is the append which adds a node at the end of the line up. Moving to the third row, you have the copy and paste buttons, which are self explanatory. Then you have the full view button, which puts the image in full screen mode. Moving to the fourth row you have previous and next still buttons which helps you move from still to still if you are trying to use different reference stills in a grade. Then you have the highlight button which is to highlight the changes on that specific node. This is basically the Shift + H function on your keyboard. Now moving to the bottom row, previous and next keyframe. I don’t use these a whole lot, but when you have them it’s nice and easy to switch between. Then the last button is the reference button, which does nothing. The buttons on the right are also numbered 1-15, which I also have no idea why.
But there you go! That is an in depth look into what the mini panel does and how you can use it for your workflow. I hope this provides insight on this panel and helps you make your choice between the micro and mini panels.
MORE LIKE THIS


