
Apple M1 MacBook Pro: Can it handle 12k Raw? | DaVinci Resolve 17

What’s going on everyone, welcome to another awesome video. This time we are going to be looking at the brand new M1 MacBook from Apple. The first thing we are going to do is build out the laptop, then I’ll show you the version of DaVinci resolve to install, then we are going to download a 12k RAW clip and bring it into a timeline and see how the M1 performs. Then I will show you real world advice that will optimize this laptop for performance.
Starting off, we are going to discuss the M1 system specs.
We are going to start by building the Mac.

You want to select this version of the MacBook Pro. Then you’ll want to select the 16GB unified memory option, and select the size SSD you need. I maxed it out with 2TB.

Then you definitely want to add AppleCare to this.

This is the final price we are looking at.

Now let me show you how to download DaVinci Resolve. The first thing you want to do is type into google, BlackMagic Design support and click the first link. It will bring you to this page where you will scroll down to find the Mac only version that has support for the M1 chip.

Once you click on it, it’ll open up this dialog box and you will just fill out all the stuff. Once done, hit register and download in the bottom right.

Now we are going to download 12K RAW. You are going to type ursa 12k raw footage sample download into google and then scroll down until you see the website link that has BlackMagic design on it.
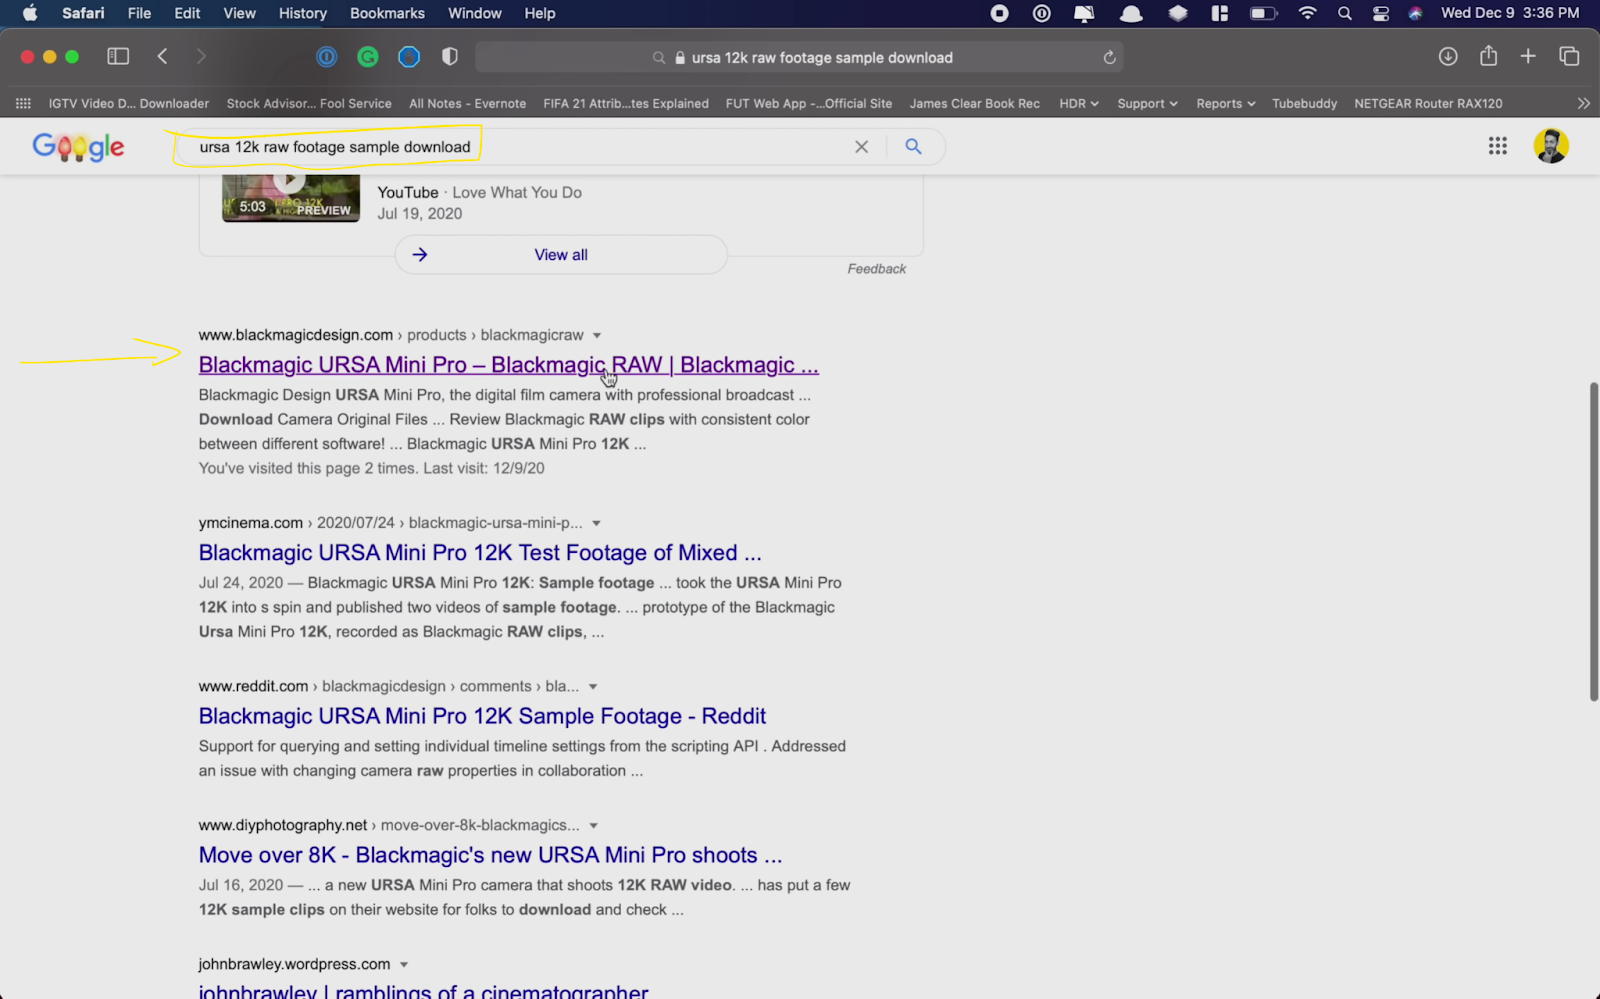
Once you are there, scroll down until you see these three clips.

Go ahead and download the first one.
Now we are going to fire up DaVinci Resolve and start grading on the M1. Once Resolve is open, go to your finder and drag in the 12k clip to the media pool.

Then create a timeline using that clip.

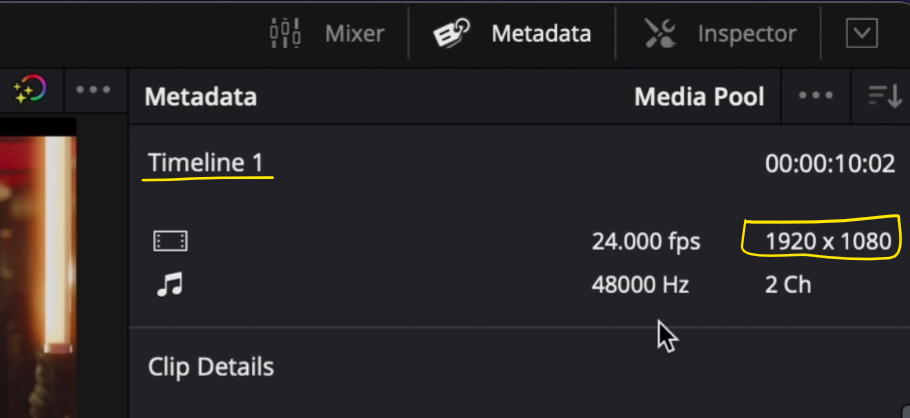
Now in the metadata, you can see that this is a 12k clip.

Now this is very different from our timeline resolution. But, if you play it back from the media pool, it still plays it back without dropped frames. However, you can see in our metadata that when we switch back to the timeline, our resolution is actually 1920 x 1080.
You can see that when we play a 12k clip in a 1080p timeline that it plays back smoothly. When we make it a 3840 x 2160 timeline, what happens?

You can see that at the start it struggles for a few seconds, but eventually it grips on and plays back smoothly.
Now this is going to drastically change when we change it to an 8k timeline.

When you hit play, you can see we are not smoothly playing back the footage.

So realistically it can’t handle more than an 8k timeline, but it can technically handle clips in a 4k or less timeline.
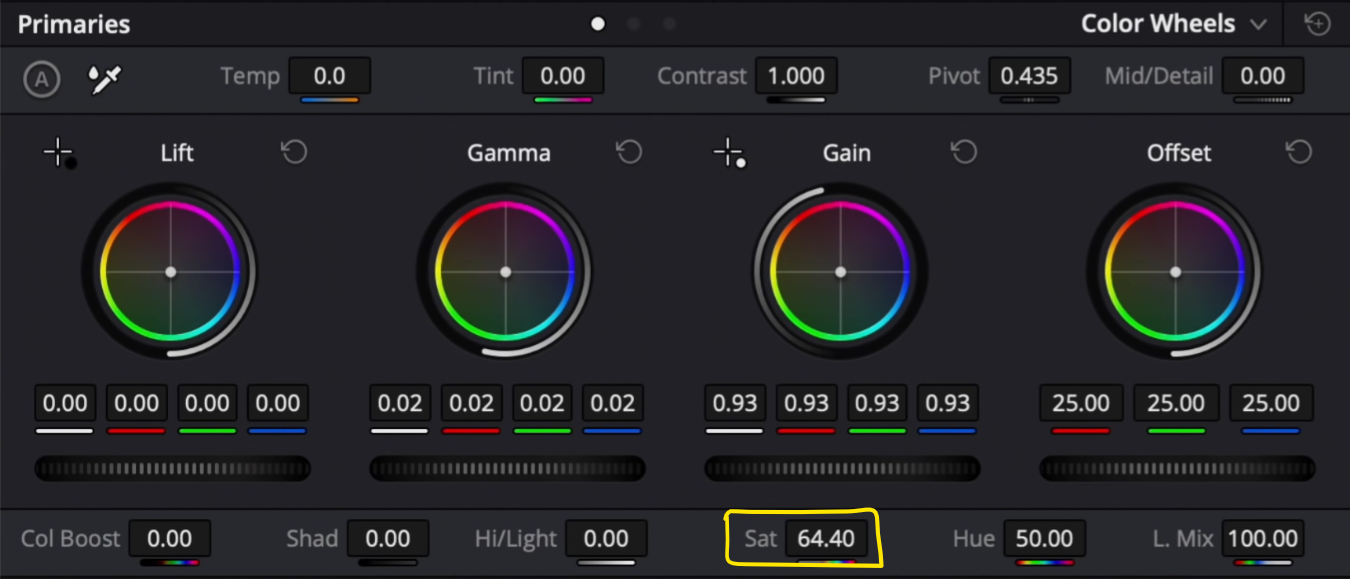
But let’s see what happens when we start adding a color grade. We are going to start off with a blank canvas, not the rec.709 version.


I am going to build out a few nodes.

Starting in my second node I am going to up the contrast a bit, not too much but enough.

You can see after just that, we are already looking really good.

Then in our first node I am going to raise our gamma to pull him out a bit, then bring our gain down some.


Now I am going to use our HDR tool, just to push it a bit. I am going to start by moving my zones to select just my highlights.

Then I am going to raise the exposure on those highlights.

Then moving to my darks, I am going to move the zone around until I grab what I need.

Now I am going to pull down my darks to really give it some contrast.


Now I want to move back to my second node and add some saturation.

Now moving to our fourth node we are going to throw in a glow effect and see how it handles it.


Now we are going to do a playback and see how it’s handling it. Remember it is a 4k timeline, with one OFX and some minor grades.

Now if I turn my glow node off, what happens.

It brings it a lot closer.
Now we are going to throw on some grain and see what happens.

Now how does it play with grain and glow?

We dropped 4 more frames. When we turn them off, we play it back in near real-time.
Now I am going to show you some real-world performance hacks to gain more performance out of the machine. The first thing I recommend that you do is drop the timeline resolution to 1080p.


That brings us up 10 fps in playback.
The second tip is to keep noise reduction and grain off until the very last step of exporting. This helps increase the playback frame rate and not tax your system more than needed. Now let’s see playback with grain turned off, but glow still on in a 1080p timeline.

Now we are back to real-time playback.
So as you can see, the M1 MacBook can handle color grading. Maybe not anything over 8k, but it can at least handle your 4k needs. Which is impressive in such a low-cost laptop.
MORE LIKE THIS


