
Resolve Color Management | DaVinci Resolve 17 Tutorial
What’s going on everyone, welcome to another awesome video. Today we are going to be going over the Resolve Color Management.
In DaVinci Resolve 17, BlackMagic released their own color science called DaVinci Wide Gamut. Look at this chart to see how it compares to the other color sciences that are currently out there.

Taking a look from narrowest to widest, you start with rec.709. Then P3. Next is rec.2020. Then it’s Aces(AP1), then Arri Wide Gamut. But none of those come close to DaVinci Wide Gamut.
Now let me explain this in a more entertaining way. I came up with it this morning, so it’ll either be the smartest thing you’ve heard or the dumbest. The difference between working in a rec.709 color space vs. a DaVinci Wide Gamut color space is that rec.709 is like getting pre-taxed. You get your paycheck and your taxes are already taken out. Whereas DaVinci Wide Gamut is like sending an invoice, getting that full amount and paying your taxes at the end. So what is the difference? Even though you are paying taxes in both scenarios, with the second option you get access to all the money upfront which you can invest and make more, whereas with the first option it is much more restricted. This is the same with these color spaces. If you are shooting something on Alexa with 15-stops of dynamic range, funneling it through rec.709 which is more restrictive, whereas if you funnel it through DaVinci Wide Gamut, the possibilities are endless.
Up until Resolve 16, everything inside Resolve was meant to work with a rec.709 color space, that’s why when someone would use Aces, they would have all these work-arounds. But now with Resolve 17, it has color space aware grading tools, which means regardless of the color space you are in, everything is going to behave similarly.

When you are inside your project window, click on the gear icon in the bottom right. It will bring up a box for your project settings. Under the color management, when you open it up you’ll see the default.

Basically what this is saying is the color space and color science are set to rec.709.
Now we are going to bring in a few different clips. We’ve got some RAW clips, some that aren’t. They are all still in a log profile., except R3D because it is set up default as rec.709. There are many ways to convert your footage from a log profile to a rec.709 color space within Resolve. However this is restricting us. So let’s go back to our edit page and select DaVinci YRGB Color Managed under our color science.

Then under the color management presets, select DaVinci Wide Gamut.


Now an important detail, our output color space is still set to rec.709 Gamma 2.4. Meaning, I am going to take advantage of all this information in the color space, but when I output it’ll be in the rec.709 color space which is safe for broadcast and web.
Now once you hit save, your footage will be transformed to a proper rec.709 color space without having to do anything yourself. It does it within resolve. However, if you are working with footage that IS NOT RAW footage, it will not know how to convert it properly since it takes the information from the camera metadata. On the clips that it doesn’t work for, you will have to right click on the clip, go to the color space and select the correct color space it was shot in, then it will convert it properly. Now we are ready to go and ready to take advantage of all that color space.
To show you how this is better, just look at this color warper and see how in the Color Managed profile, it is just over three steps.

Moving back to the regular YRGB, look where it is now.

This is maxed out. You can’t really push it more. There’s no headroom at all to push it farther, whereas in the Color Managed one, you can push it farther because there is more information. Hopefully this gives you an idea of how great this is.
Now we are going to grade this shot by adding some contrast to the image.


Honestly with that we are done. It is handling everything nicely, and nothing is blown out or crushed. It’s handling all the colors.
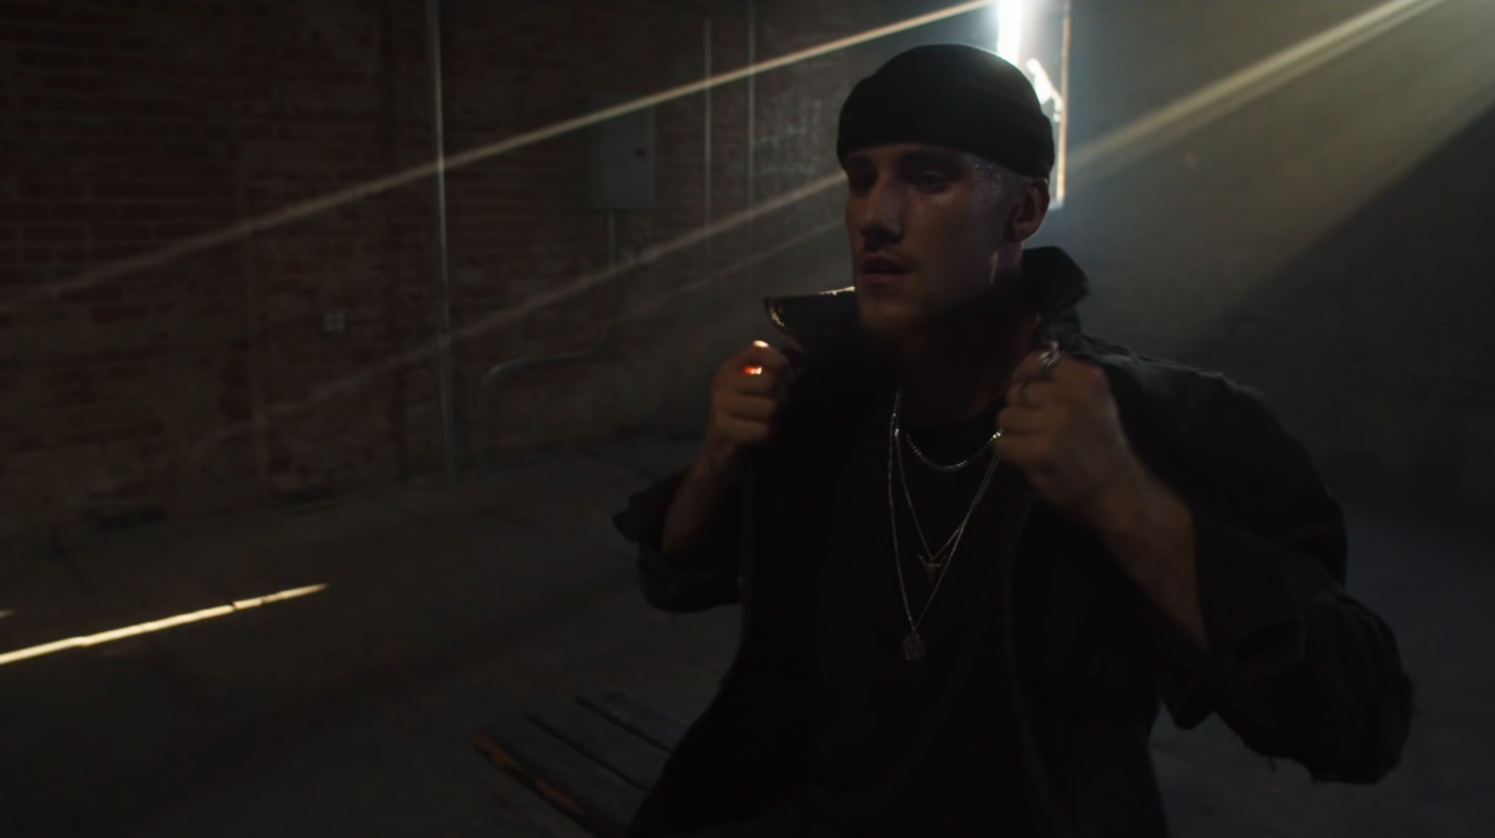
Moving onto our next shot, here is our hero frame.

Here is our simple node tree.

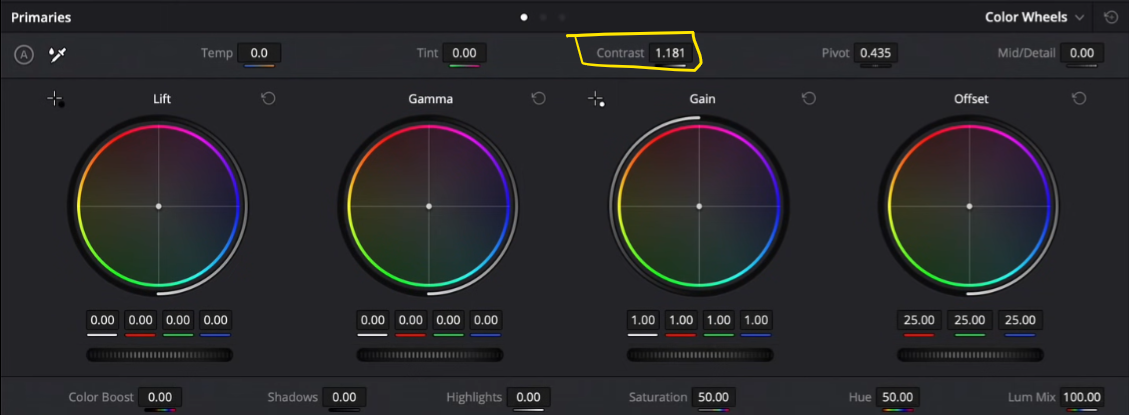
Starting in our third node, we are going to add in some contrast.

Now obviously it is too dark so moving into our second node, I am going to start by bringing the gamma up. Then bring the gain down a bit and then lift down a bit.


Now moving to our fourth node we are going to use our custom curves and make sure editable splines is checked on.

Then I am going to raise the curves from the top. Not going to do it too much because I want to create a film look. Then I am going to take the bottom down a bit too.


Next we are going to add glow to the image.


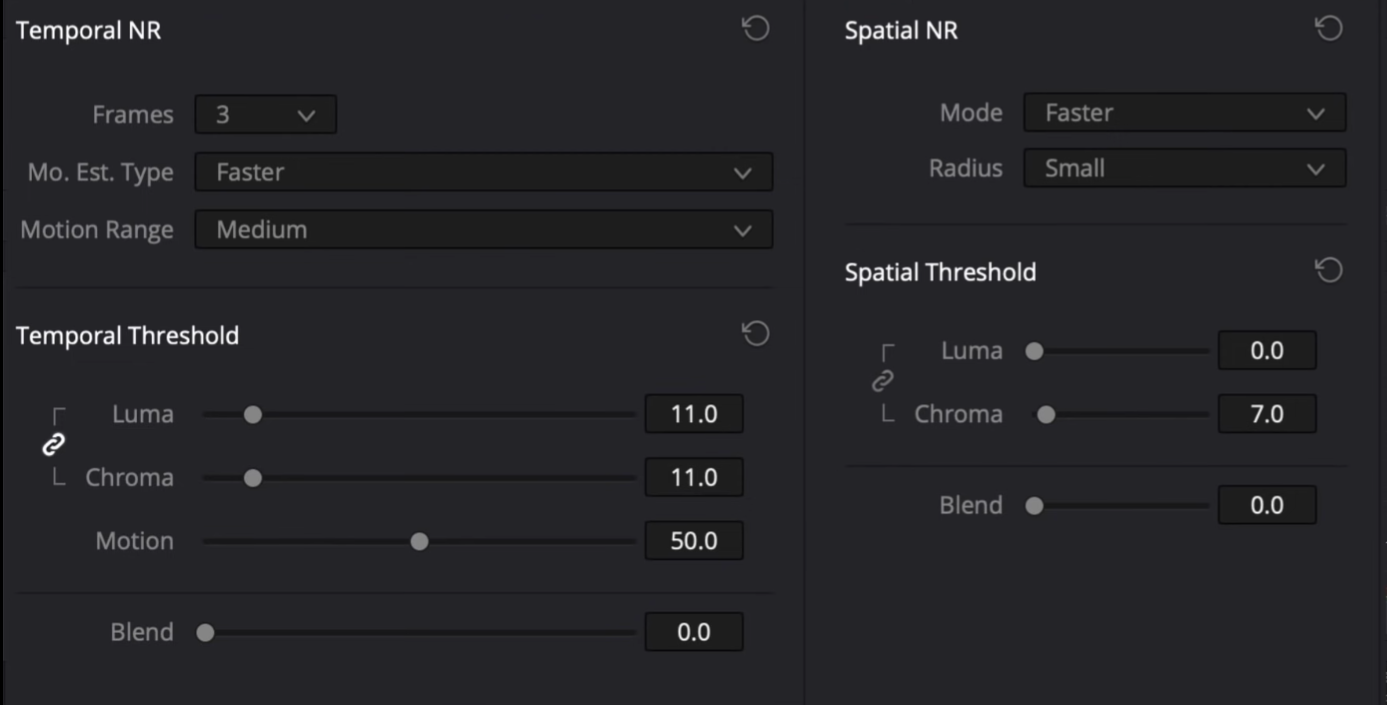
Now moving back to our first node, we are going to add some noise reduction.
Moving to our curves node we are going to add another node, then a parallel node. In our bottom parallel node, we are going to qualify his skin. We will have to finesse the qualification.


Moving back to node five, I am going to use my printer lights to balance the image. I am going to bring down the red in my lift to bring in some teal. Then I am going to take the blue channel under the gain down a bit to add some warmth, then I am going to add some red in our gain.


The beautiful thing about DaVinci Wide Gamut is to look at the highlights. Look at how it is holding up. It was shot at 3200 ISO on the Pocket 6K.
Now moving onto our Arri Alexa shot, here is our hero frame.

In the second node I am going to click on the white balance eyedropper and let it balance the image for me.


For this example in our first node we are going to crank our warmth.


Then we are going to create a layer mixer to qualify only the highlights.

In order to keep that warm look, we need to qualify the highlights to take out the dinge in the highlights.
Moving to our last shot, this is our hero frame.

One thing I am not liking is how the highlights are super clipped. In order to fix that I am going to have to change the camera RAW information to this.

Now taking it a step further, I am going to go into my HDR palette and I am going to crank my highlights to open the image up and add more dynamic range.


So guys, this is basically, in a nutshell, what DaVinci Wide Gamut is. I showed you the range, what you can do with it, how you can push it pretty far as well. This is a powerful tool that, when combined with the other tools in DaVinci Resolve, will help you achieve some unreal results. I have switched since the new update to DaVinci Wide Gamut for all my work, even my client work. I would recommend going through this a couple times to just understand it even more. But I hope you learned something from this tutorial!
MORE LIKE THIS


