
How to Remove NOISE while keeping your Footage SHARP | DaVinci Resolve Tutorial

What’s going on everyone! Welcome back to yet another epic Quick Tip Tuesday episode. Today we are going to be going over how to use noise reduction, while keeping your footage sharp. It’s a huge problem when people use noise reduction because their images get super plastic-y and unrealistic so I am going to show you how to do it the right way.
Now quick caveat to this. You WILL need the studio version of Resolve in order to do this.
Jumping right in, here is the shot we are going to be working with (already graded).
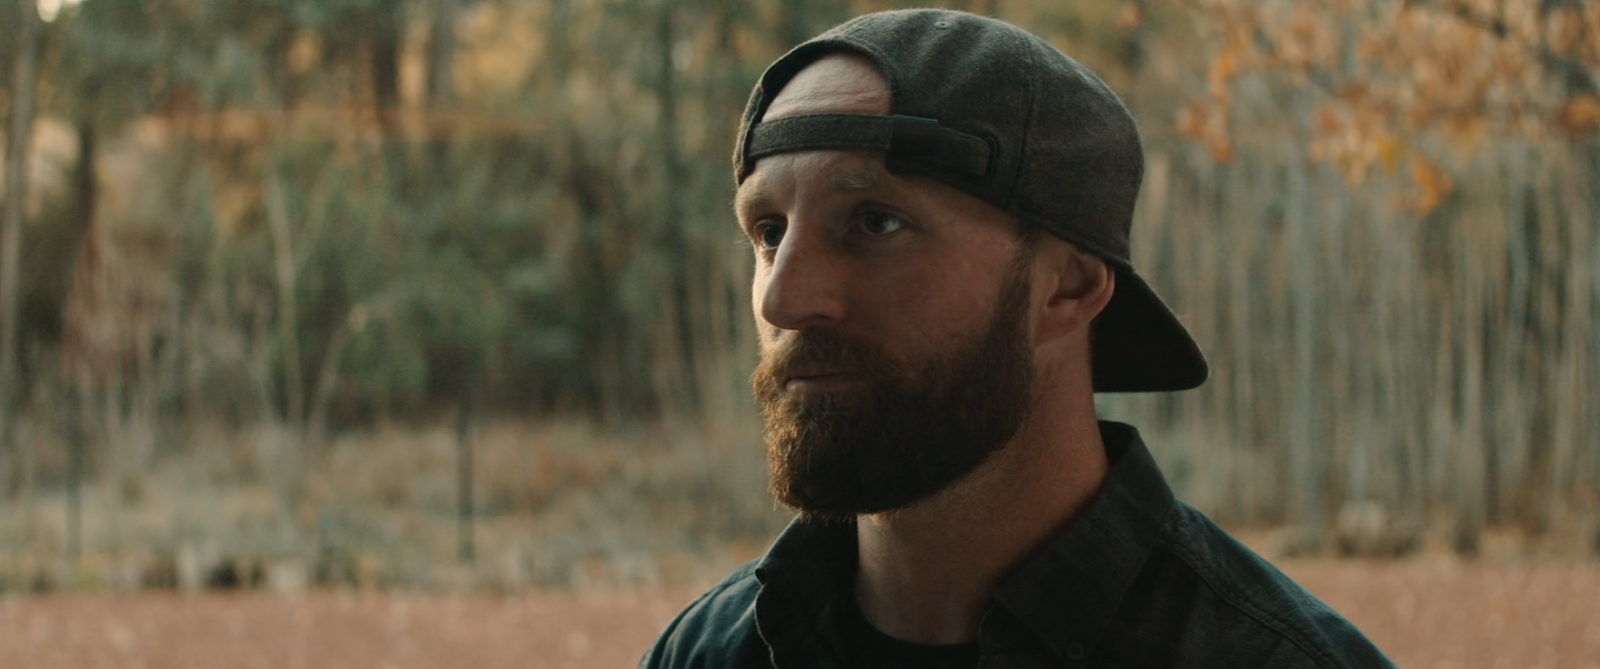
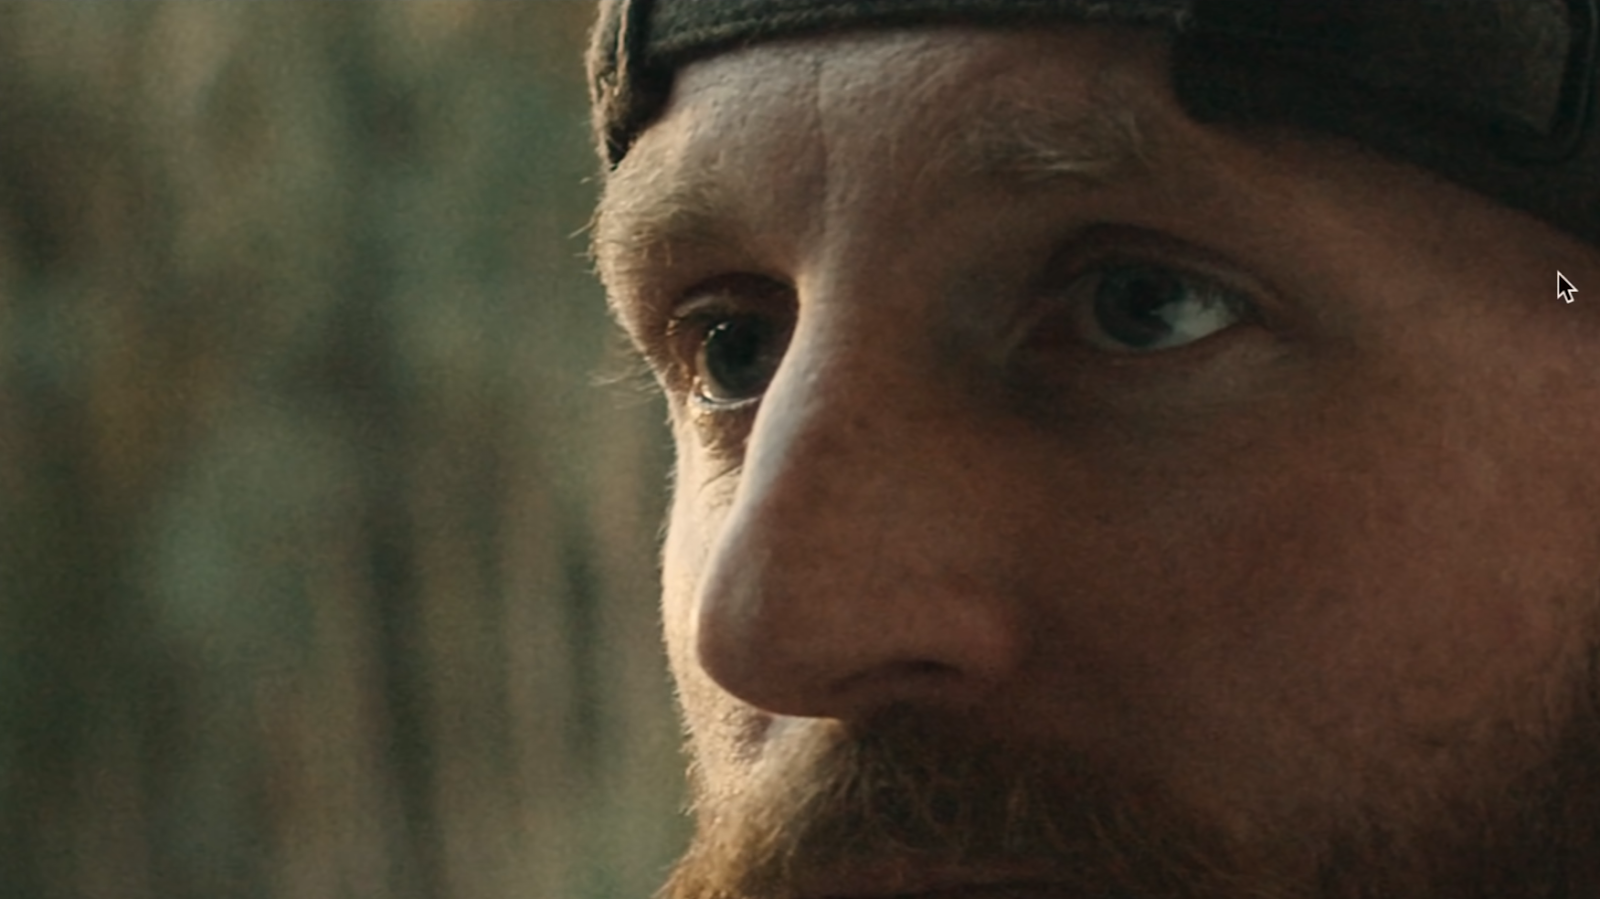
This image is from the Pocket 4k. Now let me punch in and show you all the noise in the image.

We need to clean this up before it can be sent out, so let’s do that now.
Now I know this is going to need a lot of work, so I am going to use 3 frames of temporal NR and set the motion est. type to better. Then under temporal threshold I am going to crank it up to 23.


Now there is still that RGB grain that you get in the image, so in order to take that out we are going to go to our spatial threshold and break the chain, then increase our chroma to 7.6.


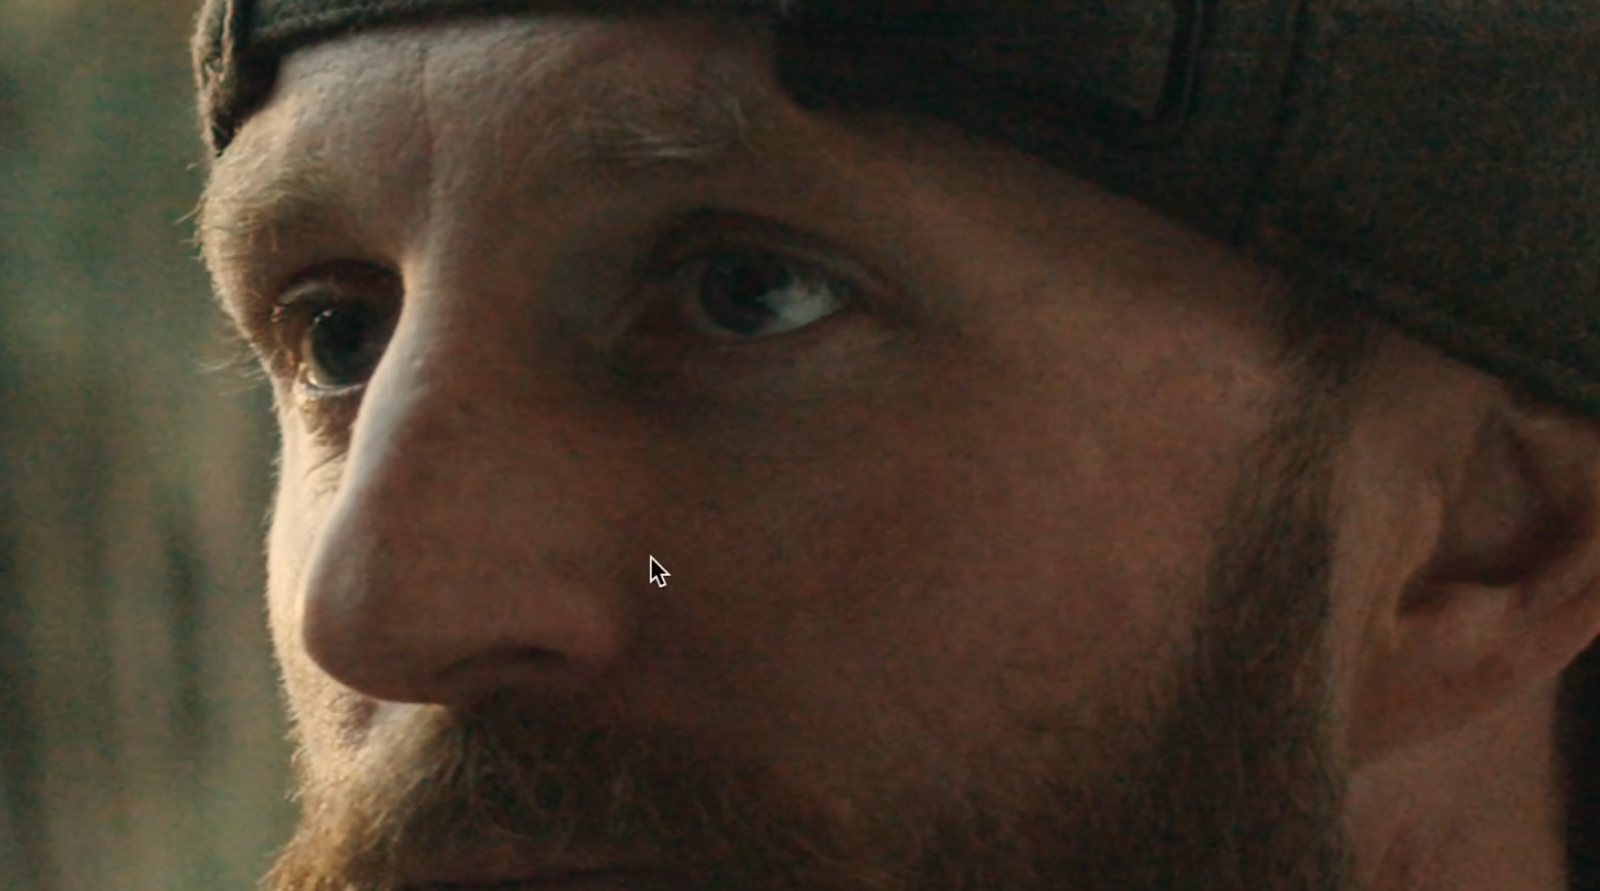
You can even see in his eyes how clean the image is.

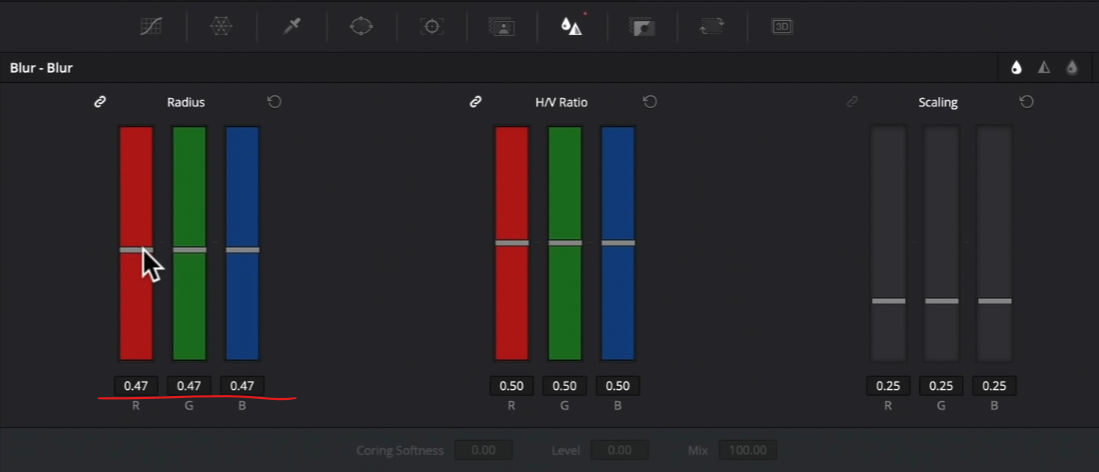
Now even though the image doesn’t need a lot of it, we are going to sharpen the image just a bit. We are going to our blur tool where we will subtract blur, or add sharpness. Keep it at around 0.47. Don’t overdo this tool.

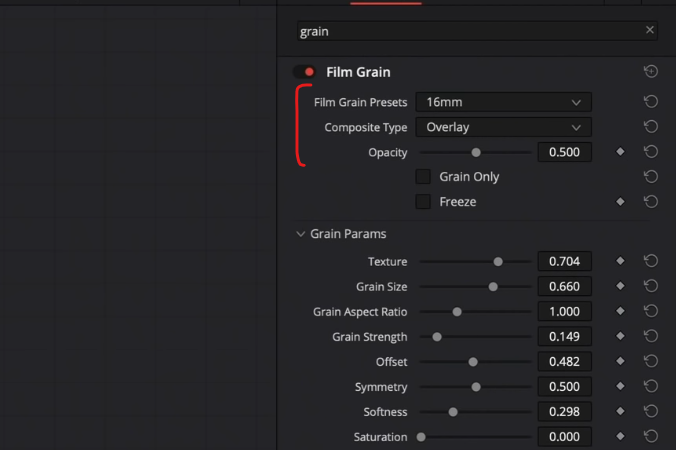
Now the last touch is to add film grain because that will also add to the illusion of sharpening and adds more texture. So just drop it on and leave it.
Just like that we are done. Let’s zoom in and see the before and after.

So there you have it. That’s how to add noise reduction, yet keep the sharpness in an image.
MORE LIKE THIS


