
Quick and Easy Way to Set Up Scopes Like a Pro | DaVinci Resolve 18 Tutorial

What’s going on everyone! Welcome to another Quick Tip Tuesday where we are covering how to set up your scopes like a pro in DaVinci Resolve 18. Let’s jump right in.
First thing you want to do is hit the expand button on your scopes.

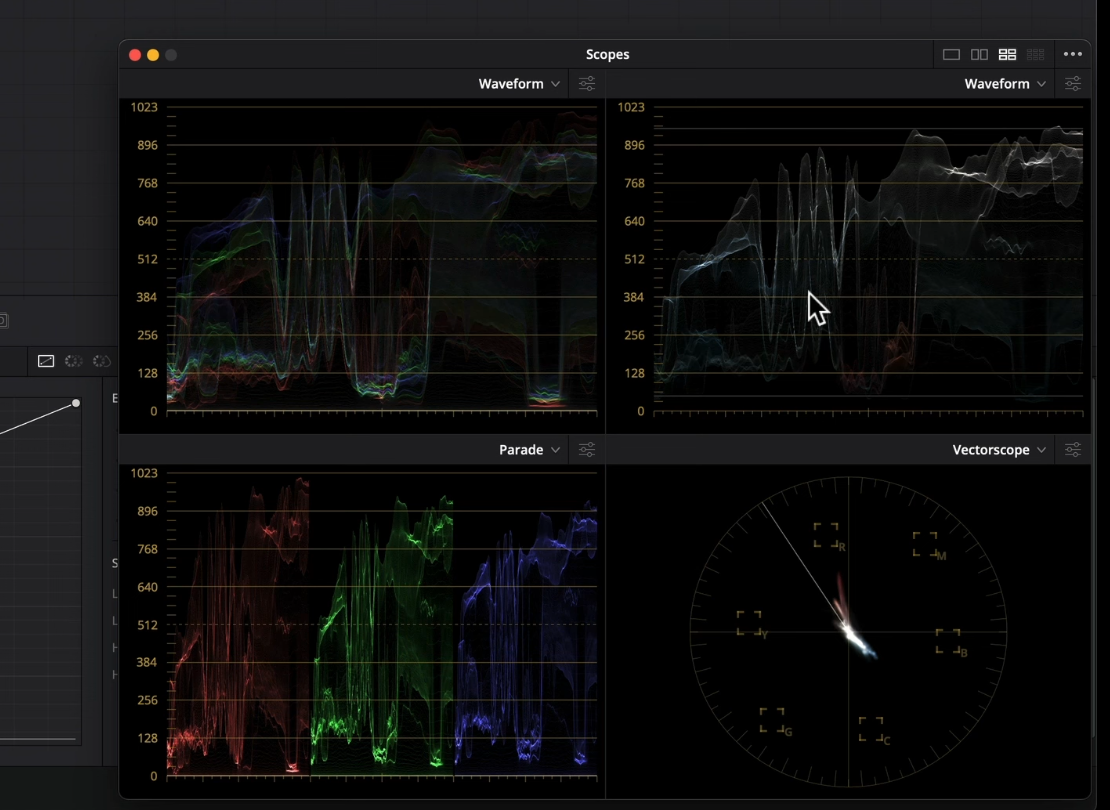
When you do that, this is what you will get.

Now click on the three dots in the top right hand corner and turn on the low pass filter. This will give us a bit of granular control over our scopes and show us what we really want to see.

I will also turn on the display qualifier focus which will give us a circle over our scopes to show where the color is sitting in our scopes.

Then under the first scopes, I am going to change that to waveform.

I am then going to leave the second one as a waveform as well, but click on the menu and select Y and select colorize. Then turn on the “show reference levels” and type in 50 for the low end and 950 for the high end.

Then the bottom left I like to make that a parade.

Then the last one I usually select vectorscope.

Then once I’ve selected vectorscope I go into the menu and turn on the show skin tone indicator so that when we hover over the skin, we can see where it lands on the vectorscope.

So this is it.
MORE LIKE THIS


