
My 2-Step Process to Recover Highlights | DaVinci Resolve 17 Tutorial

What’s going on everyone! Welcome back to another epic tutorial. Today we are discussing my two-step process to recover highlights. We will not be salvaging highlights, but recovering them after we have applied a pushed look. There are two techniques I will be using. One is specific to DaVinci Resolve 17, the other is my tried and tested.
Alright, let’s get in here. I have two clips in here to show you the two techniques. The first one is this one:

It is a very practical example, where it has practicals in the frame. These are not recoverable, it’s fine if they blow out. But this is what we have to keep in mind.

Now I have graded this shot already, so here is the look before our highlight recovery.

Now I created a node prior to all my nodes where I will tackle all of these corrections. What I am first going to do is luminance qualify just the highlighted areas.-


Now I am going to go under my highlight slider and start cranking it back. This is my favorite approach because it is so natural. It brings back the information evenly.


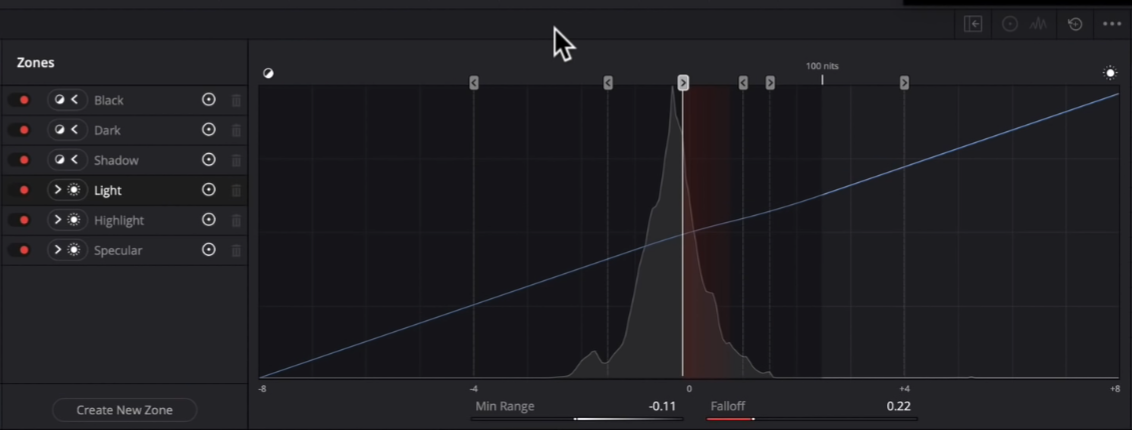
Now to show you the second way, I am going to add a version, then reset the first node. This is the method specific to DaVinci Resolve 17. The first thing I am going to do is drop my light by about half a stop, and yes, it affects too much. But we can control it with our zones.


Look how fast that was. We didn’t have to qualify anything. This is unreal when you are turning and burning.
One thing I need to mention is that you have to use the highlight recovery tools in a pre-corrector node. This means that it has to come before you make any corrections. This node is referring to your log image. This has the most information.
Now moving onto our second shot.

Now again, I have it graded so here it is graded.

Now we are going to start off with our first method. I am going to qualify using the luminance slider for our highlights.


Now I am going to take my highlights slider down to -100 and you can see in our scopes and our image that the detail is coming back.


When you are grading, you don’t always have to go too far.
Now moving to our second method, we are going to create another version and reset our first node. This time we are going to use our HDR palette, using a combination of highlights and specular. I am going to start by dropping the highlights down half a stop, then bring the specular down about a stop and a half.


Now our first version is actually doing more to take down the highlights in the shirt. That’s why I love luminance qualifying. But that just means we need to play around with it, so we will need to go into our specular highlights zone and adjust it.


I just want to make sure I am not affecting too much of the image.

So here are the two quickest ways to recover your highlights without degrading your image. You always have to do it pre-correction. That way it is not dictated by what happens after the corrections. Let’s check out the final look in fullscreen.

Now I hope this made a lot of sense. This is why I stress knowing how to build a node tree. With that, I hope you learned a lot and stay possessed!
MORE LIKE THIS


