Common Mistakes Beginners Make When Grading Dark Skin Tones | DaVinci Resolve 18 Tutorial

What’s going on Qaznation! In today’s video we are going to be covering the mistakes beginners make when grading dark skin.
Before we get started, let’s take a look at the clip we are working with.

Now this was shot with RED. To start, we are going to give our beginner the benefit of the doubt to know how to properly convert LOG footage to a rec.709 color space. To do that, we are going to drop on a color space transform.


Now what a beginner would do is they would create a new node after the color space transform. Then they would raise their gamma and gain to make sure everything looks good, then they’d pull down on the lift to add a bit more contrast into the image.


This looks good, but what’s wrong with this? The first thing is how the highlights are blown out.

This exudes amateur. Then after this, they would create a new node and add a power window over the face of the baby. The reason that’s wrong is that there is a time and place for power windows. But you don’t want to overuse them.


Beginners always over-complicated their grade. If you know how to properly grade, you don’t need to do all of this to get a desired effect and look.
Now we are going to create a pro-version. We are going to keep the CST, but reset everything else. Now as a pro, we are going to build our grade before our CST.
Now what I would do with this shot is to first go under my custom curves. Then I would grab from about 40% on the curve and pull up. Then I want to create another point lower, and start bringing it down.


Look at the beauty of what we just did. Remember the highlights in our beginner example? Well ours is now not blown out and is very film-like. We brought the exposure up naturally, as if there was a light on our subject.
Now instead of fixing the mistakes that our beginner made, we can instead create a look with the “time remaining.”
That’s what color grading is about. You want to shave as much time as possible doing the grunt work so you can spend time doing looks.
So we are going to add a new node in the beginning and use our printer lights to create this look. So I am first going to add tons of cyan.


You may think the skin is so bad now, and yes it is. So what I am going to do is create a parallel node. In this node I can go under my hue vs hue and select the yellow and crank it up. Then I am going to do the same with my reds.


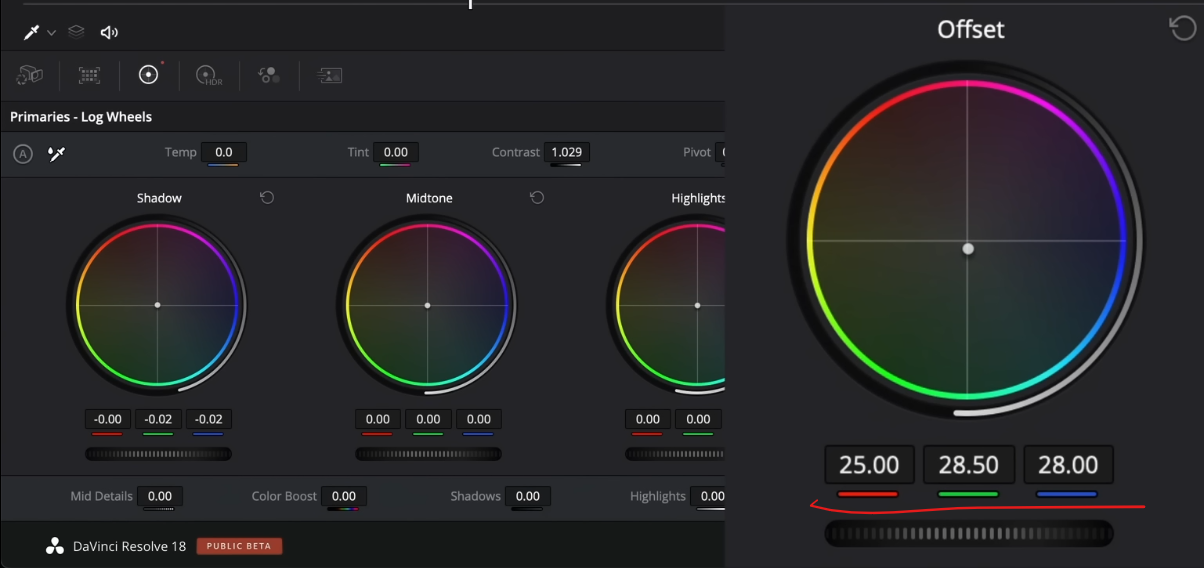
Now we still have a lot of teal seeping in, so I am going to go into my LOG wheels and balance out the shadows.


Then what I want to do is add some contrast to the image.


Now we want to add a bit more color separation. So first of all, I can go under my LOG and create more of a separation by bringing down my shadow color wheel.


The beauty of this is how much we’ve separated our subject from the background. Before it was a green/warm mush and now we have so many tones coming through in the image.
It’s looking good where it is, but what I want to do is add just a bit more green using our half printer lights.
Then I am going to go back to my hue vs hue and keep working on that.


However the hand at the bottom is getting a bit too teal, so we are going to have to use our shadow to fix that.


Just look at how beautiful and creamy our image is. If we compare it to our beginner, just look at how far we came.


Not only did we create a curve to bring out the little dude, but we also created an awesome look on top of it. Compared to the beginner who just brought up the kid.
I am noticing that I can work on my curve a bit more.


We are in the position to add a bit more, but that’s because we did it correctly. Now we are able to make more changes and not hurt the image.
But let’s go ahead and compare these in full screen.


This is the power of doing things the right way.
Hopefully what you learned from this tutorial is that simplicity is the name of the game. The time that you can save knowing what to do, you can use that time to be creative and come up with interesting looks like we just did. With that, work hard, get obsessed and get possessed.
MORE LIKE THIS