
How to get the Joker vs. The Dark Knight look

Hello and welcome to yet another tutorial. I’ve been waiting to put this video out until we really went over the basics of what exactly to do. So sit back and take some notes because this is going to be a good one.
We are going to start off with The Dark Night first. In analyzing this we can see that there is probably a power window around him, then everything else falls off. It is both a very saturated and contrasty image. You can see that the skin is extra orange. Let’s drop in our color palette and read it.
Now let’s move onto our shot. As we can see it’s nothing like our reference clip.

The reason I chose this clip was to make you think outside the box. One thing for sure we can get into the ballpark is the skin. Once I get the sky into the ballpark, boom we are about 70% done. My goal is to get you to the reference image as fast as possible.
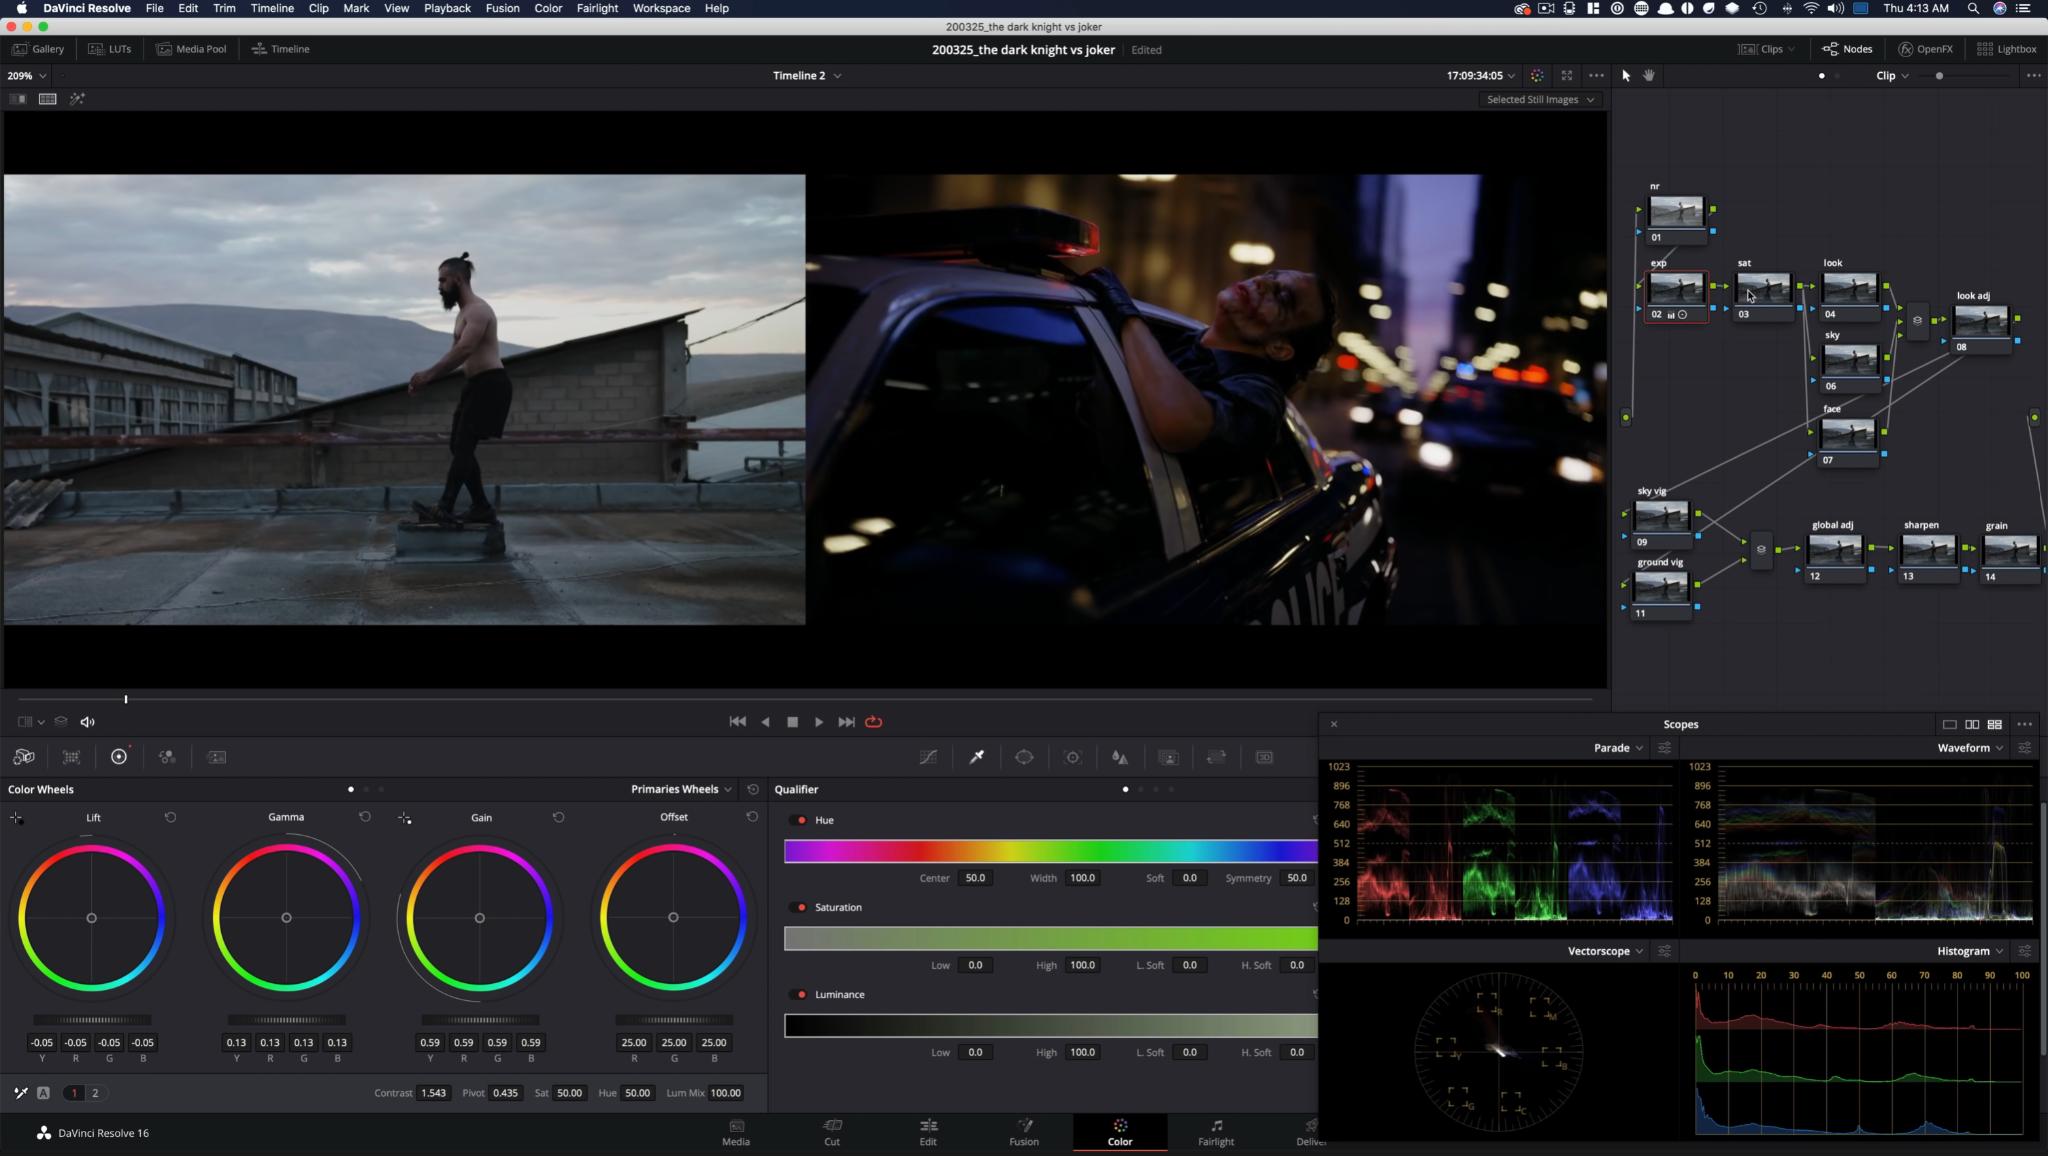
Now let’s go ahead and create our node tree.

Starting in our exposure node we are going to push our contrast. Then we are going to bring our gain down a ton. We are going to pull up our gamma, and then drop our lift as well.

Moving into our saturation node, pull up the saturation to about 65. We are trying to get some separation in the image for when we start qualifying.


Now in our look node, we are going to start dialing everything into the world of
our reference. I am going to start by taking our gain towards the blue/magenta to match the sky. Then I am going to take my gamma to try and get the skin tone to look similar to our reference.

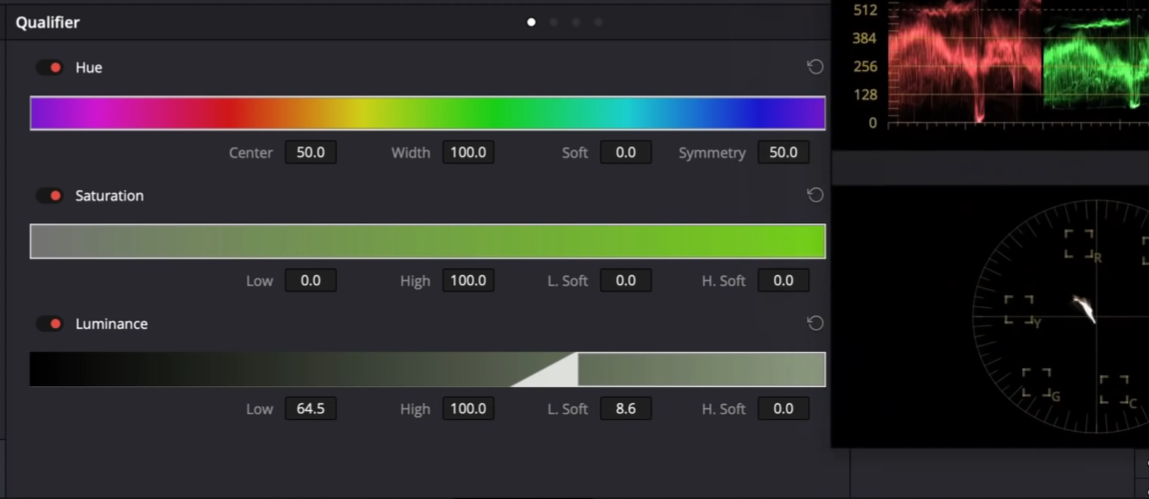
Let’s now jump into the sky node. I am going to use my luminance qualifier to grab the sky.


Now I want to take my highlights down to -100 to bring back information into the sky. After this, the skies should be matching. Then I am going to take my gamma towards blue to match the skies. Then I am going to just nudge my gain toward magenta to saturate the sky a bit more.


Really quickly we are going to select our face node and create a power window and track it to his face.

Then we are going to pull up on the curves just a bit to brighten his face.

For now we are going to skip our look adjustment node and go straight to our sky vignette. We want to create a gradient and finesse it to select the sky.

Now, we also want to make sure it doesn’t affect his face. So, select the key output from the face node, and connect it to the key input on the sky vignette node. Next, invert it in the key selection. Now we can start making changes.


With that out of the way, we are going to pull down on our curves to create more drama in the sky.

Now I want to go ahead and pull back on my color boost just a bit.

The saturation is still too much, so I am going to go into my hue vs saturation and select the blue and pull it down just a bit.


Next we are going to go into our ground vignette node to get our ground looking like our reference. I am going to start by creating a gradient and selecting just the ground. From there I am going to drop the curves a ton.


Next I am going into my global adjustment just to push it a bit more. I am going to bring down my gamma to darken and grunge up the image. It needs to be closer to our reference..


Now I want to go into my look adjustment node and pull down on my highlights.


I am going to create one more parallel node to qualify the lighter part of our subject's skin.


Then I am going to take my gain towards orange and then take out just a tiny bit of highlights.


Next I am going to add my normal sharpening. Then I am going to add some film grain.

Let’s now take a look at this in full screen.


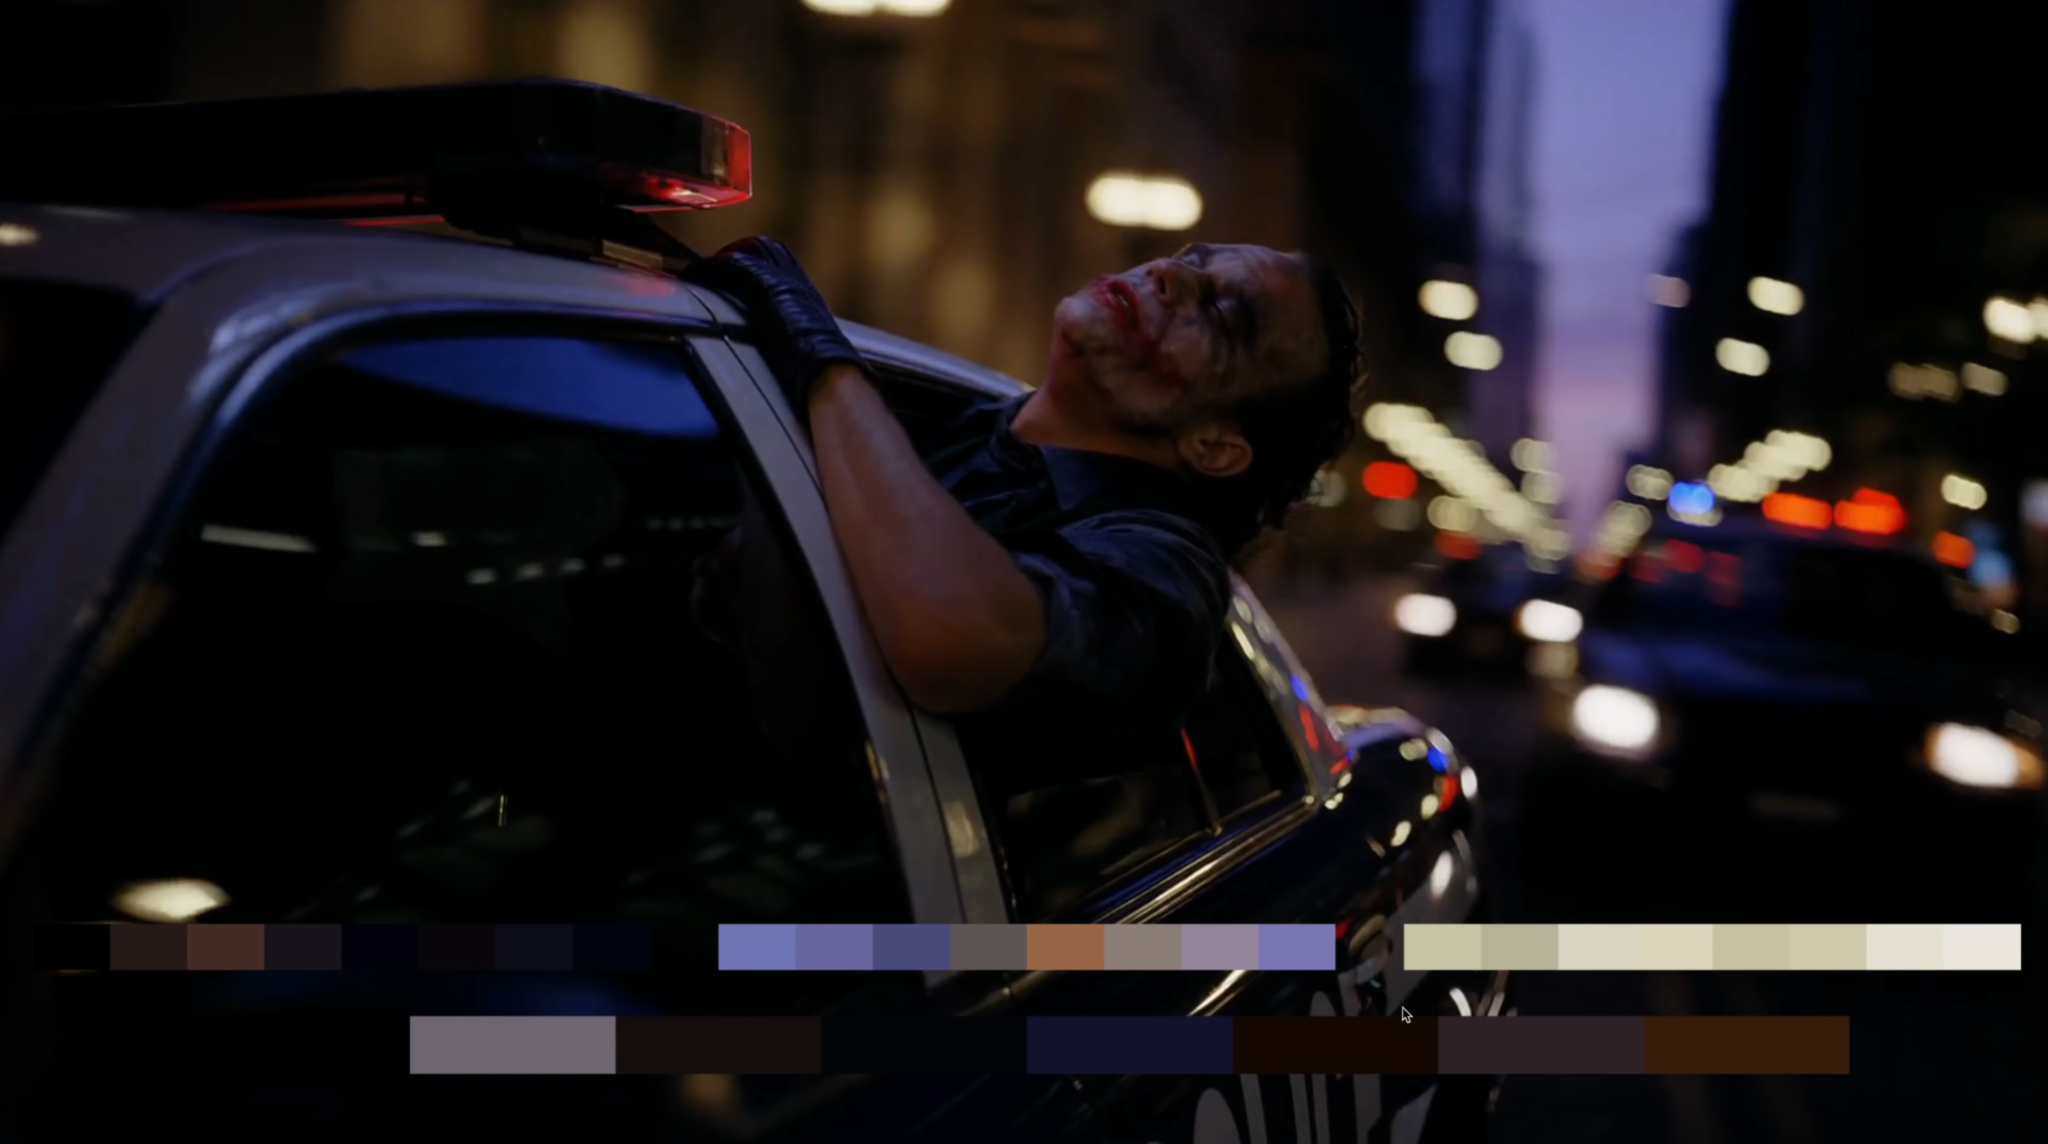
There we go! We just created The Dark Knight look. Now let’s move onto the Joker look.
In analyzing our look, compared to The Dark Knight, we can see information in the darkness. You can see there is a lot of red in the image, but then the shadows have more cyan.
Now let’s create our node tree for this shot. It will be very similar to The Dark Knight.

Starting in our first node we are going to bring in contrast. Then we are going to bring down our gain, but lift up our gamma. Then to create a bit more contrast we are going to bring our lift down.


Now I am going to go into my second node and add about the same amount of saturation.


Next we are going to move into our look node. I am going to take my gamma into that orange world. Then I am going to take my lift into that cyan world that we are seeing in our reference. Next I am going to raise my gain wheel up just a touch to bring the sky closer to our reference.


In our next node we are going to qualify our sky.

Now that it’s done, I am going to take my gamma towards the red. Then I want to pull down my highlight slider.


Now, moving onto our face node, we are going to grab his face again and track it like we did in our previous grade. Then we are going to pull up on the curves.


Moving into our look adjustment node, we are going to go into our primaries bars and take our luminance mix to 0. Then I am going to go under gamma and add red. Next I want to go into my lift and pull down the red, adding that cyan into the shadows. Now I want to go into my gain and add more red into the image and subtract blue and green to add magenta and yellow.


Next I am going to create another parallel node and go into my hue vs hue and take my cyan and blue to twist it and change that weird color in the mountain.

Next I want to go into my hue vs saturation and pull my cyan and blue down quite a bit.


In our two vignette nodes, we are going to do the same thing we did in our previous image, starting with the sky node.


Then we are going into our curves and pulling down again.

Then we need to take out some color, so going into our color boost we are going to drop it some.


Then I want to go into my ground vignette node and do one for the ground.

Now we are going to drop our curves, just a bit. We are not copying our Dark Knight grade in that respect because the Joker grade isn’t pushed as far.


Then in the global adjustment, I want to take his skin and bring it more to the warm side, not as salmon as it is.


I am going to take my gain into the yellow direction to get his skin closer. Then I am going to take my highlights down.


We are now done with our look but we are going to add our standard sharpening and add a ton of grain.

We are done! Let’s take a look in full screen.


I hope you guys had as much of a blast as I did doing these! They are both challenging, but so rewarding at the end. Stay tuned for more tutorials from me!
MORE LIKE THIS


