
How to get The Ring look | DaVinci Resolve 16 Tutorial

What’s going on everyone! I am back here with another popular movie looks video and today we are going over how to get The Ring look.
Let’s start by analyzing our shot first. Let’s bring in our color palette effect.

We can see that there are some solid black points, but everything else is in the green world. Even the warmer areas are sickly yellow, but the skin is perfect. So what are my anchors? The brown in the image can match the trunk, and the foliage needs to match the greens. Then, matching the contrast.
Let’s start off by creating our node tree.

Starting in our exposure node, let’s start by lifting up our contrast. Then we want to bring our pivot down to start creating that dark feel. Then I want to drop my lift a little bit and take my gamma and gain and lift them slightly.


Then moving into our red node, we are going to select our red preset by following the picture below.
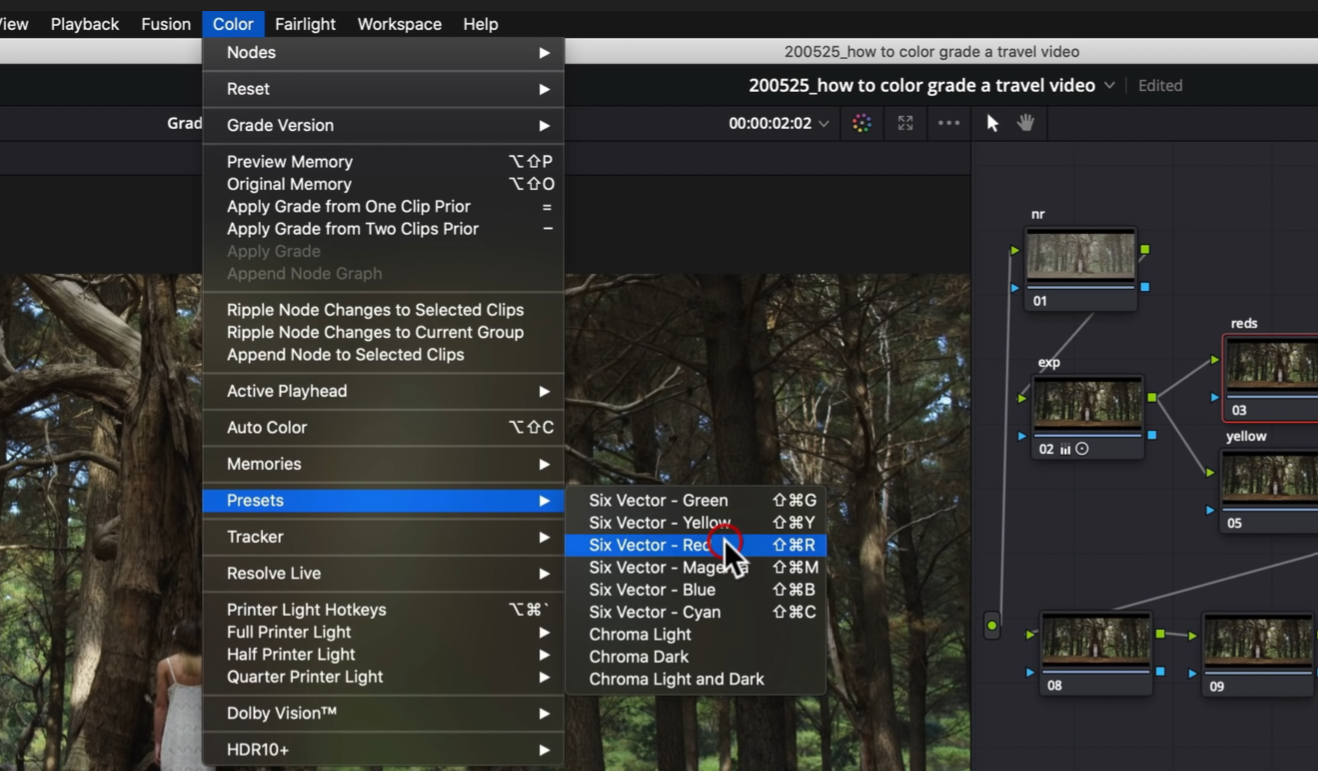
It did a pretty decent job grabbing most of the red, so I’m just going to park it there.

What I am going to do is try to take some color out of the reds but bring the offset down towards cyan. I am trying to match the skins.


Then we are going to qualify our yellows the same way we did the reds.


Now I am going to take my offset towards that sickly green color that’s in our reference. Then I am going to pull some saturation out.

Then I am going to go into my curves and pull it down from the middle.

Finally I am going to go under hue vs luminance and bring down my yellow and green.


Next, I am going to go into my custom curve and add some more pop. I am going to lift the bottom just a little, then bring down the shadows a bit. Then raise the top to give it that pop.


Now, in our look adjustment, I want to start bringing in the green a bit.

Now, under my log wheels, I want to bring back some of the brown by raising my midtones.


Now, moving into our next node, I want to go to my hue vs luminance and pull everything down, but pull my reds back up to preserve the skin.

Now I want to go under my hue vs hue and take my green towards that deep green to match our reference.

Then I want to go into hue vs saturation and select the green to pull out some of that green.


So I don’t like the blue in the sky, so I am going to create a parallel node, basically to take my cyan out. So under my hue vs saturation, I am going to pull out all of the cyan and blue.


Now I want to go to node 9 to create a vignette around my subject and soften the heck out of it, then invert it.


Then I am going to take my curves from the middle and pull them down.


Now in node 10 I want to pull out some of that saturation. I am going to go under my saturation vs saturation curves and pull it down.

Now I am going to go under my log wheels and pull down the shadows, but control it with my low range.


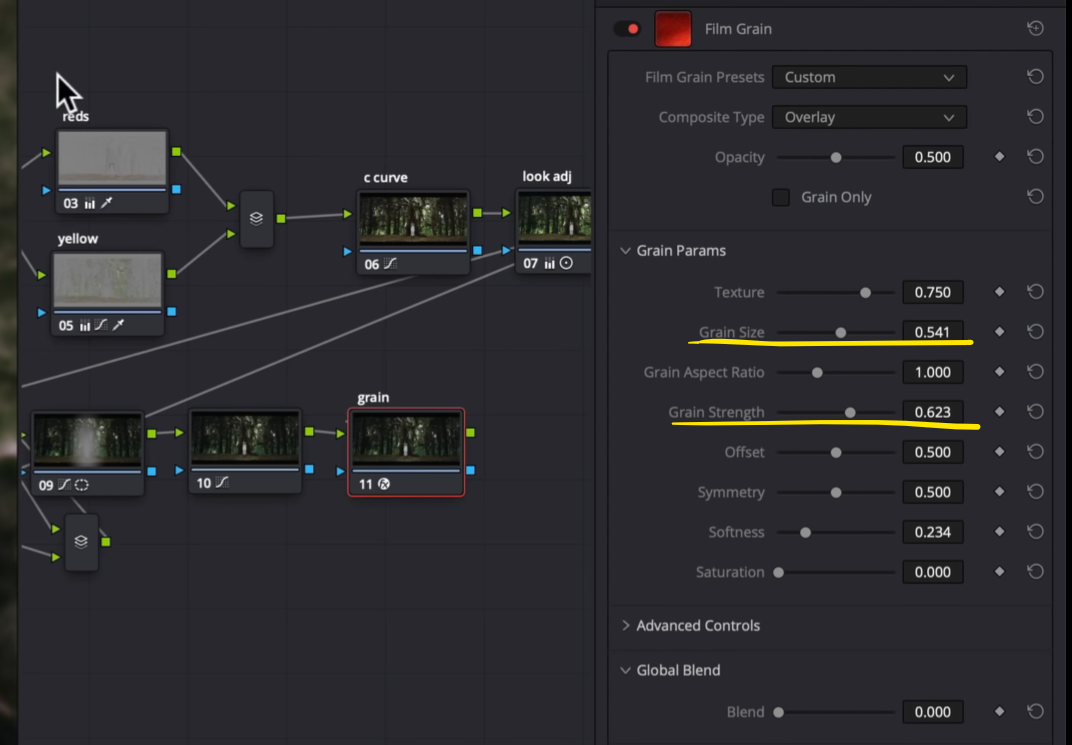
Now I am going to go under my grain and add a ton of grain. I am going to start with 35mm 400T and push it.

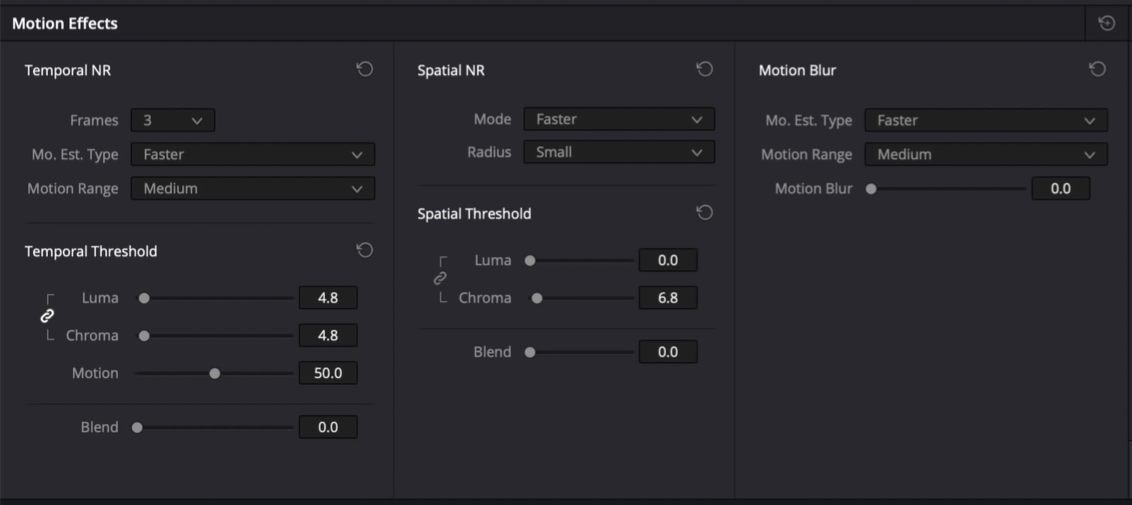
Now it looks good, but we do have to clean it up just a bit by adding some noise reduction.
Alright, and this is it! Let’s go ahead and check it out in full screen.

And there we go! We completed The Ring look! I hope this was fun and that you learned a lot!
MORE LIKE THIS


