
How to get the TENET look | DaVinci Resolve 16 Tutorial

What’s going on guys, welcome to another awesome tutorial. Today we are going to be recreating a look from Tenet. This is probably the most anticipated look so far.
Let’s start by analyzing our reference image. The first thing I am going to do is open up my color palette effect, drop it on the clip so we can read the whole color story.


Just look at the shadows. They aren’t even. If you look at our scopes, you can see that the red is lower than all of the channels giving us that cyan color, but then the blue is lower than the green. The pure blacks are not there. All of the blacks have a hint of teal. In the vectorscope, you can see the whole world is sitting in the cyan world. Except, the skin tone is pulled out.
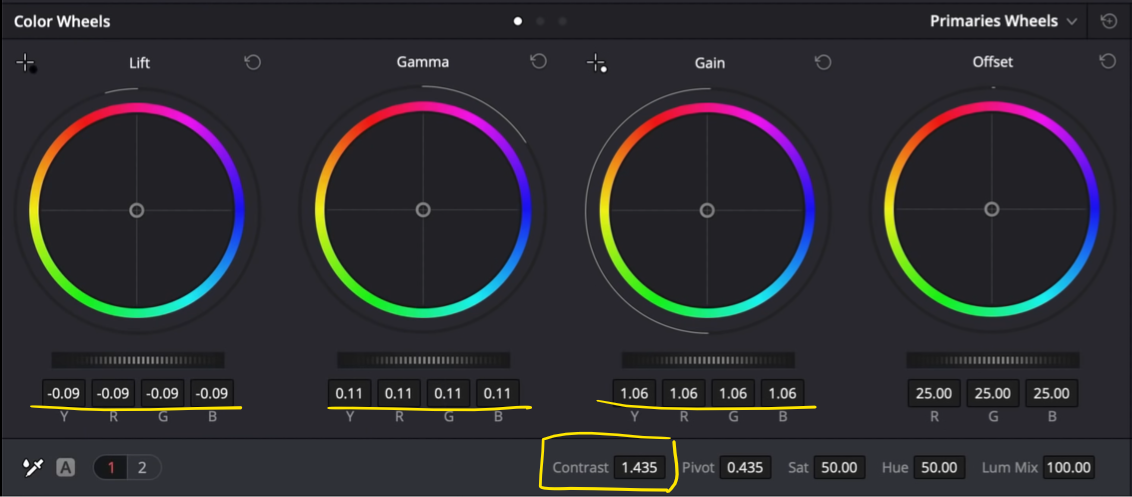
Now let’s get started on our grade. First thing we always start with is our exposure. We are going to start by bringing up the contrast. Then we are going to take our lift down, then bring gamma up. Just do that dance. Then I am going to lift my gain just a touch.

Now I am going to create a new node for balance. The way that I am going to start is by adding saturation.

Then I am going to use my temperature and tint to get the skin looking right and everything else looking proper.


I am going to create a new node for our look. This one will be a bit heavy. I am then going to create a layer mixer for skin and qualify the skin.


To get the skins to match, I am going to go into the hue vs hue options. I want to go ahead and start moving my red channel. Then I am going to move my yellow up a bit.

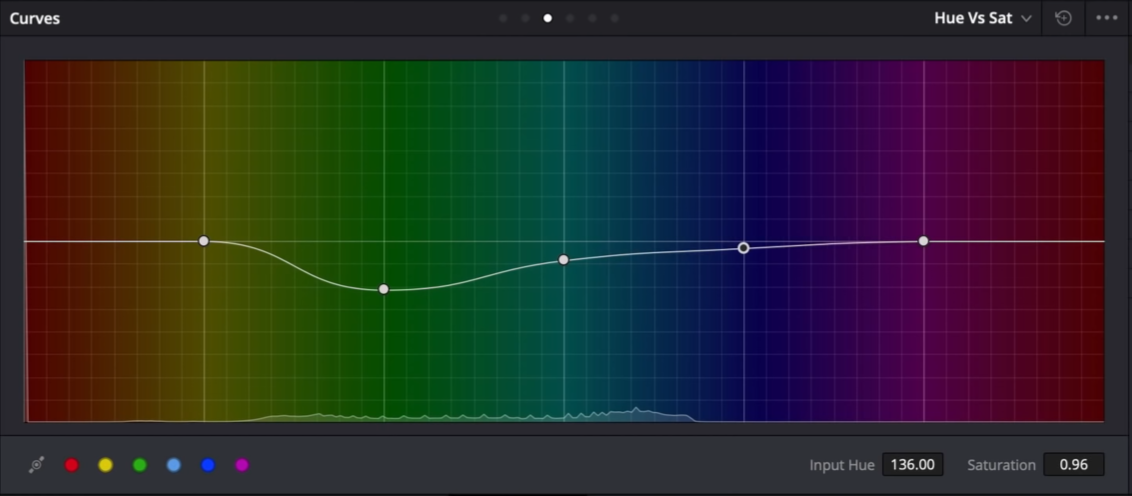
Then I am going to go into my hue vs saturation and pull down on my red and yellow to neutralize it.

Then I am going to go under my hue vs luminance and affect those same two channels by bringing them up a bit to add some of that luminance.

Now I am going to finish it off with some primary wheels action. I am going to raise up the gain a bit, then pull down the gamma a bit to match the contrast in the faces.

I am going to create another layer mixer to grab just the highlights. To do that I am going to qualify them with the luminance qualifier.


My goal with this node is to warm up the highlights and match ours to the picture frame highlights in our reference. To do that I am going to take my gain and move it to the left.


Now just remember, that yes we want it to match, but our main goal is to make it look proper. We want it to look good and not fake.
Now we are going to move into our look node. The first thing we need to do is to balance everything out because there are multiple different tonalities going on. We are going to go under the hue vs hue options and I am going to start messing with a few parameters. I am going to start bringing the green channel down and then move up on the cyan channel. Same with the blue, I am going to pull it up.

Then I am going to go into my hue vs saturation and pull down on the green, cyan and blue channels to even out the whole image.
Now that we have that done, we are going to go under our RGB curves and break the chain and select my red channel and bring it down. I am going to do the same with my green. With my blue, I am going to actually take it up a bit.


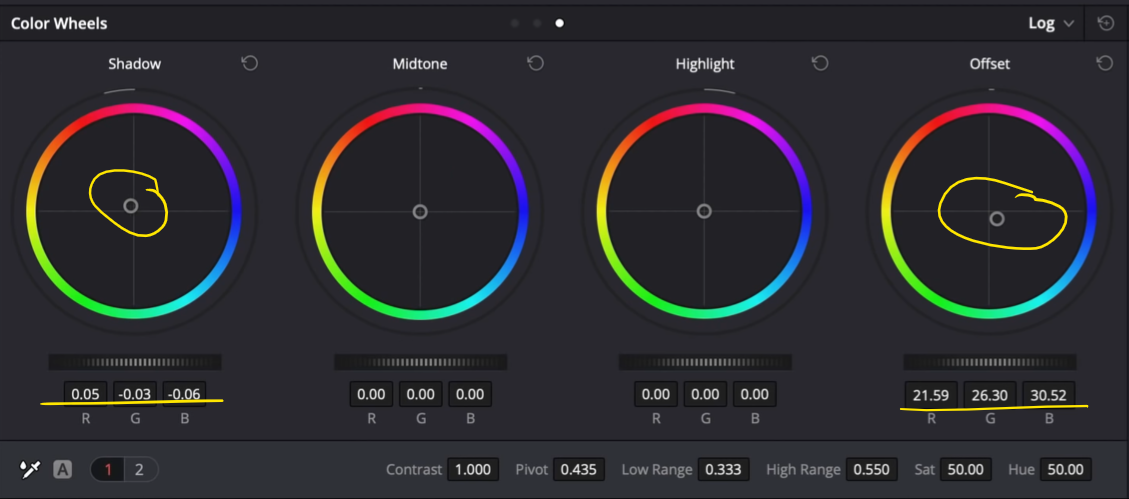
Now I am going to add another node and call it look adjustment. In this one, I am going to take my offset and move it around to get that greenish/teal we have in. I am not loving how the hair has more green/teal in it so what I am going to do is move to my log wheels and counter that in the shadows.

Now I am going to right click on the node tree area and say add a key mixer. I am then going to take the blue output of both my skin and highlights nodes and connect them to the key mixer, which I will then connect to the look adjustment node. Then I will go under the key tab and invert the key output.

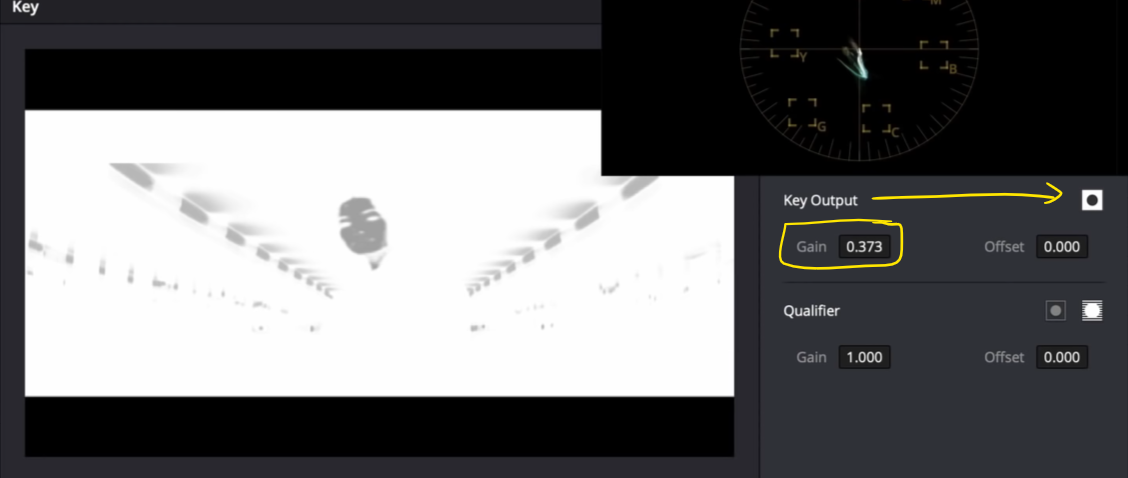
The point of this is to allow the look adjustment node to affect everything but the skin and highlights.
The look adjustment needs a bit of work, so I am going to raise the cyan channel in my hue vs hue and then adjust the offset. I will also be adjusting the shadows and low range too, to keep the blacks looking nice.


The skin is looking a bit dull now so I am going to go back into the parameters and mess around with them. Starting in our hue vs saturation I am going to bring back up the red and yellow a bit to give her face some more juice.

Now it needs more contrast so I am going to add some contrast and pivot.

Now I am going to add a new node and create a power window for a vignette.


Then I want to invert the selection.

Then I am going to use my curves to bring it down.

Then I am going to create an outside node from the vignette to raise up our subject. I am going to use the curves to do that.


Just look at what we’ve done so far.

Now the vignette is adding more green to the sides, so I am going to use my hue vs hue to move the cyan down just a hair.

There we go! This look turned out so great. Let’s check it out in full screen.

I hope you guys had a blast and learned a lot! Just look at where we came from, where we ended!
MORE LIKE THIS


